Blog

  • Pancakes from Scratch: The Fluffiest Recipe You’ll Ever Make

    Pancakes from Scratch: The Fluffiest Recipe You’ll Ever Make

    Fluffiest Homemade Pancakes
    Made Easy

    Every once in a while, you find a recipe that’s just right, easy, reliable, and worthy of repeating over and over. This pancake recipe is exactly that. It’s crafted to deliver light, tall, fluffy pancakes using ordinary pantry ingredients, but with a result that feels anything but ordinary. The secret? A touch more baking powder, a generous splash of vanilla, and plenty of butter for flavor and that irresistible golden brown finish.

    What I love about these pancakes is how effortlessly they come together. No churning of fancy batters or days-of-planning required, just wheat, sugar, milk, an egg, butter, and vanilla, all whisked together in minutes. The baking powder works its magic as the batter hits the hot skillet, creating air pockets that lift the pancakes up beautifully.

    Pour a couple onto a warm pan, flip them when the edges dry and bubbles appear, and the result is breakfast bliss, soft centers, crispy edges, and that signature fluffy stack we all crave. Whether you top them with maple syrup, fresh berries, or homemade honey butter, these pancakes deliver a comforting, crowd-pleasing experience.

    Whenever I’m asked for my go-to pancake recipe, this is the one I send. It’s easy enough for lazy weekend mornings and reliable enough to feed hungry crowds. And if you want to get creative, feel free to stir in blueberries, a pinch of cinnamon, or swap in half whole wheat flour for extra nutty texture. Honestly, there’s something so satisfying about mastering the perfect pancake,and this recipe makes it happen every time.

    Breakfast Pancakes ingredients
    Pancakes ingredients

    Pancakes from Scratch: The Fluffiest Recipe You’ll Ever Make

    Recipe by Cindy
    0.0 from 0 votes
    Difficulty: Easy
    Servings

    8

    servings
    Prep time

    4

    minutes
    Cooking time

    10

    minutes

    Ingredients

    • 1½ cups (190g) all-purpose flour

    • 2 tablespoons sugar

    • 1 tablespoon baking powder

    • ½ teaspoon salt

    • 1¼ cups (300ml) milk (dairy or non-dairy)

    • 1 large egg

    • 5 tablespoons (70g) unsalted butter, melted (plus extra for cooking)

    • 2 teaspoons vanilla extract

    Directions

    • In a large bowl, whisk together flour, sugar, baking powder, and salt.
    • In another bowl, whisk milk, egg, melted butter, and vanilla until smooth.
    • Pour wet ingredients into dry and stir until just combined—lumps are okay. Don’t overmix.
    • Heat a skillet or griddle over medium heat and lightly butter it.
    • Pour ¼-cup portions of batter onto the skillet. Cook until bubbles appear and edges look dry (about 1–2 minutes).
    • Flip and cook another 1–2 minutes until golden.
    • Serve immediately with your favorite toppings.

    Pro Tips for Pancakes Success

    • Use fresh baking powder for maximum lift—it’s the secret to that fluffy texture.
    • Don’t overmix; a few lumps are good—over-stirring makes dense pancakes instead of fluffy wonders.
    • Let your pan warm up properly, and use butter, not oil, for that golden, crispy edge.
    • Adjust heat if needed—too hot and they burn, too cool and they stay pale. Medium heat is your friend.
    • Keep pancakes warm in a 200 °F (95 °C) oven while cooking more; that way everyone eats hot and stackable.

    Note: For more informations on nutrition, visit the website: nutrition.gov

  • Chili : The Classic Homemade Recipe

    Chili : The Classic Homemade Recipe

    The Best Chili

    There are some recipes that never go out of style, and chili is one of them. It’s the kind of dish that brings people together, whether you’re serving it at a cozy weeknight dinner, a family gathering, or a game-day feast. A steaming bowl of chili has a way of warming both your belly and your soul, delivering comfort in every spoonful.

    What makes this recipe so special is how it combines simple, everyday ingredients into something deeply flavorful and satisfying. Ground beef forms the hearty base, while onions, beans, and tomatoes add texture and richness. A balanced blend of spices, chili powder, garlic, cumin, and a touch of cayenne, infuses the whole pot with warmth and just the right kick. The longer it simmers, the more the flavors meld into that signature, crave-worthy taste.

    The best part? This chili is as versatile as it is delicious. You can make it mild or fiery, keep it chunky or smooth, add extra beans, or stir in corn for sweetness. Serve it on its own with a sprinkle of cheddar and a dollop of sour cream, or spoon it over rice, baked potatoes, or even hot dogs for a fun twist. And don’t forget the cornbread on the side, it’s practically a requirement.

    If you’re looking for a recipe that’s hearty, reliable, and guaranteed to impress, this classic chili will earn a permanent spot in your kitchen. It’s easy enough for a busy weeknight but flavorful enough to feel like you’ve been cooking all day. One bowl, and you’ll see why chili is a timeless comfort food that never fails to satisfy.

    Classic Homemade Chili ingredients

    Classic Homemade Chili

    Recipe by Cindy
    0.0 from 0 votes
    Difficulty: Easy
    Servings

    6

    servings
    Prep time

    10

    minutes
    Cooking time

    25

    minutes

    Ingredients

    • 1 lb (450 g) ground beef

    • 1 large onion, chopped

    • 2 cloves garlic, minced

    • 1 can (15 oz) kidney beans, drained and rinsed

    • 1 can (15 oz) tomato sauce

    • 1 can (14.5 oz) diced tomatoes

    • 2 tbsp chili powder

    • 1 tsp ground cumin

    • ½ tsp cayenne pepper (optional, for heat)

    • ½ tsp salt, or to taste

    • ½ tsp black pepper

    • ½ cup water or beef broth

    Directions

    • In a large pot over medium heat, cook ground beef until browned, about 6–8 minutes. Drain excess fat if necessary.
    • Add chopped onion and garlic, and cook until softened and fragrant, about 3 minutes.
    • Stir in chili powder, cumin, cayenne, salt, and pepper. Cook for 1 minute to bloom the spices.
    • Add kidney beans, tomato sauce, diced tomatoes, and water (or broth). Stir to combine.
    • Bring to a boil, then reduce heat and let simmer uncovered for 20 minutes, stirring occasionally.
    • Taste and adjust seasoning if needed. Serve hot with toppings like shredded cheese, sour cream, or chopped green onions.

    Tips for the Best Chili

    • Use fresh spices. Old chili powder can lose its punch; fresh spices give the dish bold flavor.
    • Simmer longer for depth. While it’s great in 30 minutes, letting it cook for an hour or more develops a richer, heartier taste.
    • Balance the heat. Start mild and add cayenne or hot sauce at the end so everyone can enjoy their perfect spice level.
    • Top it off. Classic garnishes like cheese, sour cream, avocado, or crushed tortilla chips add layers of flavor and texture.
    • Make it ahead. Chili often tastes even better the next day as the flavors meld overnight.

    Note: For more informations on nutrition, visit the website: nutrition.gov

  • Meatloaf, Irresistibly Juicy

    Meatloaf, Irresistibly Juicy

    Irresistibly Juicy Meatloaf: A Cozy Kitchen Essential

    meatloaf
    meatloaf

    There’s something timeless about slicing into a warm, tender meatloaf fresh from the oven. My favorite version? boldly seasoned, ultra-moist, and covered in a sticky, caramelized glaze that makes each bite sing with flavor.

    I swear, despite its humble appearance, this meatloaf never fails to impress. It’s the kind of dish that feels like a warm kitchen hug: so comforting, yet complex enough to feel like a special occasion. Grate the onion, allowing its juices to naturally sweeten and soften the loaf, and use of beef bouillon granules instead of plain salt for added depth.

    This recipe skips the fuss and delivers maximum flavor with minimal effort and ingredients, perfect for busy weeknights or relaxed Sunday dinners. Leftovers? Even better. Slathered on crusty bread or next to buttery mashed potatoes, it transforms into a sandwich worth waking for.

    Whether you’re feeding kids, impressing dinner guests, or just craving that nostalgic home-cooked feeling, this meatloaf hits every note: savory, juicy, and meltingly tender. If you bake just one meatloaf this year, let this be the one.

    meatloaf ingredients
    meatloaf ingredients

    Irresistibly Juicy Meatloaf

    Recipe by Cindy
    0.0 from 0 votes
    Servings

    8

    servings
    Prep time

    15

    minutes
    Cooking time

    1

    hour 

    15

    minutes

    Ingredients

    • 1 cup panko breadcrumbs

    • 1 large onion, grated

    • 2 lb / 1 kg ground beef (ideally not too lean)

    • 2 eggs

    • 3 garlic cloves, minced

    • 1 tsp Worcestershire sauce

    • ¼ cup tomato ketchup

    • ¼ cup chopped parsley (or 2 tsp dried parsley/basil)

    • 1 tsp dried thyme

    • 2 beef bouillon cubes, crumbled (or 2 tsp beef powder)

    • 1 tsp black pepper

    Directions

    • Preheat oven to 180 °C (350 °F). Line a loaf pan (optional for easy removal).
    • In a large bowl, combine breadcrumbs, grated onion, ground beef, eggs, garlic, Worcestershire sauce, ketchup, parsley, thyme, bouillon granules, and pepper.
    • Gently mix until just combined, avoid overmixing to keep the loaf tender.
    • Shape into a loaf and place into your prepared pan.
    • Bake for 1 hour 15 minutes, or until a meat thermometer reads 160 °F (71 °C). Optionally, brush with extra ketchup during the last 10 minutes for a glossy finish.
    • Let rest for 10 minutes before slicing, this ensures juicy, clean slices.

    Cooking Tips

    • Grate, don’t chop the onion—this releases moisture and sweet flavor evenly throughout the loaf.
    • Don’t overmix. Mix until just combined. Overworking the meat will lead to a dense, dry loaf.
    • Let it rest. A brief 10-minute rest after baking lets the juices redistribute so slices stay moist when cut.
    • Glaze for shine. Brushing the top with ketchup during the last minutes of baking adds a pretty, flavorful gloss.
    • Upgrade the moisture. For extra tenderness, substitute ¼ cup of the breadcrumbs with milk-soaked bread or add a spoonful of Greek yogurt.

    Note: For more informations on nutrition, visit the website: nutrition.gov

  • Banana Bread

    Banana Bread

    There’s truly something magical about the aroma of banana bread wafting through the house—warm, comforting, and full of nostalgia. I’ll never forget stumbling upon Banana Bread recipe and thinking, this is it—the one I’ll keep coming back to, loaf after loaf. With its tender crumb, rich banana flavor, and just the right touch of brown sugar sweetness, this loaf quickly became a constant in my kitchen.
    What makes it so special? It uses simple, everyday ingredients—ripe bananas, brown sugar, butter, and a dollop of Greek yogurt or sour cream to give it extra moisture and a slight tang . The method is straightforward, cream butter and sugar, beat in eggs, fold in mashed bananas and yogurt, then whisk in the dry ingredients. Before you know it, your loaf pan is filled with golden batter, your oven becomes therapy, and soon enough your whole house smells like heaven.
    I love this recipe because it’s unpretentious yet unforgettable. It makes the perfect morning treat with coffee, a cozy afternoon pick-me-up, or a wholesome snack for lunchboxes. It’s also incredibly forgiving—overripe bananas only make it sweeter and more flavorful! Whether you bake one loaf or two, you’re in for a moment of simple kitchen joy that tastes like home.

    Banan Bread
    Banan Bread
    banana bread ingredients
    banana bread ingredients

    Banana Bread

    Recipe by Cindy
    0.0 from 0 votes
    Servings

    8

    slices
    Prep time

    10

    minutes
    Cooking time

    1

    hour 

    5

    minutes

    Easy Banana Bread Recipe

    Ingredients

    • 2 cups (250 g) all-purpose flour, spooned & leveled

    • 1 tsp baking soda

    • ¼ tsp salt

    • ½ tsp ground cinnamon (optional)

    • ½ cup (113 g) unsalted butter, softened

    • ¾ cup (150 g) packed light or dark brown sugar

    • 2 large eggs, at room temperature

    • ⅓ cup (80 g) plain Greek yogurt or full-fat sour cream, at room temp

    • 1½ cups (345 g) mashed ripe bananas (about 3–4 bananas)

    • 1 tsp pure vanilla extract

    Directions

    • Preheat your oven to 350 °F (177 °C). Grease a 9×5-inch loaf pan and line it with parchment, if desired.
    • In a medium bowl, whisk together the flour, baking soda, salt, and cinnamon (if using).
    • In a separate large bowl, use a mixer to cream the softened butter and brown sugar until light and fluffy (about 3 minutes).
    • Add eggs one at a time, beating well after each; stir in vanilla.
    • Mix in the yogurt, then fold in mashed bananas until just combined.
    • Gently stir in dry ingredients until just moistened—do not overmix.
    • Pour batter into the prepared pan. Bake for 60–65 minutes, or until a toothpick comes out with a few moist crumbs.
    • Cool in the pan for 10 minutes, then transfer loaf to a wire rack to cool completely before slicing.

    Banana Bread Pro Tips & Final Thoughts

    • Use spotty, overripe bananas, they give the most banana flavor and moisture.
    • Let the loaf cool completely before slicing, warm slices tend to crumble.
    • For added flavor, stir in ½ cup chocolate chips or chopped nuts.
    • To keep it moist, store wrapped at room temperature for up to 3 days, or freeze slices for longer storage.
    • For a flavor twist, try adding a teaspoon of espresso powder, which deepens the sweetness and adds complexity.

      Note: For more informations on nutrition, visit the website: nutrition.gov
  • Coffee-Toffee Macadamia Crunch

    Coffee-Toffee Macadamia Crunch

    I have a confession: every time I make this Paul Newman’s Coffee-Toffee Macadamia Crunch, I tell myself I’ll set some aside as gifts. And every time… well, let’s just say the tin mysteriously empties before I can tie the ribbon.

    This snack is dangerously addictive. It starts with fluffy popcorn, gets tossed with buttery caramel that has just the right kiss of coffee, and then why stop there?, it’s finished with toasted macadamias and little toffee bits that shatter with each bite. Sweet, salty, nutty, crunchy… it checks all the boxes.

    What I love most is how effortless it is. You don’t need candy-making skills or fancy equipment, just a pot, a bowl, and about 15 minutes of attention. The result tastes like something from a gourmet shop, but it’s the kind of recipe you’ll find yourself making on a random Tuesday just because the craving hits.

    Whether you’re sneaking handfuls during movie night, packaging it up as a thoughtful homemade gift, or just keeping it on the counter “for guests” (we all know how that ends), this Coffee-Toffee Macadamia Crunch is guaranteed to disappear fast.

    Paul Newman’s Coffee-Toffee Macadamia Crunch

    Recipe by Cindy
    0.0 from 0 votes
    Servings

    8

    servings
    Prep time

    10

    minutes
    Cooking time

    15

    minutes
    Cooling Time

    30

    minutes

    Ingredients

    • 8 cups freshly popped popcorn (about ½ cup kernels)

    • 1 cup roasted macadamia nuts

    • 1 cup brown sugar, packed

    • ½ cup unsalted butter

    • ¼ cup light corn syrup (or golden syrup)

    • 1 tablespoon instant coffee granules

    • ½ teaspoon baking soda

    • ½ teaspoon vanilla extract

    • ½ cup toffee bits (optional, for extra crunch)

    Directions

    • Prepare Popcorn Base
    • Place popped popcorn and roasted macadamia nuts in a very large bowl. Line a baking sheet with parchment paper.
    • Make Coffee Caramel
    • In a medium saucepan over medium heat, combine brown sugar, butter, and corn syrup. Stir until melted and bubbling. Add instant coffee and let mixture cook for 4–5 minutes, without stirring, until it turns a rich amber color.
    • Finish the Caramel
    • Remove from heat and quickly stir in baking soda and vanilla extract. The caramel will foam slightly—this is normal.
    • Coat the Popcorn
    • Pour hot caramel over the popcorn and nuts. Working quickly with a spatula, toss until evenly coated. Sprinkle with toffee bits while mixture is still warm.
    • Cool & Serve
    • Spread coated popcorn onto prepared baking sheet. Let cool completely (about 30 minutes), then break into crunchy clusters. Enjoy

    Tips & Variations

    1. Swap macadamia nuts for almonds, pecans, or cashews.
    2. Drizzle cooled clusters with dark or white chocolate for extra indulgence.
    3. Store in an airtight container for up to 1 week, or package in gift bags for a festive homemade treat.

    Note: For more informations on nutrition, visit the website: nutrition.gov

  • Cozy Pumpkin Coffee Cake

    Cozy Pumpkin Coffee Cake

    This cozy pumpkin coffee cake is the very definition of comfort food — tender, rich, and impossibly moist thanks to the natural sweetness of pumpkin puree. Each bite is layered with warm autumn spices and topped with a golden, buttery cinnamon crumb that adds just the right amount of crunch. A silky drizzle of vanilla icing finishes it off, creating the perfect balance between cozy and indulgent. Serve it alongside your morning coffee for a sweet start to the day, or pair it with a steaming cup of tea in the afternoon for a comforting treat that feels like a warm hug. Whether you’re baking it for family, sharing it with friends, or simply treating yourself, this cake is a timeless recipe you’ll want to make again and again.

    Cozy Pumpkin Coffee Cake preparation

    Keeps & Serves Like a Dream

    • Room temp: up to 3 days
    • Fridge: up to 5 days
    • Freezer: individually wrapped, up to 2 months — just thaw or warm before eating.

    Best Pumpkin Coffee Cake

    Recipe by Cindy
    0.0 from 0 votes
    Servings

    10

    servings
    Prep time

    15

    minutes
    Cooking time

    35

    minutes

    Ingredients

    • For the Crumb Topping
    • ½ cup (63 g) all-purpose flour

    • ½ cup (100 g) packed light or dark brown sugar

    • 1½ tsp ground cinnamon

    • ¼ cup (56 g) cold unsalted butter

    • For the Cake Base
    • 2 cups (250 g) all-purpose flour

    • 1 tsp baking soda

    • ½ tsp baking powder

    • ½ tsp salt

    • 1½ tsp ground cinnamon

    • ½ tsp ground nutmeg

    • ¼ tsp ground cloves

    • ¼ tsp ground ginger

    • 1 cup (230 g) pumpkin puree

    • ½ cup (100 g) packed brown sugar

    • ½ cup (120 ml) canola or vegetable oil

    • ¼ cup (82 g) pure maple syrup

    • ¼ cup (60 ml) milk

    • For the Vanilla Icing
    • 1 cup (120 g) confectioners’ sugar

    • 2 Tbsp pumpkin-spice coffee creamer (or milk/half-and-half)

    • ¼ tsp vanilla extract

    Directions

    • Preheat & Prep
    • Heat your oven to 350 °F (177 °C). Grease a 9-inch square or springform pan.
    • Make the Crumb Topping
    • In a bowl, combine flour, brown sugar, and cinnamon. Cut in the cold butter using a fork or pastry cutter until you’ve got clumps and crumbs. Set aside.
    • Mix Dry Ingredients (Cake)
    • In a large bowl, whisk together flour, baking soda, baking powder, salt, and spices.
    • Combine Wet Ingredients
    • In another bowl, whisk pumpkin puree, brown sugar, oil, maple syrup, and milk until smooth.
    • Bring Wet into Dry
    • Gently fold the wet mixture into the dry ingredients until just combined—don’t overmix. The batter will be thick and lush.
    • Assemble the Cake
    • Spread the thick batter into your prepared pan. Sprinkle the crumb topping evenly over it and press lightly.
    • Bake
    • Bake for 30–35 minutes. Start checking at 30 minutes—when a toothpick comes out clean or with just a few moist crumbs, it’s done.
    • Whip Up the Icing
    • While the cake cools slightly, whisk confectioners’ sugar, creamer (or milk), and vanilla until smooth. Adjust thickness with a bit more liquid if needed.
    • Finish & Enjoy
    • Drizzle the icing over the warm cake so it seeps into those sweet crumb pockets. Slice and serve while cozy.

    Pro Tips for the Cozy Pumpkin Cake Glory

    • Cold butter makes all the difference—it keeps your crumb topping crisp.
    • Don’t overmix your batter—it keeps the cake light and tender.
    • Drizzle the icing while the cake’s still warm to create magical pockets of syrupy sweetness.
    • Let the cake rest about 10 minutes before slicing so it holds its shape.

    Variation Ideas to Customize the Cozy Pumpkin Coffee Cake

    • Add nuts: Stir in chopped pecans or walnuts to the crumb for crunch.
    • Chocolate twist: Fold mini chocolate chips into the batter before baking.
    • Fruit flair: Mix in diced apples for juicy bits.
    • Cheesecake swirl: Dollop sweetened cream cheese into the batter and swirl.
    • Maple glaze: Switch out vanilla icing for a maple-flavored drizzle for richer flavor.

    Note: For more informations on nutrition, visit the website: nutrition.gov

  • Juicy Cooker Shredded Chicken: Your Go-To Meal Prep

    Juicy Cooker Shredded Chicken: Your Go-To Meal Prep

    Juicy Cooker Shredded Chicken is one of those fantastic “dump and go” meals that are an absolute lifesaver on a busy night. You just toss all the ingredients into your slow cooker, walk away, and come back to a kitchen filled with the incredible aroma of perfectly cooked chicken and peppers. It’s an easy, flavorful, and incredibly versatile recipe that’s perfect for tacos, rice bowls, or just eating straight from the pot!
    You can use chicken breasts or thighs. Chicken breasts are lean and shred nicely, but thighs tend to stay juicier. You can use either, or a mix of both.

    Slow Cooker Shredded Chicken Quick Stats

    • Prep Time: 10 minutes
    • Cook Time: 4-6 hours (on low)
    • Servings: Varies

    Juicy Slow Cooker Shredded Chicken

    Recipe by Cindy
    0.0 from 0 votes
    Servings

    10

    servings
    Prep time

    5

    minutes

    Ingredients

    • 1 lb boneless, skinless chicken breasts or thighs

    • 1 red bell pepper, sliced

    • 1 green bell pepper, sliced

    • 1 yellow onion, sliced

    • 2 cloves garlic, minced

    • 1 tablespoon taco or fajita seasoning

    • 2 tablespoons lime juice

    • 1 cup salsa

    Directions

    • Layer it Up: Place the chicken breasts in the bottom of your slow cooker in a single layer.
    • Add the Veggies: Add the sliced bell peppers, onion, and minced garlic over the chicken.
    • Season and Sauce: Sprinkle half of the fajita seasoning evenly over the top. Then, pour the lime juice and salsa evenly over everything. Give it a gentle stir with tongs or a large spoon to make sure the chicken and veggies are coated.
    • Cook Away: Cover the slow cooker and cook on low for 4 to 6 hours, or until the chicken is cooked through and the peppers are tender. The chicken should shred easily with two forks when it’s done.
    • Shred and Serve: Once cooked, shred the chicken directly in the slow cooker and stir it to combine with the sauce. Serve warm with tortillas and your favorite toppings like sour cream, avocado, or shredded cheese.

    Notes

    • Pro-Tips & Variations

      For Crispier Veggies: If you prefer your peppers and onions to be a bit firmer, add them to the slow cooker during the last hour of cooking.
      No Fajita Seasoning? No Problem! You can create your own seasoning mix with 1 teaspoon chili powder, ½ teaspoon paprika, and ¼ teaspoon each of onion and garlic powder.
      Make-Ahead Meal: You can turn this into a freezer meal! Combine the raw chicken, seasoning, lime juice, and a drizzle of oil in a gallon-size freezer bag. Add the sliced veggies, seal tightly, and freeze flat. When you’re ready to cook, just thaw it overnight and dump it straight into the slow cooker.

    Note: For more informations on nutrition, visit the website: nutrition.gov

  • Pumpkin Spice Latte

    Pumpkin Spice Latte

    Make yourself a Pumpkin Spice Latte at home – no fancy coffee shop needed! Just grab some milk, pumpkin puree, sugar, vanilla extract, pumpkin pie spice, and espresso, and you’re good to go!

    Pumpkin Spice Latte recipe: Make this delicious and authentic PSL at home with just 6 ingredients and 10 minutes of prep time. Perfect for fall and the holiday season, this recipe is easy to follow and customizable to your taste.
    Some tips to keep in mind:
    Use high-quality coffee beans and grind them yourself for the best flavor.
    Adjust the amount of sugar to your taste – I like mine sweeter, but you can use less or omit it altogether.
    If you want to get really fancy, top your latte with whipped cream and a sprinkle of cinnamon.

    Pumpkin Spice Latte

    Recipe by Cindy
    0.0 from 0 votes
    Course: BreakfastDifficulty: Easy
    Servings

    2

    servings
    Prep time

    5

    minutes
    Cooking time

    5

    minutes
    Calories

    130

    kcal

    Homemade Pumpkin Spice Latte . To create this delicious fall drink, you’ll need the following ingredients:

    Ingredients

    • * 1 cup of milk (whole, skim, or a non-dairy alternative, your choice)

    • * 2 tablespoons of sugar (adjust to taste – I like mine a bit sweeter!)

    • * 2 tablespoons of pumpkin puree (canned is fine, but fresh is even better)

    • * 1/2 teaspoon of vanilla extract (the good stuff, not imitation)

    • * 1/4 teaspoon of pumpkin pie spice (the magic that makes it taste like fall)

    • * 2 cups of strongly brewed coffee or espresso (I prefer a dark roast, but you do you)

    Directions

    • Combine the milk, sugar, and pumpkin puree in a small saucepan. Heat it over medium heat, whisking constantly, until it just reaches a boil.
    • Remove from the heat and pour the mixture into a blender. Add the vanilla extract and pumpkin pie spice, then pulse for 30-40 seconds or until the mixture starts to froth.
    • Pour the coffee into a cup, filling it about half full. Then, pour the pumpkin mixture into the cup until it’s full.
    • Top with whipped cream and a sprinkle of cinnamon, if you’re feeling extra fancy.

    Note: For more informations on nutrition, visit the website: nutrition.gov

  • Krispy Kreme Donuts

    Krispy Kreme Donuts

    Homemade Krispy Kreme Donuts, Light, Fluffy, and Irresistible

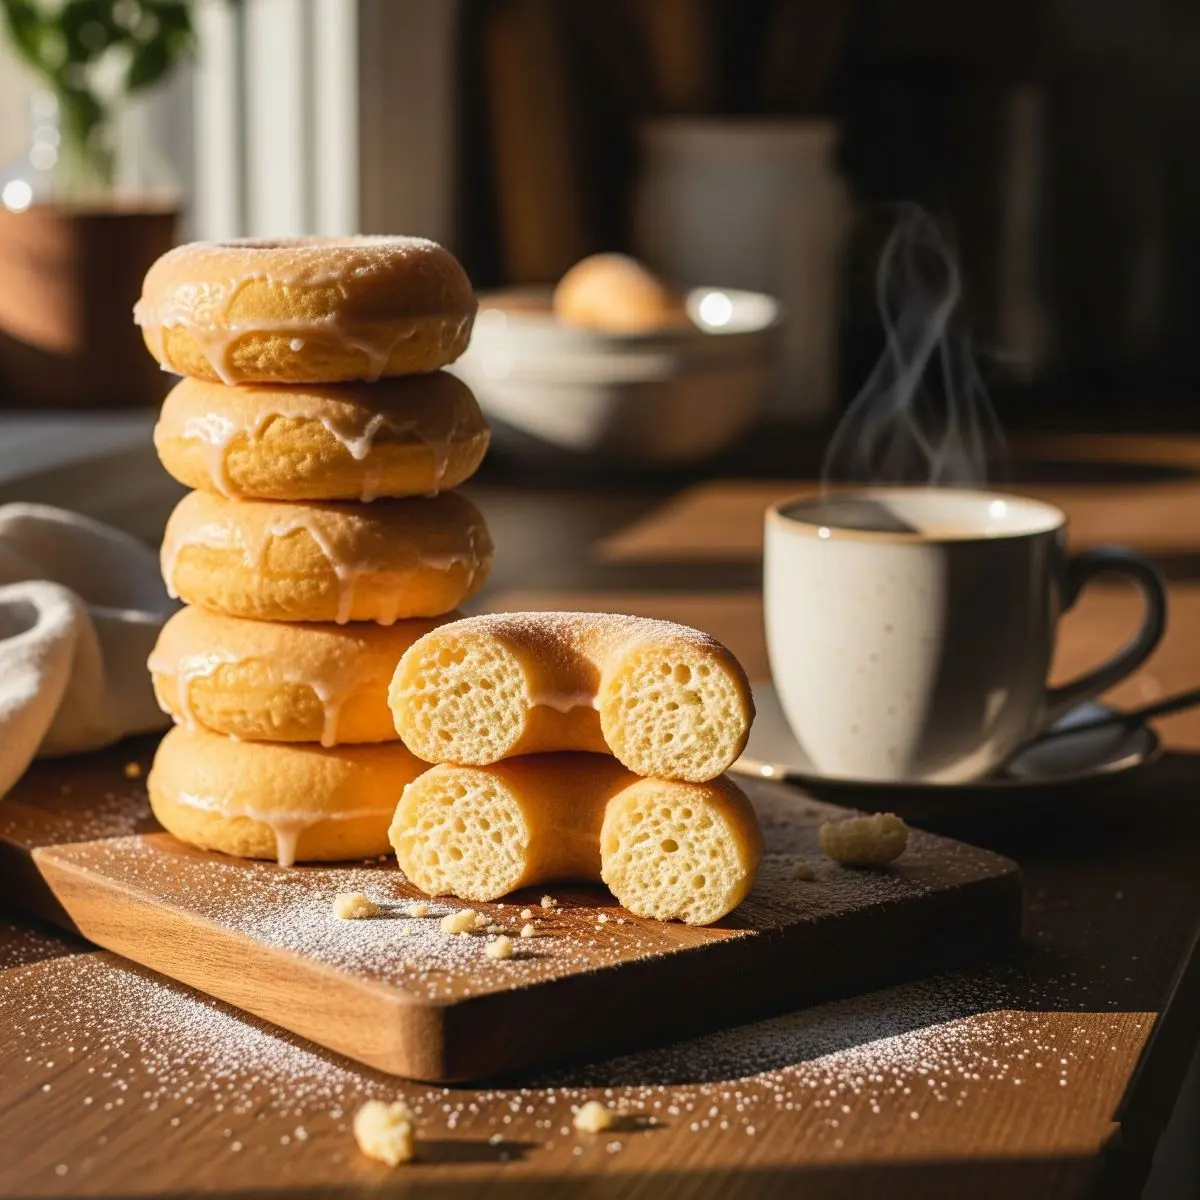
    There are few things more magical than biting into a Krispy Kreme Donut, that soft, airy texture, the delicate sweetness of the glaze, and the way it practically melts in your mouth. Now imagine being able to create that same experience at home. Yes, it’s possible! With this recipe, you can bring the joy of freshly fried Krispy Kreme Donuts right into your own kitchen.

    What makes these donuts so special is their perfect balance of lightness and flavor. Unlike dense or overly sweet donuts, a Krispy Kreme Donut is fluffy, pillowy, and just sweet enough to satisfy your cravings without being heavy. The dough is enriched with milk, butter, and a touch of sugar, giving it that signature tender crumb. Once fried to golden perfection, each donut is dipped into a silky, vanilla-infused glaze that hardens ever so slightly, creating that iconic sheen you know and love.

    The best part? You don’t need to be a professional baker to master this recipe. With a few simple pantry staples and some patience while the dough rises, you’ll be rewarded with a batch of donuts that rivals the original. Serve them warm, when the glaze is still slightly sticky, for the ultimate indulgence.

    Homemade Krispy Kreme Donuts aren’t just a treat for breakfast or dessert, they’re an experience. Picture a lazy weekend morning, the aroma of frying dough filling your kitchen, and a platter of shiny glazed donuts waiting on the counter. Pair them with a cup of coffee or a tall glass of milk, and you’ve got pure happiness in every bite.

    So next time the craving hits, skip the drive-thru and make your own batch of Krispy Kreme Donuts. One taste, and you’ll realize the homemade version is just as magical, maybe even better.

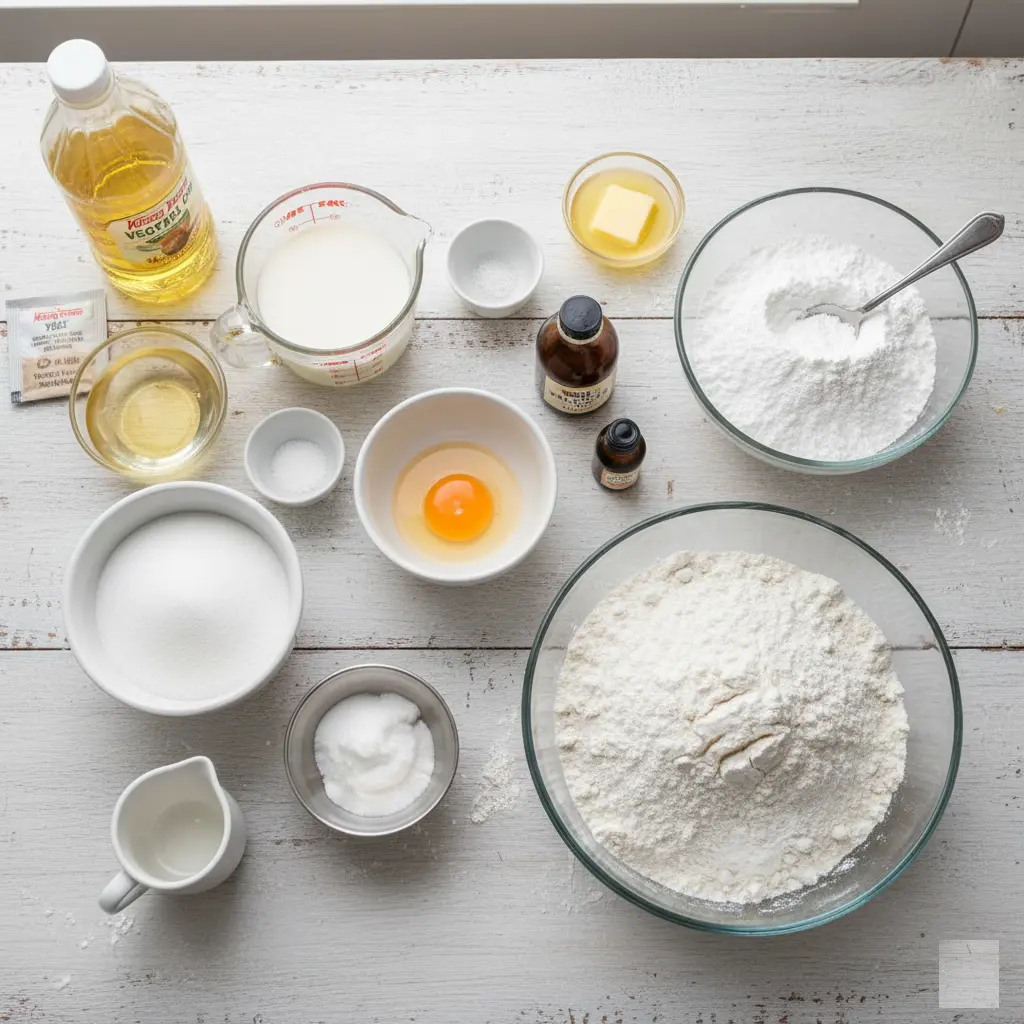
    Krispy Kreme Donuts ingredients

    Make Your Own Krispy Kreme-Style Donuts

    Recipe by Cindy
    0.0 from 0 votes
    Course: BreakfastCuisine: American
    Servings

    12

    servings
    Prep time

    20

    minutes
    Cooking time

    15

    minutes

    Home made Krispy Kreme-Style Donuts

    Ingredients

    • For the Donuts:

      1¼ oz package active dry yeast
      2 tablespoons warm water
      ¾ cup warm milk
      ¼ cup sugar
      ½ teaspoon salt
      1 egg
      2½ tablespoons shortening
      2½ cups all-purpose flour
      Oil for frying (vegetable or canola oil works well)

      For the Glaze:

      ⅓ cup butter, melted
      2 cups powdered sugar
      1½ teaspoons vanilla extract
      4-6 tablespoons hot water

    Directions

    • Activate the Yeast: In a large bowl, combine the warm water, warm milk, and yeast. Give it a gentle stir and let it sit for about 5 minutes. You’ll know it’s ready when the mixture gets foamy—that’s a sign your yeast is active!
    • Make the Dough: Add the sugar, salt, egg, shortening, and flour to the yeast mixture. Using a stand mixer with the dough hook, beat the dough on medium speed for about 2 minutes. The dough should come together and pull cleanly away from the sides of the bowl.
    • First Rise: Lightly grease a large glass or ceramic bowl with cooking spray. Transfer the dough to the bowl, cover it with plastic wrap or a clean kitchen towel, and place it in a warm spot. Let it rise for 45 minutes to an hour, or until it has doubled in size.
    • Shape the Donuts: Once the dough has risen, punch it down gently and turn it out onto a lightly floured surface. Roll the dough until it’s about ½-inch thick. Use a donut cutter or two different-sized round cutters to cut out your donut shapes. Place the donuts on a baking sheet lined with parchment paper, cover them lightly, and let them rest for a final 15 minutes.
    • Fry the Donuts: While the donuts are resting, heat about 2-3 inches of oil in a deep fryer or a heavy-bottomed pot to 350°F (175°C). Carefully fry the donuts in small batches, about 40-60 seconds per side, until they’re golden brown. Use a slotted spoon to transfer the donuts to a paper towel-lined plate to drain off any excess oil.
    • Make the Glaze: In a medium bowl, whisk together the melted butter, powdered sugar, vanilla extract, and hot water until the glaze is smooth and silky. Adjust the consistency by adding more hot water, a tablespoon at a time, until it’s thin enough to dip but thick enough to coat the donuts.
    • Glaze and Serve: While the donuts are still warm, dip each one completely into the glaze, turning to coat both sides. Place the glazed donuts on a wire rack set over a baking sheet to catch any drips. Let them set for a few minutes before serving.
    • Enjoy your delicious, homemade Krispy Kreme-style donuts!

    Note: For more informations on nutrition, visit the website: nutrition.gov

    🍩 Tips to Succeed with this Homemade Recipe

    1. Use fresh yeast
      Active yeast ensures your donuts rise light and fluffy, just like the real thing.
    2. Measure flour carefully
      Too much flour makes donuts dense. Spoon flour into the cup, then level it.
    3. Let dough rise twice
      The first rise builds structure, the second rise after shaping creates airy donuts.
    4. Oil temperature matters
      Heat oil to 350°F (175°C). Too hot burns the outside, too cool makes greasy donuts.
    5. Don’t overcrowd the pan
      Fry 2–3 donuts at a time for even cooking and golden color.
    6. Glaze while warm
      Dip donuts into glaze as soon as they cool slightly so it sets shiny and smooth.
    7. Practice patience
      Allow resting and proofing time — rushing leads to flat, heavy donuts.

    ❓ FAQ for the Krispy Kreme Donuts

    1. Can I bake instead of frying?
    Yes, but texture changes. Baked donuts are lighter and less fluffy than fried.

    2. Can I make the dough ahead of time?
    Yes, refrigerate overnight after the first rise. Shape and fry the next day.

    3. How do I store homemade donuts?
    Keep them in an airtight container at room temperature for 1–2 days. Warm briefly before serving.

    4. Can I freeze the donuts?
    Yes, freeze after frying but before glazing. Reheat in the oven, then glaze.

    5. Why are my donuts greasy?
    Oil was too cool or donuts weren’t drained properly. Keep oil steady at 350°F.

    6. How do I get perfect round shapes?
    Use a donut cutter or two round cutters. Chill dough slightly before cutting for clean edges.

    7. Can I use instant yeast instead of active dry yeast?
    Yes. Skip proofing step and mix directly with dry ingredients.

  • Black Beans Pasta

    Black Beans Pasta

    Black Beans Pasta – A Plant-Based Twist on Classic Comfort Food

    If you’ve been searching for a delicious and nutritious dinner idea that’s both affordable and easy to prepare, look no further, black beans pasta is about to become your new go-to. This isn’t your typical bowl of pasta with plain tomato sauce. Instead, it transforms humble pantry staples into a rich, hearty, and incredibly satisfying meal that everyone will love, whether they follow a plant-based lifestyle or not.

    What makes this black beans pasta so special is the unique way it blends wholesome ingredients into a dish that feels indulgent yet nourishing. Canned black beans form the heart of the sauce, giving it a robust, almost “meaty” texture that pairs beautifully with garlic, onions, tomatoes, and a handful of herbs and spices. Tossed with your favorite pasta, the result is a bolognese-style dish that’s completely vegan but still delivers that comforting depth of flavor you crave in a traditional pasta dinner.

    Not only is this recipe full of protein and fiber, but it’s also incredibly versatile. You can use gluten-free pasta for a lighter option, add veggies like spinach or bell peppers for extra nutrients, or sprinkle on nutritional yeast or vegan parmesan for a cheesy finish. It’s a perfect balance of flavor, texture, and nutrition that proves healthy meals don’t have to be bland or complicated.

    Best of all, this black beans pasta comes together in about 30 minutes, making it an ideal choice for busy weeknights. With just a few cans from your pantry and some fresh ingredients, you can create a restaurant-worthy dish that satisfies the whole family. Comforting, budget-friendly, and packed with plant-based goodness, this recipe is proof that simple ingredients can lead to extraordinary meals.

    black beans pasta ingredients

    Hearty Vegan Bolognese with Black Beans

    Recipe by Cindy
    0.0 from 0 votes
    Servings

    4

    servings
    Prep time

    5

    minutes
    Cooking time

    30

    minutes
    Calories

    409

    kcal

    Ingredients

    • 1 tbsp olive oil

    • 1 red onion, diced

    • 1 carrot, diced

    • 1 celery rib, diced

    • 2 cloves garlic, minced

    • 1 tsp oregano

    • ¼ to ½ tsp chili flakes (adjust to your spice preference)

    • 1 sprig fresh rosemary

    • 2 bay leaves

    • 1 tbsp tomato paste

    • 1 can (14 oz / 400g) black beans, drained and rinsed

    • 1 can (14 oz / 400g) diced tomatoes

    • ⅓ cup red wine

    • ½ tsp fine salt, or to taste

    • ¼ tsp ground black pepper, plus more for serving

    • Fresh chopped parsley and grated vegan parmesan (optional, for serving)

    • 9 oz (250g) pasta of your choice (penne, linguine, fusilli, etc.)

    Directions

    • Let’s Get Cooking!
    • Heat the olive oil in a large pot or Dutch oven over medium heat. Add your diced onion, carrot, and celery (the “soffritto” base) and cook for about 5-7 minutes, stirring occasionally until they soften and become fragrant.
    • Toss in the minced garlic, oregano, chili flakes, rosemary, and bay leaves. Stir and let everything cook for another minute or two until the garlic becomes fragrant.
    • Add the drained black beans, tomato paste, and red wine. Stir well and let it simmer for about a minute to cook off the alcohol.
    • Now, stir in the canned diced tomatoes, salt, and pepper. Bring the sauce to a gentle simmer, then reduce the heat to low, cover the pot, and let it cook for at least 20 minutes. As it simmers, use the back of a wooden spoon or a potato masher to lightly crush some of the black beans. This will help thicken the sauce and create a richer texture.
    • While the sauce simmers, bring a large pot of generously salted water to a boil and cook your pasta according to the package directions until it’s al dente. Before draining, remember to save about a cup of the starchy pasta water.
    • Once the pasta is cooked, drain it and add it directly to the pot with the black bean sauce. Toss everything together over medium heat for about 30 seconds, allowing the pasta to absorb the flavors. If the sauce seems too thick, add a splash of the reserved pasta water to loosen it up.
    • Serve immediately, topped with fresh parsley, extra black pepper, a drizzle of olive oil, and some vegan parmesan if you like. Enjoy!

    Note: For more informations on nutrition, visit the website: nutrition.gov

    🌟 Tips to Succeed with Black Beans Pasta Recipe

    1. Cook pasta al dente
      Slightly firm pasta holds its shape and absorbs the sauce better.
    2. Use canned or pre-cooked black beans
      This saves time and ensures a creamy texture when mixed with sauce.
    3. Season generously
      Black beans are mild; don’t hesitate to add garlic, cumin, or chili for depth.
    4. Reserve pasta water
      A splash of starchy pasta water helps bind beans and sauce together.
    5. Fresh herbs elevate flavor
      Cilantro, parsley, or basil add freshness and balance to the earthy beans.
    6. Add a creamy element
      A sprinkle of Parmesan, a dollop of sour cream, or avocado slices enhance richness.
    7. Balance with acidity
      A squeeze of lime or lemon brightens the dish and prevents it from feeling heavy.

    ❓ FAQ for Black Beans Pasta Recipe

    1. Can I use any pasta shape?
    Yes, though short pasta like penne or fusilli holds the beans and sauce best.

    2. Do I need to rinse canned black beans?
    Yes, rinse them under cold water to remove excess starch and sodium.

    3. Can I make this recipe vegan?
    Absolutely. Skip the cheese or use plant-based alternatives for a vegan-friendly dish.

    4. What protein goes well with black beans pasta?
    Grilled chicken, shrimp, or tofu pair beautifully without overpowering the beans.

    5. Can I make this ahead of time?
    Yes, store it in the fridge for up to 3 days. Reheat with a splash of water or broth.

    6. How do I make it spicier?
    Add fresh chili, red pepper flakes, or a dash of hot sauce for extra heat.