Blog

  • Rocky Road Fluff Salad

    Rocky Road Fluff Salad

    Introduction

    Rocky Road Fluff Salad is one of those “throw it all in a bowl” kinda desserts that feels like a big cozy hug in every bite! It’s chocolatey, creamy, chewy, nutty, and a total nostalgia bomb. You don’t need to be a pastry chef or turn on the oven for this one—just grab a spoon and your sweet tooth. Whether you’re whipping it up for a BBQ, potluck, or just a weeknight treat, this dessert salad is gonna steal the show. And yes, it’s a salad. Just go with it—your taste buds will thank you!
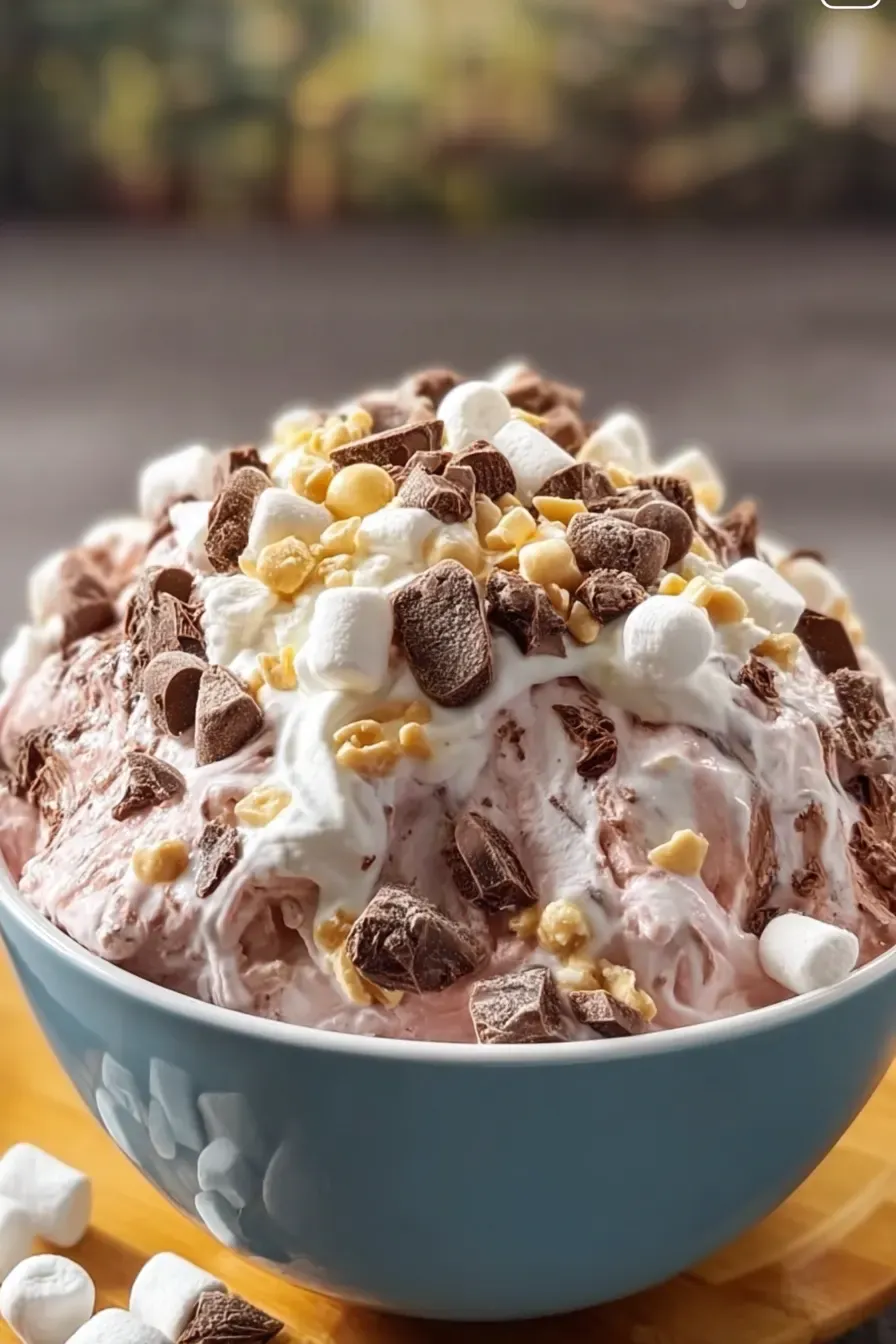
    Rocky Road Fluff Salad

    Reasons You’ll Love This Rocky Road Fluff Salad

    If you’re someone who loves rich, chocolate-packed desserts that don’t take a ton of time or effort—this fluff salad is your new best friend. Here’s why:

    • No-bake bliss! You don’t even need to turn on your stove.
    • Make-ahead magic – tastes even better after chilling.
    • Kid-approved and grown-ups will sneak seconds too!
    • Customizable galore! Add what you love and leave what you don’t.
    • Perfect for parties – it’s a crowd pleaser every single time.
    • Texture heaven – chewy marshmallows, crunchy nuts, soft brownie bites? YES PLEASE.
    • Back pocket dessert that works for birthdays, BBQs, or late-night cravings.
    • One-bowl wonder – minimal dishes, maximum payoff.

    Try it once and you’ll understand. It’s DA BOMB!!!

    Rocky Road Fluff Salad

    Equipment

    • Large mixing bowl
    • Rubber spatula
    • Measuring cups

    Ingredients

    • 2 cups mini marshmallows
    • 1.5 cups chocolate pudding prepared and chilled
    • 1.5 cups whipped topping Cool Whip or homemade
    • 1 cup chocolate brownie chunks or chocolate cake pieces
    • 0.5 cup mini chocolate chips
    • 0.5 cup chopped nuts almonds, walnuts, or peanuts
    • 1 cup sweetened shredded coconut optional

    Instructions

    • In a large mixing bowl, fold together chilled chocolate pudding and whipped topping until smooth and fluffy.
    • Gently stir in mini marshmallows, brownie chunks, chocolate chips, and nuts.
    • If using coconut, fold it in as well.
    • Cover and refrigerate for at least 1 hour to let the flavors combine and marshmallows soften slightly.
    • Scoop into bowls and top with extra marshmallows, nuts, and chocolate shavings.

    What Makes a Good Rocky Road Fluff Salad

    A rockstar Rocky Road Fluff Salad hits that perfect balance of textures and flavors. You want:

    • Fluffy base: Chocolate pudding and whipped topping give it that silky-smooth, melt-in-your-mouth vibe.
    • Chewy elements: Mini marshmallows are the OG Rocky Road player and essential here.
    • Crunch factor: Nuts add bite and balance the sweetness.
    • Richness: Brownie chunks or chocolate cake = over-the-top delicious.
    • Extras: Coconut, chocolate chips, or even a dash of sea salt for some flair.

    When these all come together? You’re eating dessert gold. Trust me on this one—it’s liquid gold!

    Cultural Significance of Rocky Road Fluff Salad

    Fluff salads are a beloved part of American food culture, especially in the Midwest and Southern states. They’re the kind of dish that shows up at family reunions, holiday dinners, or grandma’s Sunday spread. Why are they called salads? Who knows—and honestly, who cares when they taste like this?

    Rocky Road Fluff Salad is like the chocolate lover’s take on a classic fluff. It borrows the flavors of Rocky Road ice cream and spins them into something you can scoop and serve cold, no cone needed. It’s comforting, playful, and brings people together—because let’s be real, no one eats this alone. It’s made to share!

    A Brief History of Rocky Road Fluff Salad

    The Rocky Road combo dates all the way back to the 1920s, when it first popped up as an ice cream flavor. Legend says it was created to give people something sweet during the Great Depression—chocolate, marshmallows, and nuts to cheer folks up. And oh boy, did it work!

    Fluff salads came a little later, booming in popularity in the 50s and 60s thanks to the rise of convenience foods like instant pudding and Cool Whip. Eventually, someone had the genius idea to mash these two together—and Rocky Road Fluff Salad was born. It’s old-school, retro, and totally timeless.

    And here she is—still making us all smile a century later.
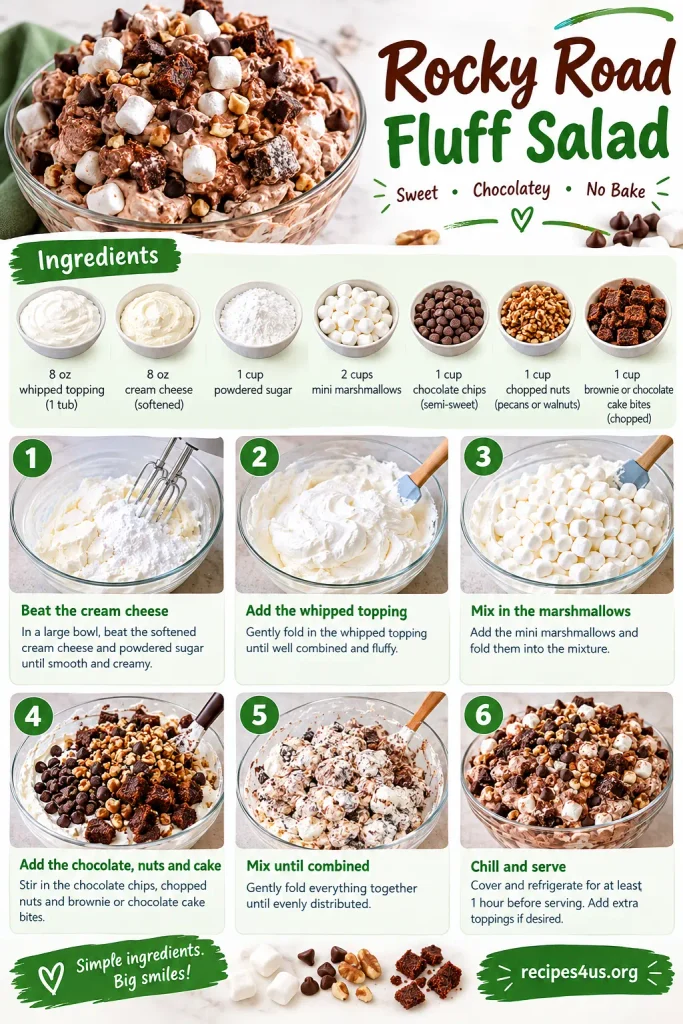
    Rocky Road Fluff Salad
    Rocky Road Fluff Salad

    Ingredients in Rocky Road Fluff Salad

    Here’s everything you’ll need to whip up this decadent delight:

    • 2 cups mini marshmallows – chewy, sweet, and classic.
    • 1 ½ cups chocolate pudding – chilled and thick.
    • 1 ½ cups whipped topping – I’m a Cool Whip girl, but homemade works too.
    • 1 cup chocolate brownie chunks – or chocolate cake pieces if you’re in a pinch.
    • ½ cup mini chocolate chips – little bursts of chocolate in every bite.
    • ½ cup chopped nuts – almonds, walnuts, or peanuts all work great.
    • 1 cup sweetened shredded coconut (optional) – adds texture and a tropical twist.

    Nothing fancy here—just pantry staples coming together in the most EPIC way.

    Equipment You’ll Need

    You’re not going to need a ton of gear for this one. Just:

    • A large mixing bowl
    • A rubber spatula or spoon
    • Measuring cups

    That’s it! Easy cleanup = more time to eat.

    Instructions

    1. Mix the base In a large bowl, gently fold together the chilled chocolate pudding and whipped topping until it’s smooth, fluffy, and evenly combined. Don’t overmix—we want it light and airy!
    2. Add the goodies Stir in the mini marshmallows, brownie chunks, chocolate chips, and chopped nuts. Fold everything in gently so it stays nice and fluffy.
    3. Optional coconut twist If you’re using shredded coconut, now’s the time to fold it in.
    4. Chill time Cover the bowl and refrigerate for at least 1 hour. This helps the flavors come together and softens the marshmallows just enough.
    5. Serve it up Scoop into bowls and top with extra mini marshmallows, chopped nuts, and a few chocolate shavings if you’re feeling fancy.

    And there you have it—pure dessert joy in under 15 minutes. See? I told you this would be your new back pocket recipe!
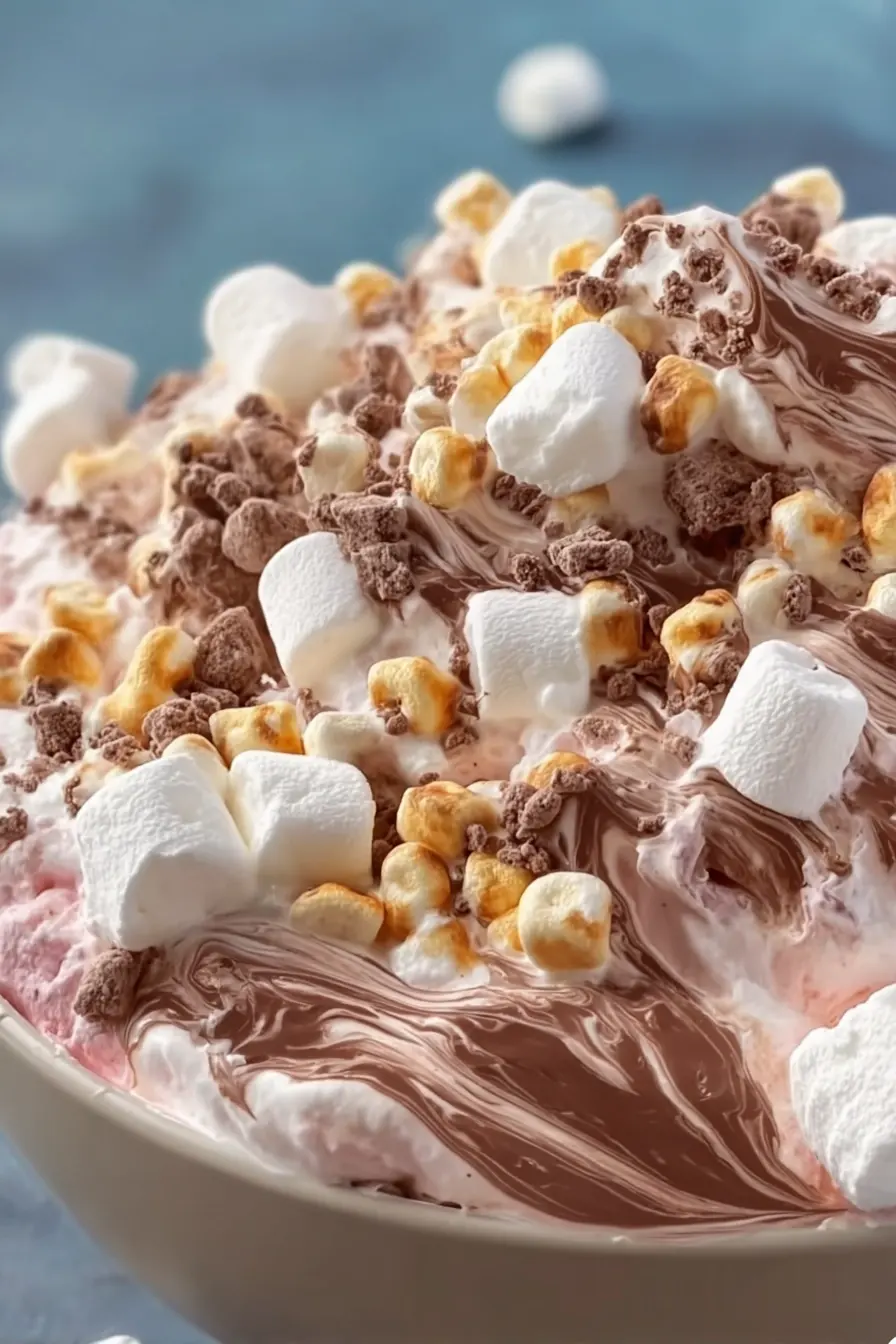
    Rocky Road Fluff Salad

    How to Tell When Your Rocky Road Fluff Salad is Ready

    This beauty is one of those no-fail desserts, but you can tell when it hits that sweet spot of perfection:

    • Chilled and thick: After an hour in the fridge, the salad should be cool, slightly thickened, and fluffy.
    • Marshmallows softened slightly: They’ll still hold their shape but should have absorbed a bit of moisture, making every bite pillowy-soft.
    • No watery separation: The pudding and whipped topping should stay smooth and creamy—if it looks separated, give it a gentle stir.

    Trust your spoon. If it scoops easily and holds its shape? It’s go-time!

    Rocky Road Fluff Salad Variations & Toppings

    You know me—I love a recipe you can riff on. Rocky Road Fluff Salad is basically a blank chocolatey canvas, so go wild!

    Fun Variations

    • Minty Twist: Use mint chocolate chips or a few drops of peppermint extract.
    • PB-Choco Dream: Add in mini peanut butter cups or swirl in some peanut butter.
    • Tropical Rocky Road: Use coconut and toss in chopped dried pineapple or banana chips.
    • Cookie Crumble: Swap the brownie chunks for chopped Oreos or chocolate chip cookies.

    Topping Ideas

    • Crushed graham crackers (s’mores vibes!)
    • Fresh raspberries or strawberries
    • Chocolate shavings or curls
    • Whipped cream swirl
    • A drizzle of chocolate or caramel sauce

    You do you. This salad is endlessly customizable and 100% forgiveness built in.

    Nutritional Insights

    Okay, this isn’t health food—but it is feel-good food, and sometimes that matters more. That said, here’s the rough breakdown per serving (assuming 8 servings):

    • Calories: 280-320 (depending on add-ins)
    • Protein: 3-5g
    • Sugar: Oh yeah, there’s sugar. Around 22-28g per serving.
    • Fat: Mostly from nuts and whipped topping—around 14-18g

    Want to lighten it up a bit? Use sugar-free pudding, low-fat whipped topping, or skip the coconut and chocolate chips. But honestly? Live a little. This is worth it.

    Pro Tips and Tricks for Making Rocky Road Fluff Salad

    You know how I roll—quick, easy, tasty. But these little tips make a BIG difference:

    • Chill your pudding first: Warm pudding will melt the whipped topping and make everything soupy.
    • Don’t overmix: Gently fold everything together to keep the fluffiness. We’re not making brownie batter here.
    • Use fresh brownies or day-old cake: Too soft and it’ll dissolve. Too dry and it’ll be chewy in the wrong way.
    • Toast the nuts: Seriously. Just a few minutes in a pan adds major flavor and crunch.
    • Let it rest: An hour minimum in the fridge is non-negotiable. Overnight? Even better.
    • Serve cold: This isn’t one to leave out on the table for hours—it gets soft fast.
    • Use clear bowls or cups for serving: It looks super cute layered up!

    One more? Make extra. You’ll wish you had when people go back for thirds.

    My Takes on Rocky Road Fluff Salad

    I personally have a preference for using walnuts in mine—they’ve got that earthy, buttery flavor that just works . But if I’ve got peanuts on hand, those get tossed in too. I also love tossing in a handful of mini peanut butter cups when I really wanna impress guests (or just myself).

    Sometimes, I skip the coconut, especially if I know my crew’s not into it. But when I do use it, I toast it lightly for a bit more depth. It’s incredible!

    Oh—and if I’ve got leftover chocolate cake from the weekend? Into the bowl it goes. Waste not, want dessert, right?

    Storage & Health Tips

    Storing Rocky Road Fluff Salad is as easy as making it:

    • Fridge: Store in an airtight container in the fridge for up to 3 days.
    • Don’t freeze: The texture gets weird. Trust me.
    • Stir before serving again: A gentle fold brings it back to life after chilling.

    Health-ish Tips

    If you’re looking to cut back a little:

    • Use sugar-free pudding mix
    • Light whipped topping (or make a homemade one with less sugar)
    • Reduce marshmallows or swap with chopped fruit
    • Use unsweetened shredded coconut
    • Limit the brownie or cake pieces (I know, I know… but just a smidge)

    Still indulgent, still delicious, just a tiny bit lighter.
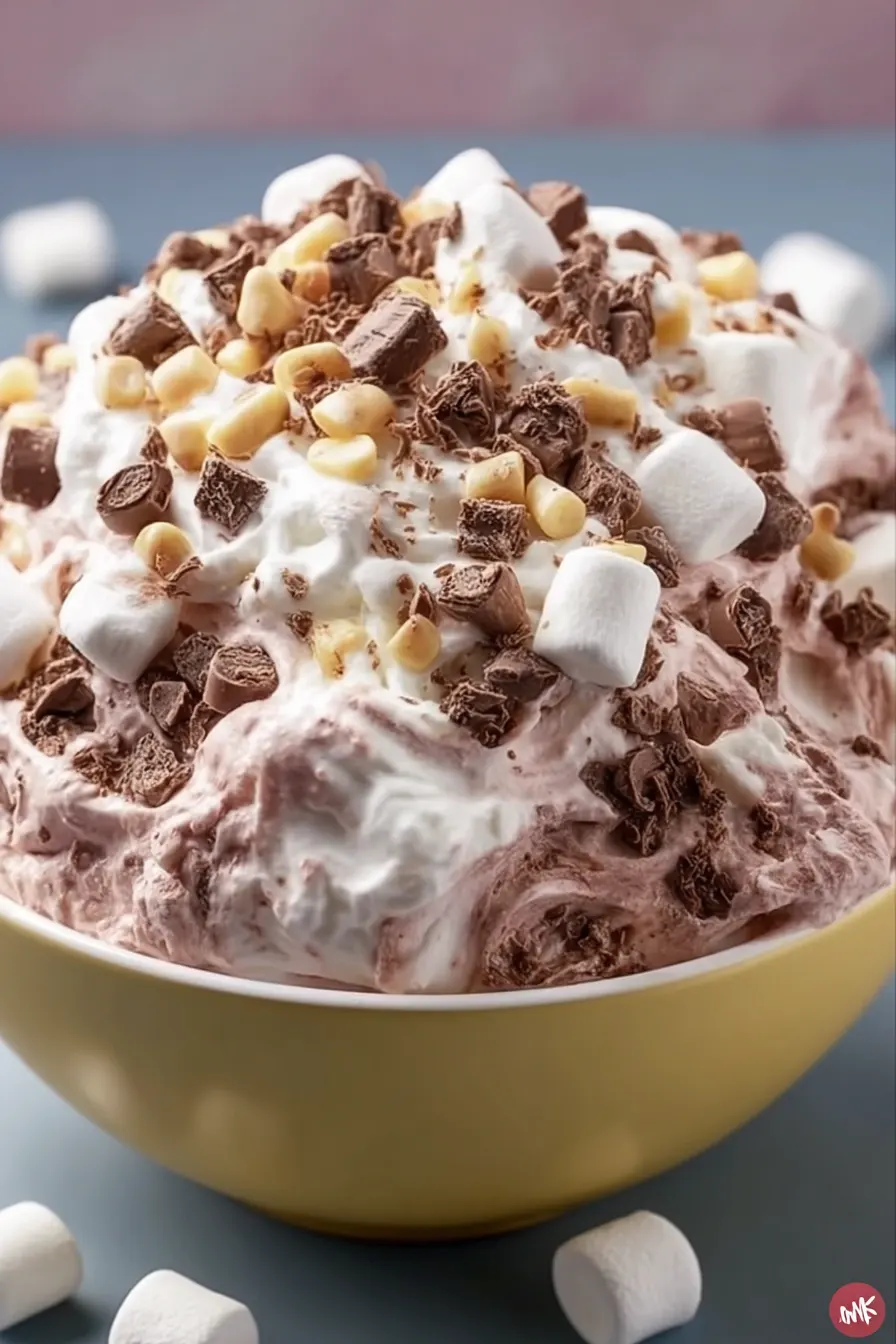
    Rocky Road Fluff Salad

    Rocky Road Fluff Salad FAQs

    Can I make this ahead of time? Absolutely! In fact, it’s better when made ahead. Make it the night before and let it chill overnight. Flavors meld beautifully.

    What can I use instead of Cool Whip? You can use homemade whipped cream—just whip 1 cup of heavy cream with a tablespoon of sugar and a dash of vanilla until stiff peaks form. Use it right away though—doesn’t hold as long as Cool Whip.

    Do I have to use coconut? Nope! It’s totally optional. Leave it out if it’s not your jam or sub with something else (like crushed graham crackers for a twist).

    Can I use chocolate chips instead of brownies? Sure! Just note that you’ll lose that chewy brownie bite. But chocolate chips are still a great addition. You can even use both if you’re feeling wild.

    Is this gluten-free? If you use gluten-free pudding, cake, and marshmallows—yes! Always double-check labels to be safe though.

    Can kids help make this? Oh YES. It’s the perfect kid-friendly recipe. No knives, no heat, and they can dump and stir to their heart’s content.

    Can I double the recipe? Totally! Just use a bigger bowl (like a punch bowl or salad mixing bowl) and you’re golden.

    Before You Go

    If this Rocky Road Fluff Salad stole your heart, you’ve gotta check out some of my other creamy, dreamy dessert salads:

    • Easy Hawaiian Cheesecake Salad – like a tropical vacation in a bowl!
    • Apple Cranberry Salad – sweet, tart, and oh-so-refreshing!

    Don’t forget to follow along on Pinterest for more easy dessert ideas and join our fun foodie fam on Facebook ! I love seeing your photos, so tag me or drop a pic in the group when you try it!

    See? I told you this one was gonna be your new obsession. Can’t wait to hear what you think!

    For more information on nutrition and healthy eating, visit nutrition.gov or MyPlate.gov.

    See you next time at recipes4us.org!
  • Strawberry Pretzel Dessert

    Strawberry Pretzel Dessert

    A Classic Dessert With the Perfect Sweet-and-Salty Balance

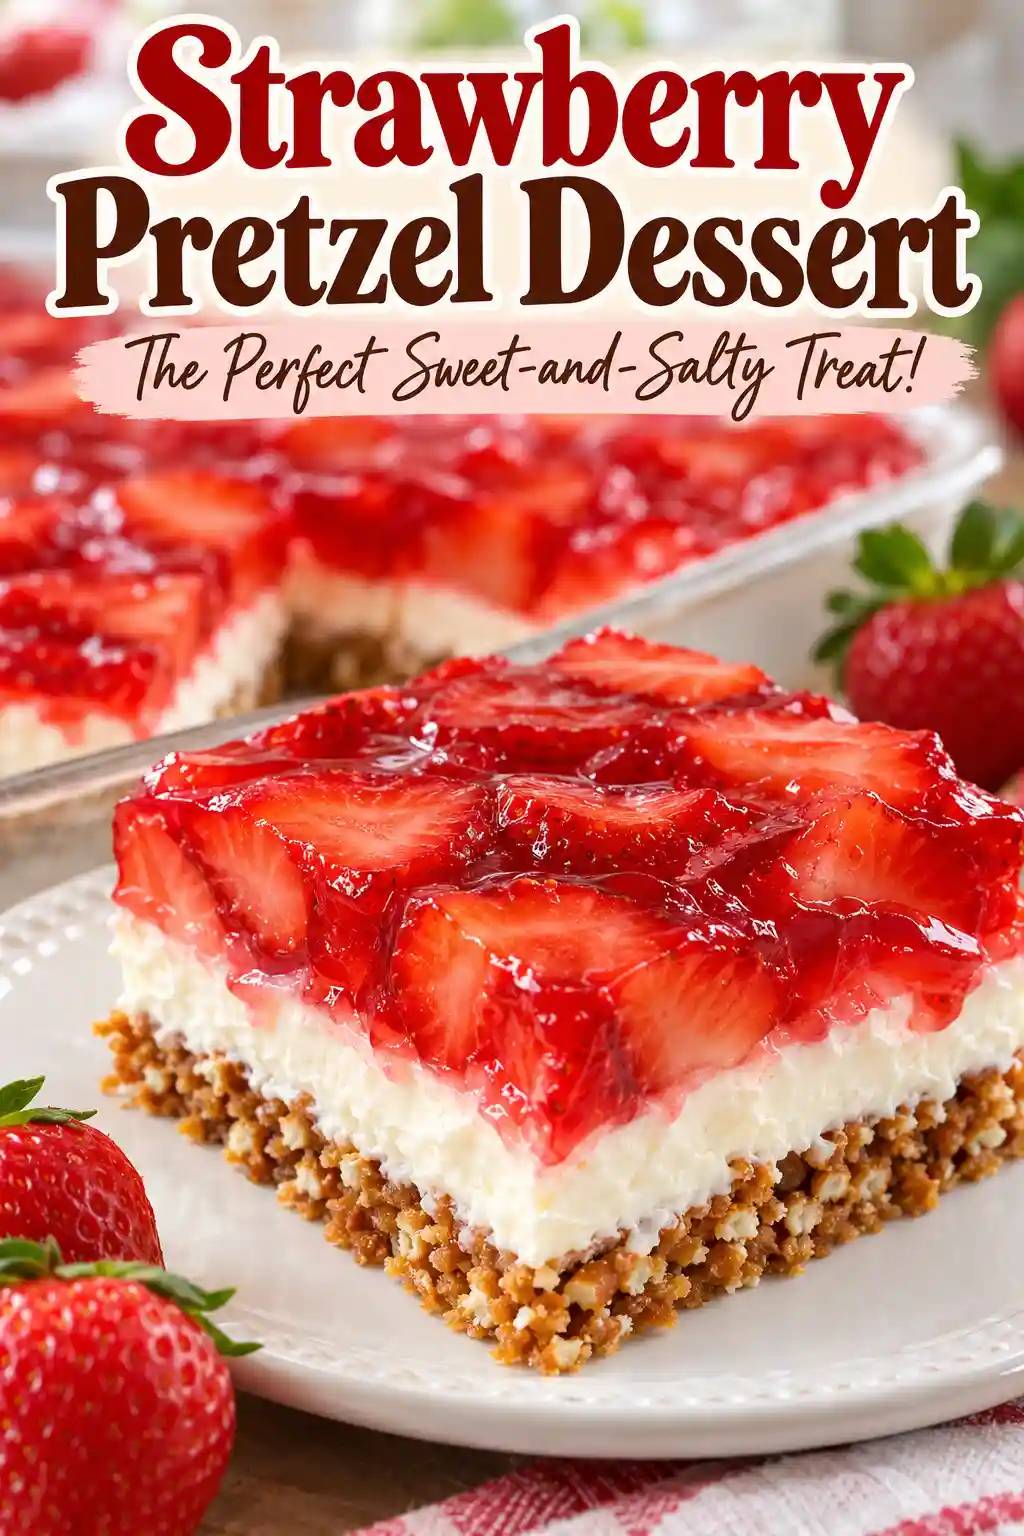
    Strawberry Pretzel Dessert is one of those classic desserts that immediately makes a table feel a little more special. It brings together a buttery, salty pretzel crust, a smooth and creamy cream cheese layer, and a bright strawberry Jell-O topping filled with fresh sliced strawberries. Every bite gives you a wonderful combination of textures and flavors, from crisp and slightly crunchy to creamy, soft, fruity, and refreshing.

    What makes Strawberry Pretzel Dessert especially appealing is the contrast between its layers. The pretzels provide a gentle saltiness that keeps the dessert from tasting overly sweet. Above that, the cream cheese and Cool Whip mixture creates a soft, creamy middle that balances the crisp crust. Finally, the strawberry layer adds a beautiful fruity finish with a lovely jewel-like appearance.

    Strawberry Pretzel Dessert
    Strawberry Pretzel Dessert

    It also has a wonderfully nostalgic quality. This is the kind of dessert that feels right at family gatherings, potlucks, celebrations, holiday meals, and casual weekend dinners. It looks impressive once sliced, but the preparation itself is straightforward.

    The most important thing is to give each layer enough time to do its job. The pretzel crust needs to cool completely before the cream cheese layer goes on, and the cream cheese layer should be chilled before the strawberry mixture is added. Then the finished dessert needs several hours in the refrigerator so the Jell-O can completely set.

    Take your time with those stages, and you’ll have a beautiful layered dessert that’s creamy, fruity, salty, sweet, and absolutely amazing.

    Why You’ll Love Strawberry Pretzel Dessert

    There’s a reason Strawberry Pretzel Dessert has remained such a popular favorite. It doesn’t rely on complicated techniques, yet the finished dessert looks like you spent much longer making it.

    First, there’s the flavor contrast. The pretzel crust brings a lightly salty, buttery character to every bite. That savory edge works beautifully with the sweetness of the cream cheese mixture and strawberry topping. Instead of all the layers competing with one another, each one brings something different.

    The texture is just as important. The baked pretzel crust gives the dessert a firm base with a pleasant crunch. The cream cheese layer is smooth and creamy, while the Cool Whip helps make it light and soft rather than dense. On top, the Jell-O becomes beautifully set and holds the sliced strawberries in place.

    The dessert is also wonderfully make-ahead friendly. In fact, it needs several hours of refrigeration, which makes it convenient when you’re preparing food for guests. You can assemble it, place it in the refrigerator, and let the chilling time take care of the final stage.

    Another reason this dessert is such a keeper is its appearance. When you cut it into squares, you can see the distinct layers. The golden pretzel base sits underneath the pale, creamy center, while the bright red strawberry topping makes everything pop.

    It’s also easy to portion. Once the Jell-O has completely set, you can slice the dessert into squares and serve it chilled. That makes it particularly convenient for gatherings where everyone can simply take a piece.

    And let’s talk about those strawberries. Fresh sliced strawberries tucked into the strawberry Jell-O create a fruity layer that tastes fresh and looks beautiful. The strawberries also give the topping a little more texture, so it isn’t simply a smooth gelatin layer.

    If you enjoy desserts that combine contrasting flavors and textures, this one is DA BOMB! It has enough sweetness to feel like a real treat, but the salty pretzels and tangy cream cheese keep the overall experience balanced.

    Ingredients and steps  for Strawberry Pretzel Dessert

    Ingredients for Strawberry Pretzel Dessert

    The ingredient list for Strawberry Pretzel Dessert is simple, and each ingredient has an important role in creating the finished layers.

    Pretzel crust

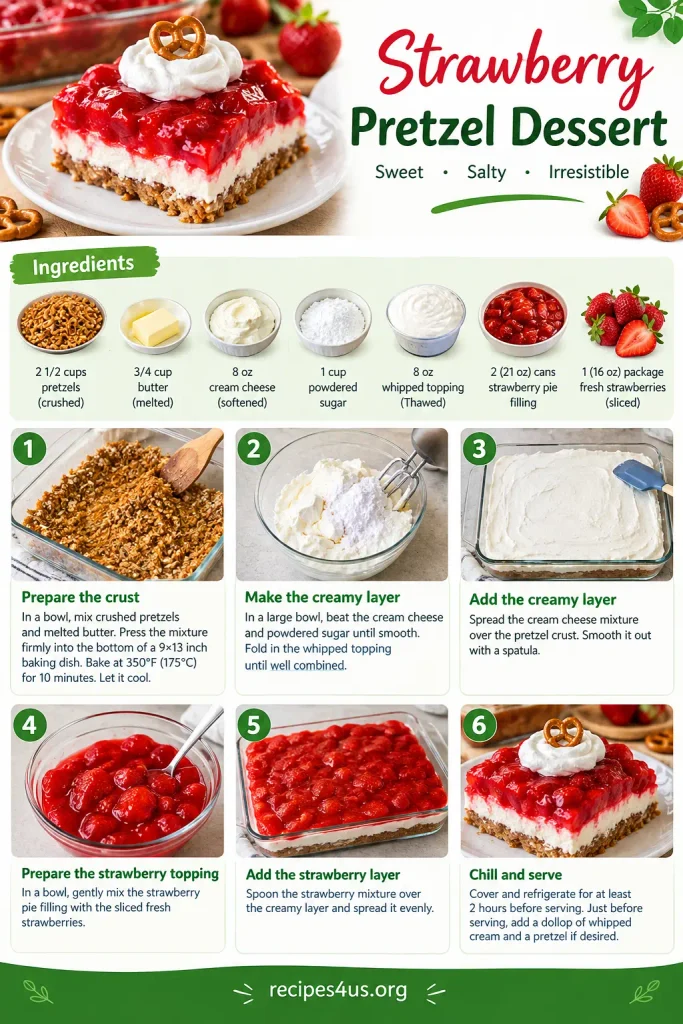
    • 2 cups crushed pretzels
    • ¾ cup melted butter
    • 3 tablespoons sugar

    The crushed pretzels form the foundation of the dessert. Their salty flavor is particularly important because it contrasts with the sweeter layers above. Crushing them gives you a texture that can be combined with the melted butter and sugar and then pressed firmly into the baking dish.

    The melted butter helps hold the crushed pretzels together after baking. It also gives the crust a rich, buttery quality. The 3 tablespoons of sugar provide additional sweetness while the crust bakes.

    Cream cheese layer

    • 8 ounces softened cream cheese
    • 1 cup sugar
    • 8 ounces thawed Cool Whip

    Softened cream cheese is important because it needs to beat smoothly with the sugar. If the cream cheese is soft, the mixture can become creamy and even rather than remaining lumpy.

    The sugar sweetens the cream cheese, while the Cool Whip creates a lighter, softer texture. Once combined, this layer provides a creamy contrast to the pretzel crust and fruity topping.

    Strawberry topping

    • 2 cups boiling water
    • 1 package (6 ounces) strawberry Jell-O
    • 2 cups fresh strawberries, sliced

    The boiling water dissolves the strawberry Jell-O. Once the Jell-O has cooled to room temperature, the sliced strawberries can be stirred into it.

    The strawberries are the star of this final layer. Their fresh fruit flavor works beautifully with the strawberry Jell-O, while their bright color gives the dessert an eye-catching finish.

    Because this recipe has distinct layers, accurate quantities matter. Keep the ingredient amounts as listed so the crust, creamy center, and strawberry topping have the right balance.

    Equipment You’ll Need

    You don’t need specialized equipment to make Strawberry Pretzel Dessert.

    A 9×13-inch baking dish is used for assembling and baking the dessert. You’ll also need a mixing bowl for the cream cheese mixture, a bowl or suitable container for dissolving the Jell-O, and utensils for stirring and spreading.

    A mixer is useful for beating the softened cream cheese and sugar until smooth. You’ll also need something suitable for crushing the pretzels if they aren’t already crushed.

    A spatula is particularly helpful when spreading the cream cheese layer. You want to create an even layer that reaches all the way to the edges of the crust.

    Finally, make sure you have enough refrigerator space for the 9×13-inch baking dish. The dessert needs to chill for several stages, including the final 4–6 hours required for the Jell-O to completely set.

    How to Make Strawberry Pretzel Dessert

    1. Prepare the oven. Preheat your oven to 350°F. Starting with a properly preheated oven helps the pretzel crust bake evenly. While the oven heats, you can prepare the crust mixture.
    2. Make the pretzel crust. Combine the 2 cups crushed pretzels, ¾ cup melted butter, and 3 tablespoons sugar. Stir until the ingredients are well combined. The melted butter should coat the crushed pretzels so the mixture can be pressed into a cohesive layer. Transfer the mixture to a 9×13-inch baking dish. Press it firmly and evenly into the bottom of the dish. Take a little extra care here because the crust forms the foundation for everything that follows. An even layer will make it easier to spread the cream cheese mixture later and will also help the finished dessert cut into neat squares.
    3. Bake and cool the crust. Bake the crust for 8–10 minutes. The short baking time helps set the pretzel mixture and develop its buttery, lightly sweet character. When the baking time is finished, remove the dish from the oven and allow the crust to cool completely. This step is essential. Don’t rush into adding the cream cheese mixture while the crust is still warm. The cream cheese layer should go onto a completely cooled crust so the layers remain distinct.
    4. Prepare the cream cheese layer. Beat the softened cream cheese with 1 cup sugar until smooth. The goal is a creamy mixture without obvious lumps. Starting with softened cream cheese makes this much easier. Once the cream cheese and sugar are smooth, fold in the 8 ounces of thawed Cool Whip. Fold gently enough to keep the mixture smooth and light. Continue until the ingredients are well combined.
    5. Spread and chill the cream cheese layer. Spread the cream cheese mixture evenly over the completely cooled pretzel crust. Make sure you spread the mixture all the way to the edges. This detail is particularly important because the cream cheese layer creates a barrier between the pretzel crust and the strawberry Jell-O. An even layer also makes the finished dessert look much prettier when sliced. Once the cream cheese layer is spread evenly, refrigerate the dessert for about 30 minutes. This gives the layer time to chill and become more stable before the strawberry topping is added.
    6. Prepare the strawberry Jell-O. Dissolve the strawberry Jell-O in 2 cups boiling water. Stir carefully until the Jell-O is dissolved. Then allow the mixture to cool to room temperature. This cooling stage is important before adding the strawberry mixture to the cream cheese layer. The Jell-O shouldn’t be poured over the chilled cream cheese mixture while it is still hot.
    7. Add the strawberries. Stir the 2 cups sliced fresh strawberries into the cooled strawberry Jell-O. Try to distribute the strawberries throughout the mixture so the fruit is not concentrated in only one area. The combination of the bright strawberries and red Jell-O creates the signature top layer of the dessert.
    8. Add the strawberry layer. Carefully pour the strawberry mixture over the cream cheese layer. Pour gently so you don’t disturb the smooth cream cheese layer underneath. A slow, controlled pour helps keep the layers separate and attractive. Once all the strawberry mixture has been added, the dessert is ready for its final and longest chilling stage.
    9. Refrigerate until completely set. Refrigerate the dessert for 4–6 hours, or until the Jell-O is completely set. This is the stage where patience really pays off. The dessert needs enough time for the strawberry topping to become firm enough to slice. Avoid rushing this stage. If the Jell-O hasn’t completely set, the squares won’t have the clean, layered appearance you’re looking for.
    10. Slice and serve. Once the Jell-O is completely set, slice the dessert into squares. Serve the Strawberry Pretzel Dessert chilled. For the prettiest presentation, use a clean knife when cutting the squares and take care to cut through all three layers. The finished pieces should show the pretzel crust, creamy center, and strawberry topping together.

    What Makes a Good Finished Strawberry Pretzel Dessert

    A good Strawberry Pretzel Dessert should have clearly recognizable layers. The pretzel crust should be firm enough to support the creamy and fruity layers while still providing a pleasant texture.

    The crust should have a buttery, lightly sweet, salty character. It shouldn’t overpower the dessert. Instead, it should create a flavorful contrast against the sweet cream cheese layer.

    The cream cheese layer should be smooth and creamy. Because the cream cheese is beaten with sugar before the Cool Whip is folded in, the finished texture should be soft and light rather than heavy.

    One of the most important visual details is the edge-to-edge cream cheese layer. If there are gaps along the sides, the strawberry Jell-O can come into direct contact with the pretzel crust. Spreading the cream cheese mixture all the way to the edges helps keep the layers distinct.

    The strawberry layer should be completely set before slicing. It should hold its shape rather than spreading across the plate. The sliced strawberries should be visible throughout the red gelatin, giving the top a fresh and colorful appearance.

    There are a few common mistakes worth avoiding. Don’t pour the strawberry mixture onto a warm cream cheese layer. Don’t skip the 30-minute refrigeration period. And don’t cut the dessert before the Jell-O has completely set.

    Another useful tip is simply to be patient. This recipe is easy, but chilling is part of the process rather than an optional extra. The refrigerator gives each layer the time it needs to become stable.

    When everything comes together, the result should be firm enough to cut into squares, creamy in the middle, fruity on top, and pleasantly salty underneath.

    Trust me on this one—the contrast is what makes every bite so satisfying!

    Serving Suggestions

    Strawberry Pretzel Dessert is best served chilled, straight from the refrigerator.

    It works beautifully as a dessert for family dinners, potlucks, celebrations, gatherings, and other occasions when you want something colorful and easy to portion.

    Because the dessert is made in a 9×13-inch dish and sliced into squares, it’s especially convenient for serving a group. The bright strawberry topping also makes each piece look festive without requiring complicated decoration.

    For the cleanest presentation, allow the Jell-O to fully set before slicing. Serve the squares chilled so the layers maintain their texture and structure.

    Storage

    Store Strawberry Pretzel Dessert in the refrigerator because the dessert contains a cream cheese layer, Cool Whip, and a set Jell-O topping.

    Keep the dessert chilled after preparation and return any remaining portions to the refrigerator after serving.

    The recipe is naturally suited to making ahead because it requires 4–6 hours of refrigeration before serving. That means you can prepare it in advance and allow the refrigerator to handle the final setting process.

    For the best texture and appearance, make sure the Jell-O is completely set before slicing. If you’re preparing the dessert ahead for a gathering, keeping it refrigerated until you’re ready to serve will help preserve its distinct layers.

    When storing leftovers, keep them chilled and serve them cold.

    Conclusion

    Strawberry Pretzel Dessert is a classic layered treat that delivers something special in every bite. The salty pretzel crust, creamy cream cheese and Cool Whip layer, and bright strawberry Jell-O topping work together to create an irresistible combination of flavor and texture.

    It’s simple enough to prepare without complicated techniques, yet the finished squares have a beautiful layered appearance that makes them feel perfect for sharing.

    The key is giving each stage the time it needs. Bake the crust, let it cool completely, create the smooth cream cheese layer, chill it, prepare the strawberry Jell-O, and then give the finished dessert 4–6 hours to set completely.

    Once it’s ready, all that’s left is to slice it into squares and serve it chilled.

    If you love the combination of sweet and salty flavors, creamy textures, and fresh strawberry flavor, Strawberry Pretzel Dessert is absolutely one to keep in your recipe collection.

    Don’t forget to save this recipe to your Pinterest board and share it with your friends! Tag us on social media—we’d love to see your creations.

    For more information on nutrition and healthy eating, visit nutrition.gov or MyPlate.gov.

    See you next time at recipes4us.org!
  • Classic Eggplant Parmesan Recipe

    Classic Eggplant Parmesan Recipe

    Introduction

    If you have been scrolling through Pinterest lately, you have probably noticed eggplant parmesan taking over food boards everywhere and for good reason. This classic Italian American comfort food has seen a massive resurgence in 2026 with searches skyrocketing by 785 percent as home cooks rediscover just how satisfying a well-made eggplant parmesan can be. Whether you grew up eating it at Sunday dinners or are trying it for the first time, this dish delivers layers of crispy breaded eggplant, rich tomato sauce, and gooey melted cheese that feels like a warm hug on a plate. In this post, you will learn how to make a classic eggplant parmesan recipe from scratch with clear step-by-step instructions that even beginners can follow. We will cover the best techniques for getting that perfect crispy coating without the sogginess, how to build layers of flavor in your sauce, and tips for achieving that ideal cheesy pull every time. By the end, you will have a restaurant-quality dish ready to serve your family and friends.

    Why You Will Love This Recipe

    • Ready in about 90 minutes with mostly hands-off baking time, perfect for a relaxing weekend cooking project.
    • No deep frying required. The eggplant slices are oven-baked until golden and crisp, cutting down on oil and mess.
    • Packed with flavor. Layers of tender roasted eggplant, tangy homemade marinara, creamy mozzarella, and nutty parmesan create an irresistible combination.
    • Make-ahead friendly. Assemble the dish up to 24 hours in advance and bake when you are ready to eat.
    • Naturally vegetarian. This hearty main course satisfies even the most dedicated meat lovers without any meat required.
    • Great for families. Kids and adults alike love the familiar flavors, and it pairs beautifully with pasta, salad, or crusty bread.

    What Makes a Good Eggplant Parmesan

    The secret to exceptional eggplant parmesan lies in three elements: properly prepared eggplant, a well-balanced sauce, and quality cheese. The most common pitfall is soggy eggplant, which happens when the slices retain too much moisture. Salting the eggplant slices before breading draws out excess water and concentrates the flavor, giving you a creamy interior rather than a watery one. Roasting the breaded slices in a hot oven instead of frying achieves a crisp golden crust while keeping the process lighter and more manageable. Equally important is your tomato sauce. A good marinara should be rich, slightly tangy, and seasoned with garlic, basil, and a pinch of red pepper flakes for warmth. And do not skimp on the cheese. Fresh mozzarella provides that glorious stretchy texture while parmesan adds a salty, nutty finish. The balance of these components is what transforms a simple casserole into something truly memorable.

    The History of Eggplant Parmesan

    Eggplant parmesan, known in Italy as “parmigiana di melanzane,” has roots that reach back to southern Italy, particularly Sicily and the Campania region. The earliest recorded recipes date to the early 19th century, though the dish is believed to be much older. The name “parmigiana” likely refers to the use of Parmesan cheese or possibly the word “parmiciana,” which describes the overlapping arrangement of wooden slats in Sicilian shutters that resembles the layered eggplant slices in the dish. The recipe made its way to the United States with Italian immigrants in the late 1800s and early 1900s, where it evolved into the breaded and cheese-laden casserole we know today. American versions often use a thicker breadcrumb coating and more cheese than traditional Italian preparations. In 2026, this classic comfort food has found new life on social media as home cooks share their own twists on the beloved dish, from gluten-free variations to air fryer shortcuts.

    Ingredients

    For the Eggplant:
    • 2 large globe eggplants (about 2.5 pounds total)
    • 1 tablespoon kosher salt (for sweating)
    • 1 cup all-purpose flour
    • 4 large eggs, beaten
    • 3 cups panko bread crumbs
    • 1 teaspoon garlic powder
    • 1 teaspoon dried oregano
    • 1/2 teaspoon black pepper
    • 1/3 cup olive oil (for brushing)
    For the Marinara Sauce:
    • 2 tablespoons olive oil
    • 4 cloves garlic, minced
    • 1 can (28 ounces) crushed San Marzano tomatoes
    • 1/2 teaspoon red pepper flakes
    • 1 teaspoon dried basil
    • Salt and pepper to taste
    • 1/4 cup fresh basil leaves, chopped
    For the Assembly:
    • 12 ounces fresh mozzarella cheese, thinly sliced
    • 1 cup grated parmesan cheese
    • 1/4 cup fresh basil leaves for garnish
    Classic Eggplant Parmesan
    Classic Eggplant Parmesan
    infographic Classic Eggplant Parmesan

    Classic Eggplant Parmesan Recipe

    Recipe by Cindy
    0.0 from 0 votes
    Course: DinnerCuisine: Italian AmericanDifficulty: Easy, Medium
    Servings

    8

    servings
    Prep time

    30

    minutes
    Cooking time

    1

    hour 
    Calories

    361

    kcal
    Total time

    1

    hour 

    30

    minutes

    Ingredients

    • For the Eggplant:
    • – 2 large globe eggplants, sliced into 1/2-inch planks

    • – 1 tablespoon kosher salt

    • – 1 cup all-purpose flour

    • – 4 large eggs, beaten

    • – 3 cups panko bread crumbs

    • – 1 teaspoon garlic powder

    • – 1 teaspoon dried oregano

    • – 1/2 teaspoon black pepper

    • – 1/3 cup olive oil

    • For the Marinara Sauce:
    • – 2 tablespoons olive oil

    • – 4 cloves garlic, minced

    • – 1 can (28 ounces) crushed San Marzano tomatoes

    • – 1/2 teaspoon red pepper flakes

    • – 1 teaspoon dried basil

    • – Salt and pepper to taste

    • – 1/4 cup fresh basil, chopped

    • For the Assembly:
    • – 12 ounces fresh mozzarella, thinly sliced

    • – 1 cup grated parmesan cheese

    • – 1/4 cup fresh basil leaves for garnish

    Directions

    • Slice eggplants into 1/2-inch thick planks. Sprinkle both sides with salt and let sit on paper towels for 30 minutes. Pat dry.
    • Preheat oven to 425 degrees F. Set up breading station: flour in one bowl, beaten eggs in second bowl, panko mixed with garlic powder, oregano, and pepper in third bowl.
    • Dredge each slice in flour, dip in egg, then press into panko mixture until coated.
    • Line baking sheets with parchment, brush with olive oil. Arrange breaded slices in a single layer, brush tops with oil. Bake 15 minutes, flip, bake 10 more minutes until golden and crisp.
    • Meanwhile, make sauce: heat 2 tablespoons olive oil in saucepan over medium heat. Cook garlic 1 minute. Add tomatoes, red pepper flakes, dried basil, salt, and pepper. Simmer 15 to 20 minutes. Stir in fresh basil.
    • Reduce oven temperature to 375 degrees F.
    • Spread 1/2 cup sauce in a 9×13-inch baking dish. Layer with eggplant, 1 cup sauce, one-third of mozzarella, one-third of parmesan. Repeat twice. Top with remaining sauce and parmesan.
    • Bake uncovered for 25 to 30 minutes until bubbly and golden.
    • Let rest 10 to 15 minutes before slicing. Garnish with fresh basil.

    Notes

    • Salting the eggplant is essential for removing moisture and preventing a watery casserole.
      For a gluten-free version, use gluten-free panko and almond flour.
      Assemble up to 24 hours ahead and refrigerate. Add 10 minutes to bake time.
      To freeze, assemble unbaked, wrap tightly, and freeze for up to 3 months.

    • NUTRITION:
      Per serving: Calories 363 kcal | Protein 16g | Carbohydrates 27g | Fiber 5g | Fat 21g | Saturated Fat 7g | Cholesterol 27mg | Sodium 801mg | Calcium 209mg | Iron 2mg | Vitamin A 1228 IU | Vitamin C 45mg

    Instructions

    1. Prepare the eggplant. Slice the eggplants lengthwise into 1/2-inch thick planks. Arrange them on paper towels and sprinkle both sides with kosher salt. Let them sit for 30 minutes to draw out moisture. Pat dry with paper towels.
    2. Set up your breading station. Place the flour in one shallow bowl, the beaten eggs in a second bowl, and combine the panko bread crumbs with garlic powder, oregano, and black pepper in a third bowl.
    3. Bread the eggplant. Working one slice at a time, dredge each eggplant slice in flour, shaking off the excess. Dip into the beaten eggs, letting any extra drip off, then press firmly into the panko mixture until both sides are well coated.
    4. Bake the eggplant. Preheat your oven to 425 degrees Fahrenheit. Line two baking sheets with parchment paper and brush with olive oil. Arrange the breaded eggplant slices in a single layer and brush the tops with more olive oil. Bake for 15 minutes, then flip and bake for another 10 minutes until golden and crisp.
    5. Make the marinara. While the eggplant bakes, heat 2 tablespoons of olive oil in a medium saucepan over medium heat. Add the minced garlic and cook until fragrant, about 1 minute. Stir in the crushed tomatoes, red pepper flakes, dried basil, salt, and pepper. Simmer for 15 to 20 minutes, stirring occasionally. Stir in fresh basil at the end.
    6. Lower the oven temperature to 375 degrees Fahrenheit.
    7. Layer the dish. Spread 1/2 cup of marinara sauce on the bottom of a 9×13-inch baking dish. Arrange a single layer of baked eggplant slices on top, overlapping slightly as needed. Spoon 1 cup of sauce over the eggplant, then layer with one-third of the mozzarella slices and one-third of the parmesan. Repeat this layering two more times, finishing with a final layer of sauce and the remaining parmesan on top.
    8. Bake. Place the dish on a baking sheet to catch any drips and bake uncovered for 25 to 30 minutes, until the sauce is bubbly and the cheese is golden brown on top.
    9. Rest and serve. Let the dish cool for 10 to 15 minutes before slicing. This resting period helps the layers set so you get clean slices. Garnish with fresh basil and serve warm.

    Pro Tips for Perfect Results

    • Do not skip the salting step. Salting the eggplant draws out moisture and bitterness, giving you a creamier texture and preventing a watery casserole.
    • Use a light hand with the oil. Brush the breaded slices with a thin layer of olive oil rather than drenching them. You want them golden, not greasy.
    • Let the baked eggplant cool slightly before layering. Hot eggplant can make the cheese melt too quickly during assembly.
    • Choose fresh mozzarella over pre-shredded. Fresh mozzarella melts beautifully and gives you that signature stretch. Pre-shredded cheese contains anti-caking agents that affect melting.
    • Make your own sauce if you have time. A 15-minute homemade marinara beats any jarred sauce and lets you control the seasoning.
    • Use San Marzano tomatoes for the sauce. They are sweeter and less acidic than standard canned tomatoes, creating a richer base.
    • Taste and adjust seasoning at each step. Eggplant can absorb a lot of salt, so season your breading, sauce, and cheese layers individually.
    • Let it rest before cutting. This is the hardest step to wait through, but it makes all the difference for clean, intact servings.

    Nutritional Insights

    Each serving of eggplant parmesan (about 1.5 cups) contains approximately:
    • Calories: 363 kcal
    • Protein: 16 g
    • Carbohydrates: 27 g
    • Dietary Fiber: 5 g
    • Fat: 21 g
    • Saturated Fat: 7 g
    • Cholesterol: 27 mg
    • Sodium: 801 mg
    • Calcium: 209 mg (16 percent DV)
    • Iron: 2 mg (11 percent DV)
    • Vitamin A: 1228 IU (25 percent DV)
    • Vitamin C: 45 mg (50 percent DV)
    Eggplant is rich in dietary fiber and antioxidants called nasunin, which supports brain health. Tomatoes provide lycopene, a powerful antioxidant linked to heart health, and the calcium from cheese contributes to bone strength. For more detailed nutrition information, visit Nutrition.gov or MyPlate.gov.

    Variations to Try

    Gluten-Free Eggplant Parmesan:
    • Replace all-purpose flour with almond flour or gluten-free all-purpose blend
    • Use gluten-free panko bread crumbs or crushed pork rinds for a low-carb option
    Air Fryer Eggplant Parmesan:
    • Cook breaded eggplant slices in the air fryer at 375 degrees Fahrenheit for 8 to 10 minutes, flipping halfway through
    • Reduce oil to a light spray for a lighter version
    Vegan Eggplant Parmesan:
    • Use cashew ricotta or vegan mozzarella shreds instead of dairy cheese
    • Replace eggs with a flax egg mixture (1 tablespoon ground flaxseed plus 3 tablespoons water per egg)
    • Use nutritional yeast in place of parmesan for a cheesy flavor
    Spicy Sausage and Eggplant Parmesan:
    • Brown 1/2 pound of spicy Italian sausage and layer it between the eggplant slices
    • Add an extra 1/2 teaspoon of red pepper flakes to the marinara for additional heat

    Frequently Asked Questions

    Can I make eggplant parmesan ahead of time? Yes, you can assemble the entire dish up to 24 hours in advance. Cover and refrigerate, then add about 10 minutes to the baking time since you will be starting from cold. Can I freeze eggplant parmesan? Absolutely. Assemble the dish, cover tightly with foil, and freeze for up to 3 months. Thaw overnight in the refrigerator and bake as directed, adding 10 to 15 minutes to the cooking time. Do I need to peel the eggplant? No, the skin is edible and contains fiber and nutrients. For a more tender texture, you can peel strips lengthwise to create a striped pattern, leaving some skin on for structure. Why is my eggplant parmesan watery? This usually happens when the eggplant is not properly salted and dried before breading. It can also occur if you use too much sauce. Stick to the measurements in the recipe and make sure to pat the eggplant dry thoroughly. Can I use jarred marinara sauce instead of homemade? Yes, you can use your favorite store-bought marinara in a pinch. Look for one with simple ingredients and no added sugar. Rao’s and Victoria are excellent options. What is the best cheese to use? Fresh mozzarella is ideal for its melting quality and mild flavor. Combine it with a good quality parmesan or pecorino romano for the best result. Avoid pre-shredded cheese. How do I reheat leftovers? Reheat individual portions in a 350 degree Fahrenheit oven for 10 to 15 minutes or in the microwave for 2 to 3 minutes. The oven method keeps the coating crispier. What should I serve with eggplant parmesan? It pairs beautifully with spaghetti or angel hair pasta, a simple green salad with lemon vinaigrette, garlic bread, or roasted vegetables like broccoli or zucchini.

    Storage Tips

    Refrigerating: Store leftover eggplant parmesan in an airtight container in the refrigerator for up to 4 days. The flavors actually deepen and improve overnight. Freezing: For best results, freeze the unbaked assembled dish. Wrap tightly with plastic wrap and then foil. It will keep for up to 3 months. You can also freeze individual baked portions for quick meals. Reheating: For the crispiest result, reheat in a 350 degree Fahrenheit oven for 15 to 20 minutes. The microwave works in a pinch but the breading will be softer.

    Before You Go

    If you loved this eggplant parmesan recipe, you will also enjoy these related dishes on our site:

    Did you make this recipe? We would love to hear about it. Pin this recipe to your favorite Pinterest board so you can find it later, and share your photos with us in the comments below. Your support helps us keep creating free recipes for everyone.

    For reliable nutrition information, visit Nutrition.gov and MyPlate.gov.

  • Fluffy Lemon Ricotta Pancakes with Blueberry Compote

    Fluffy Lemon Ricotta Pancakes with Blueberry Compote

    Introduction

    If you have been scrolling through food blogs or Pinterest lately, you have probably noticed lemon ricotta pancakes taking over spring breakfast feeds. This bright and fluffy breakfast treat has become one of the most trending recipes of May 2026, and for good reason. The combination of creamy ricotta cheese and fresh lemon zest creates a pancake that is impossibly light, tender, and bursting with citrus flavor. In this post, we will walk you through everything you need to know to make perfect lemon ricotta pancakes at home. From the simple ingredient list to the foolproof folding technique that gives these pancakes their signature cloud-like texture, you will have restaurant-quality brunch on your table in under 30 minutes. We will also share a quick homemade blueberry compote that takes this dish over the top.

    Why You Will Love This Recipe

    • Takes only 31 minutes from start to finish, perfect for lazy weekend mornings or special occasion brunches
    • Uses simple, everyday ingredients you can find at any grocery store
    • The ricotta cheese makes these pancakes extra fluffy, moist, and protein-rich compared to standard pancakes
    • Bright lemon flavor feels fresh and spring-appropriate, especially for Mother’s Day or Easter brunch
    • Kid-friendly and crowd-pleasing, everyone from toddlers to grandparents will ask for seconds
    • Versatile base recipe, you can swap the blueberry compote for any seasonal fruit topping

    What Makes a Good Lemon Ricotta Pancake

    The secret to exceptional lemon ricotta pancakes lies in two key techniques. First, the ricotta must be full-fat and at room temperature so it blends smoothly into the batter without lumps. Second, folding in stiffly beaten egg whites is what gives these pancakes their signature lift. Unlike regular pancakes that rely solely on baking powder, the whipped egg whites create an airy, souffle-like texture that is truly unforgettable. Getting the griddle temperature right matters too. Medium heat ensures the pancakes cook through without burning the exterior. You want a golden-brown crust with a soft, custard-like center. The ricotta keeps the interior moist and tender while the lemon zest provides bright, aromatic notes in every bite.

    The History of Ricotta Pancakes

    Ricotta pancakes have roots in Italian cooking, where ricotta is a beloved ingredient in both sweet and savory dishes. Italian nonnas have been making ricotta fritters and pancakes for generations, often flavored with citrus zest or a splash of vanilla. The version we know today became popular in American brunch culture over the last decade, with chefs lightening the batter by folding in whipped egg whites for extra fluffiness. Lemon ricotta pancakes gained major traction on social media starting around 2020, and they continue to trend every spring when fresh citrus is at its peak. The 2026 revival has been fueled by home cooks looking for impressive yet approachable brunch recipes that photograph beautifully.

    Ingredients

    For the Lemon Ricotta Pancakes:

    • 1 cup ricotta cheese (full-fat, room temperature)
    • 1 egg yolk
    • 3/4 cup milk
    • 1/2 teaspoon vanilla extract
    • 2 tablespoons lemon zest (from about 2 lemons)
    • 1 cup all-purpose flour
    • 1 1/2 teaspoons baking powder
    • 1/4 teaspoon salt
    • 2 egg whites
    • 2 tablespoons sugar
    • 2 tablespoons butter (for cooking)

    For the Blueberry Compote:

    • 2 cups fresh or frozen blueberries
    • 1/2 cup sugar
    • 1/2 cup water
    • 1 tablespoon lemon juice

    For Garnish:

    • Powdered sugar (for dusting)
    • Fresh blueberries and lemon slices
    • Maple syrup (optional)
    Fluffy Lemon Ricotta Pancakes with Blueberry Compote
    Fluffy Lemon Ricotta Pancakes with Blueberry Compote
    Lemon Ricotta Pancakes infographics

    Fluffy Lemon Ricotta Pancakes with Blueberry Compote

    Recipe by Cindy
    0.0 from 0 votes
    Course: BreakfastDifficulty: Easy, Medium
    Servings

    6

    servings
    Prep time

    15

    minutes
    Cooking time

    16

    minutes
    Calories

    425

    kcal
    Total time

    31

    minutes

    Ingredients

    • For the Lemon Ricotta Pancakes:
    • – 1 cup ricotta cheese, room temperature

    • – 1 egg yolk

    • – 3/4 cup milk

    • – 1/2 teaspoon vanilla extract

    • – 2 tablespoons lemon zest

    • – 1 cup all-purpose flour

    • – 1 1/2 teaspoons baking powder

    • – 1/4 teaspoon salt

    • – 2 egg whites

    • – 2 tablespoons sugar

    • – 2 tablespoons butter, for cooking

    • For the Blueberry Compote:
    • – 2 cups fresh or frozen blueberries

    • – 1/2 cup sugar

    • – 1/2 cup water

    • – 1 tablespoon lemon juice

    • For Garnish:
    • – Powdered sugar, for dusting

    • – Fresh blueberries and lemon slices

    • – Maple syrup (optional)

    Directions

    • Make the blueberry compote first. In a small saucepan, combine blueberries, sugar, water, and lemon juice. Cook over medium heat for 8 to 10 minutes, stirring occasionally, until the berries break down and the mixture thickens. Remove from heat and set aside.
    • In a large mixing bowl, whisk together the ricotta cheese, egg yolk, milk, vanilla extract, and lemon zest until smooth and well combined.
    • Sift the flour, baking powder, and salt into the ricotta mixture. Stir gently until just combined. Do not overmix.
    • In a separate clean bowl, beat the egg whites with an electric mixer on high speed until white and foamy, about 1 minute. Gradually add the sugar while continuing to beat until stiff peaks form.
    • Gently fold one-quarter of the beaten egg whites into the ricotta batter using a rubber spatula. Once incorporated, gently fold in the remaining egg whites until no white streaks remain.
    • Heat a nonstick skillet or griddle over medium heat and add a small pat of butter. Pour about 1/4 cup of batter per pancake onto the skillet.
    • Cook for 2 to 3 minutes on the first side, until bubbles form on the surface and the edges look set. Flip carefully and cook for another 2 to 3 minutes until golden brown.
    • Serve immediately with warm blueberry compote, a dusting of powdered sugar, and fresh blueberries on top.

    Notes

    • Bring all dairy ingredients to room temperature before starting for the best texture.
      Do not overmix the batter once flour is added to keep pancakes light.
      Use a clean, grease-free bowl for whipping egg whites.
      If compote thickens too much after cooling, add a splash of hot water and stir.

    • NUTRITION (per serving – 2 pancakes with compote):
      Calories: 425 kcal
      Protein: 14g
      Carbohydrates: 58g
      Fat: 15g
      Fiber: 3g
      Sugar: 32g
      Calcium: 180mg

    Instructions

    1. Make the blueberry compote first. In a small saucepan, combine blueberries, sugar, water, and lemon juice. Cook over medium heat for 8 to 10 minutes, stirring occasionally, until the berries break down and the mixture thickens. Remove from heat and set aside. The compote will continue to thicken as it cools.
    2. In a large mixing bowl, whisk together the ricotta cheese, egg yolk, milk, vanilla extract, and lemon zest until smooth and well combined.
    3. Sift the flour, baking powder, and salt into the ricotta mixture. Stir gently until just combined. Do not overmix, a few small lumps are fine.
    4. In a separate clean bowl, beat the egg whites with an electric mixer on high speed until white and foamy, about 1 minute. Gradually add the sugar while continuing to beat until stiff peaks form. The egg whites should hold their shape when you lift the beaters.
    5. Gently fold one-quarter of the beaten egg whites into the ricotta batter using a rubber spatula. Once incorporated, gently fold in the remaining egg whites until no white streaks remain. Be careful not to deflate the egg whites, this is what gives the pancakes their fluffy texture.
    6. Heat a nonstick skillet or griddle over medium heat and add a small pat of butter. Once melted and bubbling, pour about 1/4 cup of batter per pancake onto the skillet.
    7. Cook for 2 to 3 minutes on the first side, until bubbles form on the surface and the edges look set. Flip carefully and cook for another 2 to 3 minutes until golden brown on both sides.
    8. Serve immediately with a generous spoonful of warm blueberry compote on top. Dust with powdered sugar and garnish with fresh blueberries and lemon slices if desired.

    Pro Tips for Perfect Results

    • Bring your ricotta and eggs to room temperature before starting. Cold ingredients will make the batter lumpy and prevent the egg whites from whipping properly.
    • Do not overmix the batter once you add the flour. Overmixing develops gluten and will make your pancakes dense and chewy instead of light and fluffy.
    • Use a clean, grease-free bowl for whipping the egg whites. Any trace of oil or yolk will prevent them from reaching stiff peaks.
    • Fold the egg whites in gently using a cutting motion with your spatula. Stirring too aggressively will deflate all the air you just whipped in.
    • Cook on medium heat, not high. High heat will burn the outside while leaving the inside raw. Medium heat ensures even cooking and a beautiful golden color.
    • Wipe the skillet clean and re-butter between batches to prevent burnt butter from ruining the next round of pancakes.
    • If your compote becomes too thick after cooling, add a splash of hot water and stir to loosen it up.
    • For extra lemon flavor, add a teaspoon of lemon juice to the batter and use a lemon-infused sugar for dusting.

    Nutritional Insights

    Per serving (2 pancakes with compote):

    • Calories: 425 kcal
    • Protein: 14g
    • Carbohydrates: 58g
    • Fat: 15g
    • Fiber: 3g
    • Sugar: 32g
    • Calcium: 180mg

    Ricotta cheese is an excellent source of calcium and protein, which helps keep you full longer compared to standard pancakes. Blueberries are packed with antioxidants and vitamin C, making this breakfast both delicious and nutritious. For detailed nutrition guidance, visit Nutrition.gov or MyPlate.gov.

    Variations to Try

    • Strawberry Lemon Ricotta Pancakes: Replace the blueberry compote with a quick strawberry sauce. Simmer 2 cups chopped strawberries with 1/4 cup sugar and 1 tablespoon lemon juice for 5 to 7 minutes.
    • Gluten-Free Version: Substitute the all-purpose flour with a 1:1 gluten-free baking flour blend. Add 1/2 teaspoon xanthan gum if your blend does not include it.
    • Lemon Poppy Seed Ricotta Pancakes: Add 1 tablespoon of poppy seeds to the batter along with the flour. The poppy seeds add a pleasant crunch and nutty flavor.
    • Vegan Adaptation: Use full-fat coconut cream in place of ricotta, dairy-free milk, and a flax egg (1 tablespoon flaxseed meal + 3 tablespoons water). For the egg whites, use aquafaba (chickpea brine) whipped to stiff peaks.

    Frequently Asked Questions

    Can I use low-fat ricotta for this recipe?
    Full-fat ricotta is strongly recommended. Low-fat or part-skim ricotta contains more water, which can make the batter runny and result in less fluffy pancakes.

    Can I make the batter ahead of time?
    It is best to cook these pancakes immediately after making the batter. The whipped egg whites will deflate over time, and the pancakes will lose their lift. You can prepare the dry ingredients and the compote in advance.

    How do I store leftover pancakes?
    Store leftover pancakes in an airtight container in the refrigerator for up to 3 days. Place parchment paper between layers to prevent sticking.

    Can I freeze lemon ricotta pancakes?
    Yes. Let the pancakes cool completely, then stack them with parchment paper between each pancake. Place in a freezer-safe bag and freeze for up to 2 months.

    What is the best way to reheat frozen pancakes?
    Reheat in a toaster, toaster oven, or in a 350°F oven for 5 to 7 minutes. You can also microwave them for 30 to 45 seconds, though the texture will be softer.

    Can I substitute the blueberries with other fruit?
    Absolutely. This compote recipe works beautifully with strawberries, raspberries, blackberries, or sliced peaches. Adjust the sugar based on the sweetness of the fruit.

    Why did my pancakes turn out dense?
    Dense pancakes usually result from overmixing the batter or not whipping the egg whites to stiff enough peaks. Make sure your egg whites hold a firm peak and fold them in gently.

    Can I make these pancakes without an electric mixer?
    Yes, you can whip the egg whites by hand with a balloon whisk, but it will take 5 to 8 minutes of vigorous whisking. A handheld mixer makes the job much easier and more consistent.

    Storage Tips

    Refrigerator: Store cooled pancakes in an airtight container for up to 3 days. Keep the compote in a separate container.

    Freezer: Layer pancakes with parchment paper in a freezer bag. They keep well for up to 2 months. Thaw overnight in the refrigerator before reheating.

    Reheating: For best results, reheat pancakes in a toaster or 350°F oven for 5 minutes. The compote can be reheated in the microwave or on the stovetop with a splash of water.

    Before You Go

    If you loved these lemon ricotta pancakes, be sure to check out our other brunch favorites:

    Save this recipe to your Pinterest board for later and share it with someone who loves brunch as much as you do. For accurate nutrition information, visit Nutrition.gov or MyPlate.gov.

  • Strawberry Cheesecake Dump Cake Recipe

    Strawberry Cheesecake Dump Cake Recipe

    Introduction

    What if the most talked about dessert on social media right now only needed a handful of ingredients and almost no effort? Strawberry Cheesecake Dump Cake has taken over Facebook feeds and TikTok timelines with over 1.1 billion views, and for good reason. This dessert layers sweet strawberry pie filling, creamy cheesecake dollops, and a buttery golden cake topping that bakes into pure magic. It became a viral sensation because anyone can make it, no mixer required, no complicated steps, just dump and bake. In this post you will learn exactly how to make this trending strawberry cheesecake dump cake with simple ingredients you can find at any grocery store. We will cover the best techniques, pro tips for perfect results, and creative variations so you can make it your own. By the end you will have a dessert that disappears at every gathering.

    Why You Will Love This Recipe

    • Takes 10 minutes to prep. No fancy equipment, no complicated steps. Just dump, layer, and bake.
    • Only 5 main ingredients. You probably already have most of them in your kitchen.
    • Viral for a reason. This is the most made dump cake on social media with 1.1 billion TikTok views.
    • Crowd pleasing dessert. Perfect for potlucks, holidays, family dinners, and summer parties.
    • Incredibly versatile. Swap the fruit, change the cake mix, or add your favorite toppings.
    • Perfect for beginners. No baking experience needed. If you can open a can and stir, you can make this.

    What Makes a Good Strawberry Cheesecake Dump Cake

    A great strawberry cheesecake dump cake balances three distinct layers. The bottom should have sweet, jammy strawberries that bubble up around the edges during baking. The middle needs pockets of creamy, tangy cheesecake that stay soft and rich. The top should be golden brown, slightly crisp, and buttery with no dry spots. When you scoop through all three layers together, you get the perfect bite every time. The key is resisting the urge to stir. The layers are meant to stay separate so each one keeps its own texture. The dry cake mix on top needs enough butter to moisten every bit, and the cream cheese must be softened so it blends smoothly. Bake until the top is golden and the edges bubble, then let it rest before serving so everything sets properly.

    The History of Dump Cakes and This Viral Sensation

    Dump cakes have been around since the mid 20th century, appearing on American dessert tables as a shortcut version of fruit cobblers. The name comes from the method: you dump the ingredients into a pan and bake. No stirring, no creaming, no fuss. They became popular in the 1960s and 1970s when boxed cake mixes made home baking faster and easier. The strawberry cheesecake version exploded on TikTok in 2024 and has remained one of the most shared dessert recipes on social media ever since. With over 1.1 billion views and 156 million Pinterest saves, it became the most made dump cake in internet history. Home cooks love it because it tastes like you spent hours in the kitchen when you really only spent 10 minutes. Its popularity continues to grow as more people discover how easy and delicious it truly is.

    Ingredients

    For the Strawberry Layer
    • 1 can (21 oz) strawberry pie filling
    • 2 cups fresh strawberries, sliced (optional but recommended)
    For the Cheesecake Layer
    • 1 block (8 oz) cream cheese, softened
    • 1/2 cup granulated sugar
    • 1 teaspoon vanilla extract
    For the Topping
    • 1 box (15.25 oz) yellow cake mix (Betty Crocker Super Moist recommended)
    • 1/2 cup (1 stick) unsalted butter, melted
    • 1/4 cup milk (adds extra gooeyness)
    • Optional: 1 teaspoon cinnamon for sprinkling
    For Serving (Optional)
    • Vanilla ice cream or whipped cream
    • Fresh mint leaves for garnish
    Strawberry Cheesecake Dump Cake Recipe
    Strawberry Cheesecake Dump Cake Recipe step by step

    Strawberry Cheesecake Dump Cake

    Recipe by Cindy
    0.0 from 0 votes
    Course: DessertCuisine: AmericanDifficulty: Easy, Medium
    Servings

    12

    servings
    Prep time

    10

    minutes
    Cooking time

    45

    minutes
    Calories

    380

    kcal

    Ingredients

    • For the Strawberry Layer:
    • – 1 can (21 oz) strawberry pie filling

    • – 2 cups fresh strawberries, sliced (optional)

    • For the Cheesecake Layer:
    • – 8 oz cream cheese, softened

    • – 1/2 cup granulated sugar

    • – 1 tsp vanilla extract

    • For the Topping:
    • – 1 box (15.25 oz) yellow cake mix

    • – 1/2 cup unsalted butter, melted

    • – 1/4 cup milk

    • – 1 tsp cinnamon (optional)

    Directions

    • Preheat oven to 350 degrees F. Grease a 9×13 inch baking dish.
    • In a bowl, beat cream cheese, sugar, and vanilla until smooth.
    • Spread strawberry pie filling evenly in the baking dish. Scatter fresh strawberries on top.
    • Drop spoonfuls of cream cheese mixture over the strawberries. Do not mix.
    • Sprinkle dry cake mix evenly over the entire surface. Do not stir.
    • Drizzle melted butter and milk evenly over the cake mix, covering all dry spots.
    • Bake for 45 to 50 minutes until top is golden brown and edges are bubbling.
    • Cool for 15 to 20 minutes before serving. Serve warm.

    Notes

    • Do not stir the layers after adding cake mix. Make sure all cake mix is moistened by butter and milk to prevent dry spots. Full fat cream cheese gives the best texture. Best served warm with vanilla ice cream or whipped cream.

    • NUTRITION (per serving):
      Calories: 380 kcal
      Protein: 4g
      Carbohydrates: 52g
      Fat: 18g
      Saturated Fat: 10g
      Fiber: 1g
      Sugar: 35g
      Calcium: 80mg

    Instructions

    1. Preheat the oven. Set your oven to 350 degrees F (175 degrees C). Lightly grease a 9×13 inch baking dish with butter or nonstick spray.
    2. Make the cheesecake layer. In a medium bowl, beat the softened cream cheese with the granulated sugar and vanilla extract until smooth and creamy with no lumps. A hand mixer works best, but a fork or whisk will do.
    3. Layer the strawberries. Pour the strawberry pie filling into the prepared baking dish and spread it evenly. Scatter the sliced fresh strawberries over the top if using.
    4. Add the cheesecake. Drop spoonfuls of the cream cheese mixture over the strawberry layer. Spread gently but do not mix it into the fruit. The pockets of cheesecake are what make this dessert special.
    5. Add the cake mix. Sprinkle the dry yellow cake mix evenly over the entire surface. Do not stir or press it down. Cover as much area as possible.
    6. Add the butter and milk. Drizzle the melted butter and milk evenly over the cake mix. Try to cover all the dry spots so no powdery patches remain after baking.
    7. Bake. Place the dish in the oven and bake for 45 to 50 minutes, until the top is golden brown and the edges are bubbling. If the top browns too quickly, loosely cover with foil.
    8. Cool and serve. Remove from the oven and let it cool for 15 to 20 minutes. This allows the layers to set. Serve warm with vanilla ice cream or whipped cream if desired.

    Pro Tips for Perfect Results

    • Use full fat cream cheese. Low fat or reduced fat cream cheese changes the texture and may not melt as smoothly. Always use the full fat block style.
    • Soften the cream cheese fully. Cold cream cheese will leave lumps in your cheesecake layer. Let it sit at room temperature for at least 30 minutes before mixing.
    • Do not stir the layers. Once you add the cake mix, leave everything in place. Stirring creates a dense, pasty texture instead of the beautiful layered effect.
    • Cover every bit of cake mix with butter. Dry cake mix that does not get moistened will stay powdery after baking. Drizzle slowly and watch for dry patches.
    • Use a glass or ceramic baking dish. These materials conduct heat evenly and help the dump cake bake consistently without burning the edges.
    • Let it rest before serving. The cooling time is not optional. It allows the filling to thicken and the layers to set so you get clean, beautiful servings.
    • Serve warm for the best experience. The contrast between warm strawberry filling, soft cheesecake, and buttery topping is at its peak when served fresh from the oven.
    • Add fresh strawberries for brightness. Canned pie filling alone can taste heavy. Fresh strawberries add a bright, tart contrast that elevates the whole dessert.

    Nutritional Insights

    Per serving (based on 12 servings):

    • Calories: 380
    • Total Fat: 18g
    • Saturated Fat: 10g
    • Carbohydrates: 52g
    • Sugar: 35g
    • Protein: 4g
    • Fiber: 1g
    • Calcium: 80mg

    Strawberries are rich in vitamin C and antioxidants that support immune health. Cream cheese provides calcium and protein, while the dessert offers quick energy from carbohydrates. For a lighter version, use reduced sugar strawberry pie filling and a sugar free cake mix. This dessert is best enjoyed as an occasional treat in a balanced diet. For more nutritional information, visit nutrition.gov or MyPlate.gov.

    Variations to Try

    • Blueberry Cheesecake Dump Cake. Replace strawberry pie filling with blueberry pie filling. Add 1 teaspoon of lemon zest to the cream cheese mixture for brightness.
    • Peach Cobbler Dump Cake. Use peach pie filling instead of strawberry. Add 1 teaspoon of cinnamon to the cake mix and top with sliced almonds before baking.
    • Chocolate Cherry Dump Cake. Use chocolate cake mix instead of yellow and cherry pie filling instead of strawberry. The chocolate cherry combination is a classic for good reason.
    • Lemon Strawberry Dump Cake. Use lemon cake mix instead of yellow and add 1 tablespoon of lemon juice to the cream cheese mixture. The citrus note pairs beautifully with the strawberries.

    Frequently Asked Questions

    Can I use fresh strawberries instead of pie filling?
    You will need at least one can of pie filling for moisture. Fresh strawberries alone will not provide enough liquid and the dessert may turn out dry. You can add fresh berries alongside the pie filling.

    Why is my dump cake dry in spots?
    This happens when the dry cake mix is not fully moistened with butter. Make sure you drizzle the melted butter evenly and cover every visible patch of cake mix. Adding the milk also helps prevent dry spots.

    Can I make this ahead of time?
    Yes. You can assemble the dump cake up to 24 hours in advance and keep it covered in the refrigerator. Add 5 to 10 minutes to the bake time if baking straight from the fridge.

    What is the best cake mix to use?
    Betty Crocker Super Moist yellow cake mix gives the fluffiest, most tender topping. Duncan Hines and store brands also work well. Avoid mixes with pudding in the mix as they can change the texture.

    Can I freeze strawberry cheesecake dump cake?
    Yes. Let it cool completely, then wrap individual portions tightly and freeze for up to 3 months. Thaw in the refrigerator overnight and reheat in the oven at 325 degrees F for 10 minutes.

    How do I store leftovers?
    Store in an airtight container in the refrigerator for up to 5 days. The dessert gets even gooier as it sits. Reheat individual portions in the microwave for 20 to 30 seconds.

    My cream cheese did not melt. Is that normal?
    Yes, that is completely normal. The cream cheese is meant to stay in soft, creamy pockets throughout the dessert. It does not fully melt into the filling. These pockets are what give it the cheesecake texture.

    Can I use a different size pan?
    A 9×13 inch pan is ideal. If using an 8×8 pan, reduce the ingredients by half and check for doneness starting at 30 minutes. The baking time and layer thickness will change with different pan sizes.

    Storage Tips

    Room temperature: The dump cake can sit at room temperature for up to 1 day, but refrigeration is recommended for longer storage.

    Refrigerator: Store leftovers in an airtight container for up to 5 days. The dessert becomes more gooey and decadent as it rests, which many people actually prefer.

    Freezer: Wrap individual portions tightly in plastic wrap and then foil. Freeze for up to 3 months. Thaw overnight in the refrigerator before reheating.

    Reheating: Microwave individual servings for 20 to 30 seconds. For larger portions, reheat in a 325 degrees F oven for 10 to 15 minutes. Add a scoop of ice cream on top for the full experience.

    Before You Go

    If you loved this viral strawberry cheesecake dump cake, try more dessert favorites on our site. Check out our Christmas Sugar Cookie Bars for a festive treat, our Pumpkin Pie with Chocolate Whip for holiday baking, or our Orange Chicken when you want something savory.

    Save this recipe to your Pinterest boards and share it with your friends. Follow us on Pinterest for more trending recipe ideas. Snap a photo of your strawberry cheesecake dump cake and tag us when you make it. Your version might inspire someone else to try it too. Happy baking.

    Note: For more information on nutrition, visit the websites: nutrition.gov or MyPlate.gov | U.S. Department of Agriculture.

  • One Pan Dumpling Bake Recipe | 25-Minute Dinner

    One Pan Dumpling Bake Recipe | 25-Minute Dinner

    Introduction

    If you have been scrolling through TikTok lately, chances are you have seen the dumpling bake that has completely taken over social media. This cozy one-pan dish was created by Danielle Brown from Healthy Girl Kitchen, and it has racked up millions of views for a reason. It takes frozen dumplings, a creamy coconut curry sauce, and bakes everything together in one dish for a meal that looks restaurant quality and tastes even better.

    You are about to discover why home cooks everywhere are adding this recipe to their weekly rotation. You will learn how to turn a simple bag of frozen gyoza into a saucy, deeply flavorful dinner in about 25 minutes with minimal prep. The beauty of this dish is that the dumplings become plump and juicy on the bottom while the tops get slightly crispy, all while nestled in a rich, aromatic curry-coconut sauce. Let me show you exactly how to make it happen.

    Why You Will Love This Recipe

    • Only 5 minutes of active prep before the oven takes over, perfect for busy weeknights when you want real food without the effort
    • One baking dish means zero pots to scrub and almost no cleanup, a dream for tired weeknight cooks
    • Frozen dumplings work perfectly so you do not need to make dough or fill anything from scratch
    • Incredibly flavorful sauce with red curry paste, coconut milk, garlic, and ginger that tastes like it came from a Thai restaurant
    • Adaptable for any diet with easy vegan, gluten-free, and dairy-free modifications
    • Great for families, couples, and meal prep alike because it scales up easily and reheats beautifully for lunches all week

    What Makes a Good One Pan Dumpling Bake

    A great one pan dumpling bake comes down to three things. First, the sauce needs to be thick enough to coat the dumplings but still pourable, you want it to bubble and caramelize slightly around the edges while baking. Getting the coconut milk and curry paste ratio right is key. Second, you want dumplings with thinner wrappers like gyoza or potstickers, since they bake through evenly without getting gummy or falling apart. Finally, timing matters, cover the dish for the first part of baking so the dumplings steam through, then uncover at the end so the tops crisp up just right.

    Another secret is temperature. Your oven should be fully preheated to 375 degrees before the dish goes in. A hot oven ensures the sauce starts simmering right away and the dumplings cook through properly. Pulling the dish when the sauce is still slightly bubbling and the dumplings look plump and glossy is your sign that it is done.

    Origin of the Viral Dumpling Bake

    The viral one pan dumpling bake took off on TikTok in early 2026 after creator Danielle Brown, known as Healthy Girl Kitchen, posted a simple video showing how to dump frozen dumplings into a baking dish with coconut milk, curry paste, and aromatics. The concept was so easy and the results so stunning that it spread across food creator accounts within days. What makes this recipe special is how it combines convenience food with bold, authentic flavors. The dumpling bake taps into a broader trend of sheet pan and one-pan meals that deliver maximum flavor with minimum effort, and it has quickly become a staple for home cooks who want to eat well without spending hours in the kitchen.

    Ingredients

    For the Sauce:

    • 1 can (14 oz) full-fat coconut milk
    • 2 to 3 tablespoons Thai red curry paste
    • 3 cloves garlic, minced
    • 2 teaspoons fresh ginger, grated
    • 1 tablespoon soy sauce or tamari
    • 1 teaspoon sesame oil

    For the Bake:

    • 1 bag (about 1 lb or 24 to 30 pieces) frozen gyoza or potsticker dumplings, do not thaw
    • 3 cups fresh spinach or baby bok choy, roughly chopped
    • 1 medium red bell pepper, thinly sliced (optional)

    For Garnish:

    • 2 to 3 green onions, thinly sliced
    • 1 tablespoon chili crisp or chili oil
    • 1 tablespoon sesame seeds
    • Fresh cilantro leaves (optional)
    • Steamed jasmine rice, for serving
    Viral One Pan Dumpling Bake
    Viral One Pan Dumpling Bake infographic

    Frozen dumplings baked in a creamy coconut curry sauce with spinach and ginger. Ready in 25 minutes with just one dish.

    Recipe by Cindy
    0.0 from 0 votes
    Course: DinnerCuisine: Asian FusionDifficulty: Easy
    Servings

    4

    servings
    Prep time

    5

    minutes
    Cooking time

    25

    minutes
    Calories

    420

    kcal
    Total time

    30

    minutes

    Ingredients

    • For the Sauce:
    • – 1 can (14 oz) full-fat coconut milk

    • – 2 to 3 tablespoons Thai red curry paste

    • – 3 cloves garlic, minced

    • – 2 teaspoons fresh ginger, grated

    • – 1 tablespoon soy sauce or tamari

    • – 1 teaspoon sesame oil

    • For the Bake:
    • – 1 bag (about 1 lb) frozen gyoza or potsticker dumplings

    • – 3 cups fresh spinach or baby bok choy, roughly chopped

    • – 1 medium red bell pepper, thinly sliced (optional)

    • For Garnish:
    • – 2 to 3 green onions, thinly sliced

    • – 1 tablespoon chili crisp or chili oil

    • – 1 tablespoon sesame seeds

    • – Fresh cilantro leaves (optional)

    • – Steamed jasmine rice, for serving

    Directions

    • Preheat oven to 375 degrees F. Lightly grease a 9×13 inch baking dish.
    • In the baking dish, whisk together coconut milk, red curry paste, minced garlic, grated ginger, soy sauce, and sesame oil until smooth.
    • Scatter spinach and sliced bell pepper into the sauce and toss to coat.
    • Place frozen dumplings directly into the sauce in a single layer without thawing. Spoon a little sauce over each dumpling.
    • Cover tightly with aluminum foil and bake for 20 minutes.
    • Remove foil and bake for an additional 5 to 7 minutes until dumpling tops are slightly golden and sauce is bubbling.
    • Cut one dumpling open to verify filling is cooked through and hot.
    • Garnish with green onions, chili crisp, sesame seeds, and cilantro. Serve over steamed jasmine rice.

    Notes

    • Do not thaw frozen dumplings before baking, this is essential for proper texture.
      Use full-fat coconut milk for the best creamy sauce consistency.
      Curry paste heat levels vary by brand, so taste the sauce and adjust to your preference.
      You can add extra vegetables like snap peas, broccoli, or mushrooms.
      The dish is best enjoyed fresh but leftovers store well in the fridge for up to 3 days.

    Instructions

    1. Preheat your oven to 375 degrees F (190 degrees C). Lightly grease a 9×13 inch baking dish or a similar-sized oven-safe dish with oil or cooking spray.
    2. Make the curry-coconut sauce. In the baking dish, whisk together the coconut milk, red curry paste, minced garlic, grated ginger, soy sauce, and sesame oil until the curry paste is fully dissolved and the sauce is smooth. Taste and adjust the curry paste amount if you prefer it spicier or milder.
    3. Add the vegetables. Scatter the spinach and sliced bell pepper into the sauce and toss gently so everything gets coated. This creates a flavorful bed for the dumplings.
    4. Nestle in the dumplings. Place the frozen gyoza directly into the sauce without thawing. Arrange them in a single layer with the flatter side down, spacing them evenly. Spoon a small amount of sauce over the top of each dumpling so they do not dry out.
    5. Cover and bake. Cover the baking dish tightly with aluminum foil and bake for 20 minutes. The trapped steam will cook the dumplings through while the sauce thickens and infuses with flavor.
    6. Uncover and finish baking. Remove the foil and bake for an additional 5 to 7 minutes. The tops of the dumplings should become slightly golden and the sauce should be bubbling around the edges.
    7. Check for doneness. Cut one dumpling open to verify the filling is cooked through and hot. The wrapper should be tender and glossy, not doughy or translucent in the center.
    8. Garnish and serve. Remove from the oven and immediately top with sliced green onions, a generous drizzle of chili crisp, sesame seeds, and fresh cilantro if using. Serve hot over steamed jasmine rice and spoon extra sauce over each portion.

    Pro Tips for Perfect Results

    • Do not thaw the dumplings. Using them straight from the freezer is essential, thawed dumplings can become mushy and stick together during baking
    • Use full-fat coconut milk. Light coconut milk will make the sauce too thin and watery, the fat content is what gives you that rich, creamy texture
    • Taste your curry paste. Different brands vary significantly in heat level, start with 2 tablespoons and taste the sauce before adding more
    • Do not overcrowd the dish. Give the dumplings a little space so they cook evenly and the sauce can bubble properly around each one
    • Foil is your friend. Make sure the cover is tight during the first baking phase so steam builds up, this is what steams the dumplings to perfection
    • Add extra veggies. Snap peas, broccoli florets, sliced mushrooms, or baby corn all work beautifully layered into the sauce
    • Finish with chili crisp. The contrast of creamy coconut sauce with crunchy, spicy chili crisp is what takes this dish from good to incredible
    • Let it rest 2 minutes. Pulling the dish out and giving it a brief rest before serving allows the sauce to thicken slightly so it clings to the dumplings better

    Nutritional Insights

    Each serving of this one pan dumpling bake (about 6 dumplings with sauce and vegetables) contains approximately:

    • Calories: 420 kcal
    • Protein: 16 grams
    • Carbohydrates: 38 grams
    • Fat: 24 grams
    • Fiber: 3 grams
    • Sodium: 680 milligrams

    The coconut milk provides medium-chain triglycerides, which are easily metabolized for energy. Ginger and garlic both offer anti-inflammatory properties, while the spinach adds iron, vitamin K, and folate to the dish. Using a vegetable-filled dumpling can increase your fiber and vitamin intake even further. For more information on balanced nutrition, visit the resources at nutrition.gov and MyPlate.gov.

    Variations to Try

    • Green Curry Version: Swap the red curry paste for green curry paste and add a handful of Thai basil leaves before serving. The flavor profile shifts to a brighter, herbier profile with a slightly milder heat.
    • Vegan Protein Boost: Add cubed firm tofu or crispy baked chickpeas alongside the dumplings for extra plant-based protein. Marinate the tofu in soy sauce and sesame oil before tossing into the sauce.
    • Peanut Sauce Twist: Whisk 2 tablespoons of creamy peanut butter into the coconut curry sauce for a richer, nuttier flavor reminiscent of Thai peanut noodles. Top with crushed peanuts for added crunch.
    • Miso Coconut Fusion: Add 1 tablespoon of white miso paste to the sauce for deep umami flavor. This Japanese-inspired variation pairs beautifully with pork or chicken gyoza and adds a savory complexity that is hard to resist.

    Frequently Asked Questions

    Can I use homemade dumplings instead of frozen? Yes, but homemade dumplings may cook faster since they are not frozen. Reduce the covered baking time to about 15 minutes and check for doneness earlier. Homemade wrappers can also become softer, so the texture will differ slightly from frozen dumplings.

    What type of dumplings work best for this recipe? Gyoza and potstickers are ideal because they have thinner wrappers that bake evenly. Avoid thick-wrapped dumplings like bao or large wontons, as they may not cook through properly in the same amount of time. Pork, chicken, and vegetable fillings all work well.

    Can I make this recipe ahead of time? You can assemble the dish and keep it covered in the refrigerator for up to 4 hours before baking. Add 5 minutes to the covered baking time since the dish will start cold. Do not freeze the assembled unbaked dish, as the dumplings can become waterlogged.

    How do I make this recipe gluten-free? Use gluten-free dumplings, which are available at most Asian grocery stores or specialty markets. Swap regular soy sauce for tamari, and double-check that your curry paste does not contain hidden gluten. Many Thai curry paste brands are naturally gluten-free.

    What can I serve with the dumpling bake? Steamed jasmine rice is the classic pairing, but you can also serve it over rice noodles, cauliflower rice for a lower-carb option, or with warm naan bread for a fusion twist. A simple cucumber salad or quick pickled vegetables on the side adds a nice refreshing contrast.

    Is the sauce too spicy for kids? The heat level depends entirely on your curry paste brand and how much you use. Start with just 1 tablespoon of mild curry paste and omit the chili crisp garnish to make it kid-friendly. The coconut milk naturally tones down the spice, so it should be gentle enough for most palates.

    Can I use an air fryer for this recipe? While the bake method works best, you can try an air fryer version by placing dumplings in the air fryer basket at 375 degrees for 8 to 10 minutes, then serving them over the warmed sauce separately. The results will not be identical, but it is a quicker option for smaller portions.

    How do I store and reheat leftovers? Store leftovers in an airtight container in the refrigerator for up to 3 days. Reheat in the microwave with a splash of water or coconut milk to restore the sauce consistency, or warm in a covered baking dish at 350 degrees for 15 minutes. The dumplings may soften a bit upon reheating, but the flavor remains excellent.

    Storage Tips

    Refrigerator: Transfer cooled leftovers to a sealed container and store in the fridge for up to 3 days. The flavors actually meld and improve overnight, making next-day leftovers even tastier.

    Freezing: This dish is best enjoyed fresh, but you can freeze the leftover sauce and dumplings together in a freezer-safe container for up to 2 months. Thaw overnight in the refrigerator before reheating. Note that the dumpling wrappers may become slightly softer after freezing.

    Reheating: For the best results, reheat in a covered baking dish at 350 degrees F for 15 to 18 minutes until warmed through. If using the microwave, heat in 30-second intervals and add a tablespoon of water or coconut milk to prevent the sauce from drying out. Always reheat until the internal temperature reaches 165 degrees F.

    Before You Go

    If you loved this viral dumpling bake, you will want to check out more easy one-pan meals on our site. Try our Creamy Smothered Chicken and Rice for another cozy dinner, explore our Orange Chicken for a takeout favorite you can make at home, or whip up some Comfort Food Pork Chops with Caramelized Apples for a classic weeknight meal.

    Did you make this recipe? Share your results on Pinterest and tag us so we can see your beautiful creations. Follow along for more viral recipe recreations and easy dinner inspiration every week.

    Note: For more information on nutrition, visit the website: nutrition.gov or MyPlate.gov | U.S. Department of Agriculture.

  • Cream Cheese Chicken

    Cream Cheese Chicken

    Introduction

    If you have been scrolling through Facebook or TikTok lately, you have probably seen it. The viral cream cheese chicken that has taken home kitchens by storm, and trust me, once you try it, you will understand why everyone cannot stop talking about it. This is not just another weeknight chicken recipe. It is a restaurant-quality dish that comes together in under 30 minutes with ingredients you probably already have in your fridge.

    The recipe first gained traction when food bloggers and home cooks started sharing their versions online, and it quickly became clear that this dish has serious staying power. The combination of tender, seared chicken breasts swimming in a velvety cream cheese sauce is the kind of comfort food that makes even the busiest weeknight feel special.

    What makes this viral cream cheese chicken stand out from other chicken recipes is its perfect balance of simplicity and flavor. You do not need any fancy techniques or obscure ingredients. Just good, honest cooking that delivers incredible results every single time.

    Why You Will Love This Recipe

    • Ready in Under 30 Minutes: From prep to plate, this dish comes together in about 25 minutes, making it perfect for busy weeknights when you need dinner on the table fast.
    • Minimal Ingredients, Maximum Flavor: You only need a handful of simple ingredients to create a dish that tastes like it came from a fancy restaurant.
    • One Pan, Easy Cleanup: Everything cooks in a single skillet, which means fewer dishes and more time to enjoy your meal.
    • Family Friendly: Kids and adults alike love the creamy, comforting flavors of this dish. It is a guaranteed hit at the dinner table.
    • Endlessly Adaptable: Add your favorite vegetables, swap proteins, or adjust the seasonings to make it your own signature dish.
    • Perfect for Meal Prep: This chicken stores beautifully, so you can make it ahead and enjoy leftovers throughout the week.

    What Makes a Great Cream Cheese Chicken

    A great cream cheese chicken relies on three key elements working together in harmony. First, you need perfectly seared chicken that is golden on the outside and juicy on the inside. This means getting your skillet nice and hot before adding the chicken, and resist the urge to move it around too much while it cooks.

    Second, the sauce is everything. A properly made cream cheese sauce should be velvety, rich, and coat the back of a spoon beautifully. The key is to use full-fat cream cheese and let it melt slowly into the liquid, whisking gently to avoid lumps.

    Third, the seasoning brings it all together. A good amount of garlic, a splash of chicken stock, and a touch of seasoning elevate the simple ingredients into something truly memorable. Do not be shy with the garlic, as it provides the backbone of flavor for the entire dish.

    The History of Cream Cheese Chicken

    While cream cheese chicken does not have a single documented origin, it belongs to a family of creamy chicken dishes that have been popular in American home cooking for decades. Think of recipes like chicken à la king or creamy herb chicken, which have graced family dinner tables for generations.

    What makes this viral version special is how it combines the classic technique with modern convenience. Home cooks took inspiration from these beloved comfort food classics and simplified them for the social media age. The result is a dish that feels familiar yet fresh, and it resonates with people who want restaurant quality at home without spending hours in the kitchen.

    Ingredients

    For the Chicken

    • 4 boneless, skinless chicken breasts (about 6 ounces each), trimmed and pounded to even thickness
    • 1 tablespoon olive oil
    • 1 teaspoon garlic powder
    • 1 teaspoon onion powder
    • 1/2 teaspoon smoked paprika
    • Salt and freshly ground black pepper, to taste

    For the Cream Cheese Sauce

    • 8 ounces full-fat cream cheese, softened and cubed
    • 1 cup chicken broth, preferably low-sodium
    • 4 cloves garlic, finely minced
    • 1/2 teaspoon dried Italian seasoning
    • 1/4 teaspoon red pepper flakes (optional, for heat)
    • 2 tablespoons freshly squeezed lemon juice
    • 2 tablespoons unsalted butter

    For Garnish

    • 2 tablespoons freshly chopped parsley
    • 1/4 cup freshly grated Parmesan cheese
    • 2 tablespoons sliced green onions
    Viral Cream Cheese Chicken recipe step by step

    Cream Cheese Chicken

    Recipe by Cindy
    0.0 from 0 votes
    Course: DinnerCuisine: AmericanDifficulty: Easy
    Servings

    4

    servings
    Prep time

    10

    minutes
    Cooking time

    15

    minutes
    Calories

    420

    kcal

    Juicy, seared chicken in a velvety cream cheese sauce. Restaurant quality in 30 minutes.

    Ingredients

    • For the Chicken
    • – 4 boneless, skinless chicken breasts (6 oz each), trimmed and pounded to even thickness

    • – 1 tablespoon olive oil

    • – 1 teaspoon garlic powder

    • – 1 teaspoon onion powder

    • – 1/2 teaspoon smoked paprika

    • – Salt and freshly ground black pepper, to taste

    • For the Cream Cheese Sauce
    • – 8 ounces full-fat cream cheese, softened and cubed

    • – 1 cup chicken broth, preferably low-sodium

    • – 4 cloves garlic, finely minced

    • – 1/2 teaspoon dried Italian seasoning

    • – 1/4 teaspoon red pepper flakes (optional)

    • – 2 tablespoons freshly squeezed lemon juice

    • – 2 tablespoons unsalted butter

    • For Garnish
    • – 2 tablespoons freshly chopped parsley

    • – 1/4 cup freshly grated Parmesan cheese

    • – 2 tablespoons sliced green onions

    Directions

    • Prepare the chicken by patting dry with paper towels and seasoning both sides with garlic powder, onion powder, smoked paprika, salt, and pepper. Let rest at room temperature for 10 minutes.
    • Heat olive oil in a large, heavy-bottomed skillet over medium-high heat until shimmering. Add chicken breasts and cook undisturbed for 5 to 6 minutes per side until golden and internal temperature reaches 165°F. Remove to a plate and tent with foil.
    • In the same skillet, reduce heat to medium and melt butter. Add minced garlic and sauté for 30 seconds until fragrant, being careful not to burn it.
    • Pour in chicken broth and add cubed cream cheese. Stir gently as cream cheese melts into the broth, about 2 to 3 minutes. Whisk to break down any lumps and create a smooth sauce.
    • Stir in Italian seasoning, red pepper flakes if using, and lemon juice. Let sauce simmer gently for 2 to 3 minutes until slightly thickened.
    • Return chicken to the skillet, spooning sauce over the top. Reduce heat to low, cover, and simmer for 3 to 4 minutes until chicken is heated through.
    • Transfer to plates and generously spoon cream cheese sauce over each breast. Top with parsley, Parmesan cheese, and green onions. Serve immediately.

    Notes

    • Use full-fat cream cheese for the best texture and flavor.
      Do not boil the sauce once cream cheese is added to prevent curdling.
      Leftovers keep well in the refrigerator for 3 to 4 days.
      Add a splash of milk when reheating to restore creamy consistency.
      Pair with roasted vegetables, mashed potatoes, or crusty bread.
    Viral Cream Cheese Chicken

    Instructions

    Follow these simple steps for perfect cream cheese chicken every time:

    1. Prepare the Chicken: Pat the chicken breasts dry with paper towels and season both sides generously with garlic powder, onion powder, smoked paprika, salt, and pepper. Let the chicken sit at room temperature for about 10 minutes while you prepare the sauce ingredients.
    2. Sear the Chicken: Heat olive oil in a large, heavy-bottomed skillet over medium-high heat until it shimmers. Carefully add the seasoned chicken breasts to the pan. Cook undisturbed for 5 to 6 minutes per side until they develop a beautiful golden crust and reach an internal temperature of 165°F. Remove the chicken to a plate and tent loosely with foil to keep warm.
    3. Build the Sauce Base: In the same skillet, reduce heat to medium and melt the butter. Add the minced garlic and sauté for about 30 seconds until fragrant, being careful not to let it burn. The garlic should smell sweet and savory, not bitter.
    4. Add the Cream Cheese: Pour in the chicken broth and add the cubed cream cheese to the pan. Stir gently as the cream cheese begins to soften and melt into the broth. This takes about 2 to 3 minutes. Use a whisk to help break down any small lumps and create a smooth sauce.
    5. Season the Sauce: Stir in the Italian seasoning, red pepper flakes if using, and lemon juice. Let the sauce simmer gently for 2 to 3 minutes, stirring occasionally, until it thickens slightly and the flavors meld together.
    6. Return the Chicken: Nestle the seared chicken breasts back into the skillet, spooning some of the creamy sauce over the top. Reduce the heat to low, cover the pan, and let everything simmer together for 3 to 4 minutes to heat the chicken through and allow it to absorb some of the sauce.
    7. Garnish and Serve: Remove the chicken from the heat and transfer to a serving platter or individual plates. Generously spoon the cream cheese sauce over each breast. Top with freshly chopped parsley, grated Parmesan cheese, and sliced green onions. Serve immediately while hot and bubbly.

    Pro Tips for Perfect Results

    • Do Not Skip the Sear: Getting a good golden crust on your chicken is essential for texture and flavor. Make sure your pan is properly preheated and resist the urge to move the chicken too soon.
    • Room Temperature Ingredients: Let your cream cheese soften at room temperature for about 30 minutes before starting. Cold cream cheese takes much longer to melt and can form lumps in your sauce.
    • Low and Slow for the Sauce: Once you add the cream cheese, keep the heat at medium or medium-low. High heat can cause the cream cheese to separate or become grainy.
    • Rest Your Chicken: After cooking, let the chicken rest for a few minutes before slicing. This allows the juices to redistribute throughout the meat, keeping it moist and tender.
    • Add Vegetables: Toss in some spinach, sun-dried tomatoes, or mushrooms when you add the cream cheese for extra nutrition and flavor.
    • Make It Spicier: If you love heat, increase the red pepper flakes or add a dash of hot sauce to the sauce for an extra kick.
    • Deglaze for Extra Flavor: After searing the chicken, add a splash of white wine or additional broth to the pan and scrape up those browned bits. They contain incredible flavor that will enrich your sauce.
    • Serving Suggestion: This chicken pairs wonderfully with roasted vegetables, mashed potatoes, or a fresh green salad to balance the richness of the sauce.

    Nutritional Insights

    Per serving (1 chicken breast with sauce):

    • Calories: 420 kcal
    • Protein: 38 grams
    • Carbohydrates: 6 grams
    • Fat: 26 grams
    • Saturated Fat: 14 grams
    • Cholesterol: 125 mg
    • Sodium: 580 mg
    • Fiber: 0.5 grams
    • Sugar: 3 grams

    Health Benefits of Key Ingredients:

    Chicken breast is an excellent source of lean protein, providing essential amino acids that support muscle growth and repair. It is also rich in B vitamins, particularly B6 and B12, which play important roles in energy metabolism and brain function.

    Cream cheese, when enjoyed in moderation, provides calcium and vitamin A. Calcium is essential for strong bones and teeth, while vitamin A supports healthy vision and immune function.

    Garlic has been studied for its potential health benefits, including anti-inflammatory and immune-supporting properties. Regular consumption of garlic may help support cardiovascular health as well.

    Variations to Try

    Once you master the basic recipe, try these delicious variations to keep things exciting:

    1. Bacon Ranch Cream Cheese Chicken

    • Add 4 slices of cooked, crumbled bacon to the sauce
    • Stir in 1 tablespoon ranch seasoning mix
    • Top with extra cheddar cheese before serving

    2. Mediterranean Cream Cheese Chicken

    • Add 1/2 cup sun-dried tomatoes and 1/4 cup sliced Kalamata olives
    • Use Greek seasoning instead of Italian seasoning
    • Finish with crumbled feta cheese and fresh basil

    3. Spinach and Artichoke Chicken

    • Stir in 1 cup fresh spinach and 1/2 cup chopped artichoke hearts
    • Add 1/4 cup cream cheese to the sauce for extra richness
    • Top with mozzarella cheese and broil until bubbly

    4. Buffalo Chicken Style

    • Add 3 tablespoons buffalo sauce to the cream cheese sauce
    • Omit the Italian seasoning
    • Top with blue cheese crumbles and celery slices

    Frequently Asked Questions

    Can I use frozen chicken breasts for this recipe?

    While fresh chicken is always best, you can use frozen chicken breasts if needed. Just make sure to thaw them completely in the refrigerator overnight before cooking. Never cook chicken directly from frozen, as it will cook unevenly and could be unsafe.

    How do I prevent the cream cheese sauce from curdling?

    The key to a smooth cream cheese sauce is temperature control. Always add the cream cheese to a warm liquid and stir gently over medium heat. Never boil the sauce once the cream cheese is added, as high heat can cause it to separate and become grainy.

    Can I make this dish ahead of time?

    Yes, you can prepare the chicken and sauce separately, then combine them when ready to serve. Store the seared chicken in an airtight container in the refrigerator for up to 2 days. The sauce can be made ahead and reheated gently on the stovetop.

    What can I substitute for cream cheese?

    If you do not have cream cheese, you can substitute with an equal amount of mascarpone cheese or a blend of cottage cheese blended until smooth. Greek yogurt can also work, though it will result in a slightly tangier sauce.

    Is this recipe gluten-free?

    Yes, this recipe is naturally gluten-free as long as you use gluten-free chicken broth. Always check labels to ensure your ingredients do not contain hidden gluten.

    How do I reheat leftovers?

    Reheat leftover chicken gently in a covered skillet over low heat with a splash of chicken broth or milk. Microwave on 50% power in 30-second intervals, stirring between each interval. This gentle reheating prevents the sauce from breaking.

    Can I add pasta to this dish?

    Absolutely. Cook your favorite pasta separately and toss it in the cream cheese sauce before serving. Penne, fettuccine, or rotini all work beautifully with this recipe.

    What side dishes pair well with cream cheese chicken?

    This chicken pairs wonderfully with roasted vegetables, garlic mashed potatoes, steamed rice, crusty bread for soaking up the sauce, or a light green salad to cut through the richness.

    Storage Tips

    Refrigerator Storage: Store leftover chicken in an airtight container in the refrigerator for up to 3 to 4 days. Keep the sauce separate if possible, as it will stay creamier when reheated.

    Freezer Instructions: This dish can be frozen, though the texture of the sauce may change slightly upon thawing. Freeze the chicken and sauce together in a freezer-safe container for up to 2 months. Thaw overnight in the refrigerator before reheating.

    Reheating Tips: Add a splash of milk or chicken broth when reheating to restore the creamy consistency of the sauce. Stir gently while reheating over low heat to prevent the sauce from separating.

    Make-Ahead Tip: Season and sear the chicken up to 24 hours ahead. Store it in the refrigerator, then finish cooking with the sauce when ready to serve. This cuts down on prep time significantly.

    Before You Go

    If you loved this viral cream cheese chicken, be sure to check out these other comforting recipes on the blog:

    Did you make this recipe? Snap a photo and share it on Pinterest! Your creations inspire our cooking community, and I love seeing how you put your own spin on these dishes.

    Note: For more information on nutrition, visit nutrition.gov or MyPlate.gov for balanced meal planning resources.

  • Viral 2-Ingredient Biscoff Cheesecake

    Viral 2-Ingredient Biscoff Cheesecake

    Introduction

    If you’ve spent even five minutes scrolling through TikTok or Pinterest lately, you’ve probably seen this magical dessert making the rounds. The viral 2-ingredient Biscoff cheesecake has taken social media by storm, and for good reason—it’s ridiculously easy, requires zero baking, and somehow tastes like you spent hours in the kitchen.

    This creamy, no-bake dessert combines thick Greek yogurt with Biscoff cookies (also known as Speculoos or cookie butter biscuits) to create a cheesecake-like texture that will blow your mind. The cookies soften overnight in the refrigerator, turning into a tender, cake-like layer that pairs perfectly with the tangy, creamy yogurt base. It’s the kind of dessert that feels too simple to be this delicious.

    In this post, I’ll walk you through everything you need to know to master this viral recipe, including pro tips, variations, and answers to all your burning questions. Let’s dive in!

    Why You Will Love This Recipe

    • Minimal Prep Time – Takes only 5 minutes to assemble. No mixing, no baking, no special equipment needed.
    • Only 2 Main Ingredients – Just Greek yogurt and Biscoff cookies. You probably already have these at home!
    • No Oven Required – This is a refrigerator-only dessert, making it perfect for hot summer days.
    • High in Protein – Thanks to the Greek yogurt, this dessert actually has some nutritional value compared to traditional cheesecake.
    • Endlessly Customizable – Add vanilla, sweetener, cocoa powder, or your favorite toppings to make it your own.
    • Perfect for Meal Prep – Make it ahead and let it chill overnight. It’s ready when you need a sweet treat!

    What Makes a Good Biscoff Cheesecake

    The magic of this recipe lies in the contrast between textures and flavors. You need thick Greek yogurt (5% fat works best) that can hold its shape when you press the cookies in. The yogurt should be plain or vanilla-flavored—not too thin or watery, or the cookies won’t set properly.

    The Biscoff cookies are the star of the show. These spiced Belgian biscuits have a unique caramelized, cinnamon-like flavor that pairs beautifully with the creamy yogurt. As they chill, they absorb moisture from the yogurt and soften into a texture reminiscent of cake or tiramisu. Patience is key—letting it refrigerate overnight (6-12 hours) yields the best results.

    The History/Origin

    This viral dessert is inspired by Japanese-style cheesecakes, which are known for their light, airy texture and minimalist approach. Japanese cheesecake typically uses just cream cheese, eggs, sugar, and a touch of flour—no heavy cream or sour cream.

    The TikTok version takes this simplicity even further by replacing cream cheese with thick Greek yogurt and the flour base with Biscoff cookies. This hack went viral in early 2026, with thousands of content creators trying and loving the surprisingly delicious results. The trend started with people simply shoving Biscoff cookies into yogurt containers, but it’s evolved into a more refined make-ahead dessert that looks almost too pretty to eat.

    Ingredients

    For the Base:

    • 1 tub (500-750g) plain Greek yogurt (5% fat recommended)
    • 15-20 Biscoff cookies (depending on container size)

    Optional Enhancements:

    • 1 teaspoon vanilla extract
    • 2-3 tablespoons powdered sweetener (Truvia, powdered sugar, or sweetener of choice)
    • Pinch of salt

    For Topping (Optional):

    • 1 tablespoon unsweetened cocoa powder
    • 2-3 tablespoons melted Biscoff spread
    • Fresh berries
    • Whipped cream

    Viral 2-Ingredient Biscoff Cheesecake

    Recipe by Cindy
    0.0 from 0 votes
    Course: DessertCuisine: American, Japanese-InspiredDifficulty: Easy
    Servings

    6

    servings
    Prep time

    5

    minutes
    Chill Time in HOURS

    6

    minutes
    Calories

    240

    kcal

    A creamy, no-bake TikTok-inspired dessert made with thick Greek yogurt and Biscoff cookies. Takes 5 minutes to prepare and tastes like real cheesecake!

    Ingredients

    • FOR THE BASE:
    • – 1 tub (500-750g) plain Greek yogurt (5% fat recommended)

    • – 15-20 Biscoff cookies

    • FOR SWEETENING (Optional):
    • – 1 teaspoon vanilla extract

    • – 2-3 tablespoons powdered sweetener (Truvia, powdered sugar, or sweetener of choice)

    • FOR TOPPINGS (Optional):
    • – 1 tablespoon unsweetened cocoa powder

    • – 2-3 tablespoons melted Biscoff spread

    • – Fresh berries

    • – Whipped cream

    Directions

    • Transfer Greek yogurt into a small baking dish (4×6″), loaf pan, or individual serving cups. Smooth the surface evenly.
    • Add vanilla extract and powdered sweetener (if using) directly to the yogurt. Stir until completely smooth and well combined.
    • Gently press Biscoff cookies vertically into the yogurt, spacing them evenly. Push them in until they’re submerged about halfway to three-quarters. Break cookies in half to fill gaps as needed.
    • (Optional) For a tiramisu twist, dip each cookie briefly in espresso or strong coffee before pressing into the yogurt.
    • Cover the dish tightly with plastic wrap or a lid. Refrigerate for at least 6 hours, preferably overnight (6-12 hours for the best texture).
    • Remove from refrigerator. Dust with cocoa powder if desired.
    • Serve with melted Biscoff spread drizzle, fresh berries, or whipped cream. Scoop through the softened cookies and creamy yogurt to enjoy!

    Notes

    • Use thick Greek yogurt (5% fat) for best results—thin yogurts won’t hold the cookies properly.
      The longer this chills, the softer the cookies become. Overnight (8-12 hours) is ideal.
      Store covered in the refrigerator for up to 3 days.
      Customize with your favorite toppings: melted Biscoff spread, chocolate chips, honey, or fresh fruit.
      Individual servings in small cups or mason jars make great grab-and-go treats.

    Instructions

    This no-bake dessert comes together in minutes, but requires patience for the chilling time. Here’s how to make it:

    Step 1: Prepare Your Container

    Transfer the Greek yogurt into a small baking dish (approximately 4×6″), a loaf pan, or individual serving cups. Smooth the surface evenly with the back of a spoon.

    Step 2: Add Sweetener and Vanilla

    If using vanilla extract and/or powdered sweetener, add them directly to the yogurt now. Stir until completely smooth and well combined. You can do this in the original container or a separate bowl—whichever is easier.

    Step 3: Press in the Biscoff Cookies

    Gently press the Biscoff cookies vertically into the yogurt, spacing them evenly. You can arrange them in rows, or simply push them in wherever they fit. Break cookies in half if needed to fill gaps. The cookies should be submerged about halfway to three-quarters of the way.

    Step 4: Optional Flavor Boost

    For a tiramisu-inspired twist, dip each cookie briefly in espresso or strong coffee before pressing it into the yogurt. This adds a subtle coffee flavor that complements the Biscoff beautifully.

    Step 5: Cover and Refrigerate

    Cover the dish tightly with plastic wrap or a lid. Place in the refrigerator for at least 6 hours, preferably overnight (6-12 hours for the best texture).

    Step 6: Serve and Enjoy

    Remove from the refrigerator, dust with cocoa powder if desired, and serve with a drizzle of melted Biscoff spread or fresh berries. Scoop through the softened cookies and creamy yogurt to enjoy!

    Pro Tips for Perfect Results

    • Use Thick Greek Yogurt – A 5% fat Greek yogurt holds its shape best. Avoid non-fat or thin yogurts, as the cookies won’t set properly.
    • Don’t Skip the Chill Time – Minimum 6 hours is essential. The cookies need time to soften and absorb the yogurt’s moisture.
    • Overnight is Best – For the most cake-like texture, refrigerate for 8-12 hours. The cookies will be perfectly tender.
    • Sweeten to Taste – Plain Greek yogurt is tangy. Add sweetener gradually and taste as you go to find your perfect level.
    • Layer It Up – For extra visual appeal, layer half the cookies at the bottom and press the rest vertically into the top.
    • Add Cocoa for Variety – Dusting with unsweetened cocoa powder before serving gives a beautiful presentation and tiramisu-like flavor.
    • Make Individual Portions – Use small cups or mason jars for easy serving and grab-and-go convenience.
    • Store Leftovers Properly – Keep covered in the refrigerator for up to 3 days. The cookies will continue to soften over time.

    Nutritional Insights

    Per serving (based on 6 servings, using 750g yogurt and 15 cookies):

    • Calories: 240 kcal
    • Protein: 15g
    • Carbohydrates: 28g
    • Fat: 3g
    • Saturated Fat: 0.5g
    • Fiber: 0.5g
    • Sugar: 18g
    • Sodium: 182mg

    Health Benefits:

    • Greek Yogurt provides probiotics for gut health, calcium for strong bones, and high-quality protein for muscle maintenance.
    • Biscoff Cookies contain wholesome ingredients like wheat flour, sugar, and vegetable oils, with a touch of cinnamon and nutmeg for antioxidants.
    • This dessert offers more protein than traditional cheesecake, making it a more satisfying treat.

    Variations to Try

    1. Tiramisu-Inspired Version

    • Dip Biscoff cookies in espresso before layering
    • Dust with cocoa powder before serving

    2. Chocolate Biscoff Delight

    • Use chocolate-flavored Greek yogurt
    • Add chocolate chips between cookie layers
    • Drizzle with melted Biscoff spread

    3. Berry Blast Cheesecake

    • Press cookies into yogurt as directed
    • Top with fresh raspberries, strawberries, or blueberries
    • Add a honey drizzle for extra sweetness

    4. Vanilla Bean Luxe

    • Use vanilla bean Greek yogurt or add vanilla bean paste
    • Scatter vanilla bean seeds throughout the yogurt
    • Top with crushed Biscoff crumbs

    Frequently Asked Questions

    Can I use a different type of yogurt?

    Plain or vanilla Greek yogurt works best. You can also use Skyr or quark for an even thicker, higher-protein result. Avoid thin yogurts or fruit-flavored varieties, as they won’t provide the right texture.

    Do I need to use Biscoff cookies specifically?

    Biscoff cookies are ideal because of their unique spiced flavor and the way they soften beautifully. However, you can substitute with Speculoos cookies, Lotus cookies, or even digestive biscuits if needed. The flavor profile will change slightly.

    How long does this dessert keep?

    Covered in the refrigerator, it will keep for up to 3 days. The cookies will continue softening over time, which is fine for the texture, but the yogurt may start to separate slightly after day 2.

    Can I make this dairy-free?

    You can try using coconut yogurt or almond-based yogurt, though the texture and flavor will differ. Look for thick, full-fat versions for the best results.

    Is this recipe gluten-free?

    Standard Biscoff cookies contain wheat flour, so this recipe is not naturally gluten-free. However, you can use gluten-free Biscoff-style cookies if available.

    Can I freeze this dessert?

    Freezing is not recommended, as the yogurt base may become grainy or separate when thawed. This recipe is best enjoyed fresh or within a few days.

    How do I know when it’s ready to eat?

    After 6-12 hours in the refrigerator, the cookies should feel soft like cake when you insert a spoon. If they’re still too firm, give it more time—the longer it chills, the softer they become.

    Can I add other toppings?

    Absolutely! Get creative with melted Biscoff spread, whipped cream, fresh fruit, crushed cookies, caramel sauce, or a dusting of powdered sugar.

    Storage Tips

    Refrigerator Storage:

    • Cover the dish tightly with plastic wrap or transfer to an airtight container.
    • Store for up to 3 days.
    • The cookies will continue softening, which is normal and delicious.

    Freezing:

    • Freezing is not recommended—Greek yogurt doesn’t thaw well and may become watery or grainy.
    • If you must freeze, eat it semi-frozen as a frozen yogurt bark, but quality will suffer.

    Reheating:

    • This dessert is meant to be served cold or at room temperature.
    • If refrigerated for more than a day, let it sit at room temperature for 5-10 minutes before serving for the best flavor and texture.

    Before You Go

    If you loved this viral Biscoff cheesecake, you’ll definitely want to try these other trending desserts on our site:

    Don’t forget to save this recipe to your Pinterest board and share it with your friends! Tag us on social media—we’d love to see your creations.

    For more information on nutrition and healthy eating, visit nutrition.gov or MyPlate.gov.

    See you next time at recipes4us.org!

  • Smash Burger Tacos

    Smash Burger Tacos

    Introduction

    If you’ve been scrolling through Facebook or TikTok lately, you’ve probably seen the buzz around smash burger tacos – and trust me, this trend is worth every bit of the hype it has received. These crispy, cheesy, flavor-packed tacos took the internet by storm in 2025 and have only gotten more popular in 2026, with home cooks everywhere ditching traditional taco night for this genius fusion creation.

    The concept is beautifully simple: instead of building tacos with pre-formed burger patties, you smash seasoned ground beef directly onto a warm tortilla and let the hot skillet do its magic. The result? A crispy, caramelized beef shell that’s somewhere between a taco and a burger, loaded with melty cheese and all your favorite toppings. It’s the kind of recipe that makes you wonder why no one thought of this sooner.

    Whether you’re looking for a quick weeknight dinner, a crowd-pleasing party dish, or just something exciting to break out of your dinner rut, these smash burger tacos deliver on every level. In this recipe, I’ll walk you through exactly how to recreate that crispy, sizzling perfection right in your own kitchen.

    Why You Will Love This Recipe

    • Incredibly Fast: Ready in just 20 minutes from start to finish – perfect for busy weeknights when you need dinner on the table fast.
    • Minimal Ingredients: You probably already have most of what you need in your fridge and pantry. No fancy ingredients required!
    • Crispy Perfection: The smash technique creates an irresistible crispy edge on the beef that you’ll keep coming back for.
    • Family-Friendly: Kids and adults alike go crazy for these tacos. They’re a guaranteed hit at the dinner table.
    • Customizable: Switch up the toppings, cheese, and sauces to create your perfect combination every time.
    • Budget-Friendly: Simple ingredients that won’t break the bank. Great for feeding a family without the hefty price tag.

    What Makes a Good Smash Burger Taco

    The secret to an incredible smash burger taco lies in two key elements: the sear and the sauce. When you smash the seasoned beef onto a hot tortilla or directly onto a scorching skillet, you’re creating maximum surface contact. This means more caramelization, more flavor, and that coveted crispy texture that makes these tacos so addictive.

    Your choice of sauce can make or break the experience. The signature Big Mac-style sauce – a simple blend of mayo, ketchup, mustard, and pickles – brings tangy, creamy perfection that elevates every bite. Don’t skimp on the cheese, either. American cheese melts beautifully over the hot beef, creating that gooey, stringy pull that makes these tacos Instagram-worthy every single time.

    The History/Origin

    Smash burger tacos emerged as a natural evolution of two beloved comfort foods: the classic American burger and traditional Mexican tacos. While the exact origin is debated, this trend first exploded on TikTok when home cooks started posting videos of the technique – pressing beef onto tortillas and watching them sizzle and crisp on a hot griddle.

    What began as a simple hack quickly evolved into a full-blown food movement. In 2026, creative variations like dumpling smash tacos, Japanese BBQ smash tacos, and Philly cheesesteak smash tacos are taking over social media, proving that the smash technique is endlessly adaptable. The trend has staying power because it actually delivers on the hype – these tacos aren’t just pretty; they’re genuinely delicious and incredibly easy to make.

    Ingredients

    For the Beef

    • 1 lb ground beef (80/20 lean ratio recommended)
    • 1 teaspoon garlic powder
    • 1 teaspoon onion powder
    • 1/2 teaspoon smoked paprika
    • 1/2 teaspoon salt
    • 1/4 teaspoon black pepper

    For the Big Mac Sauce

    • 1/2 cup mayonnaise
    • 2 tablespoons ketchup
    • 1 tablespoon yellow mustard
    • 2 tablespoons sweet pickle relish
    • 1 tablespoon white vinegar
    • 1/4 teaspoon garlic powder

    For Assembly

    • 8 flour tortillas (6-inch size)
    • 8 slices American cheese
    • 1 cup shredded iceberg lettuce
    • 1/2 cup diced pickles
    • 1/4 cup diced white onion
    • Sesame seeds (optional, for garnish)
    Smash Burger Tacos

    Smash Burger Tacos

    Recipe by Cindy
    0.0 from 0 votes
    Course: DinnerCuisine: American Fusion
    Servings

    4

    servings
    Prep time

    10

    minutes
    Cooking time

    10

    minutes
    Calories

    385

    kcal

    Crispy, cheesy smash burger tacos with homemade Big Mac sauce – ready in 20 minutes!

    Ingredients

    • For the Beef
    • – 1 lb ground beef (80/20 lean ratio)

    • – 1 teaspoon garlic powder

    • – 1 teaspoon onion powder

    • – 1/2 teaspoon smoked paprika

    • – 1/2 teaspoon salt

    • – 1/4 teaspoon black pepper

    • For the Big Mac Sauce
    • – 1/2 cup mayonnaise

    • – 2 tablespoons ketchup

    • – 1 tablespoon yellow mustard

    • – 2 tablespoons sweet pickle relish

    • – 1 tablespoon white vinegar

    • – 1/4 teaspoon garlic powder

    • For Assembly
    • – 8 flour tortillas (6-inch size)

    • – 8 slices American cheese

    • – 1 cup shredded iceberg lettuce

    • – 1/2 cup diced pickles

    • – 1/4 cup diced white onion

    • – Sesame seeds (optional, for garnish)

    Directions

    • Make the Big Mac Sauce: In a small bowl, whisk together the mayonnaise, ketchup, mustard, pickle relish, white vinegar, and garlic powder until smooth. Refrigerate until ready to use.
    • Season the Beef: In a medium bowl, combine the ground beef with garlic powder, onion powder, smoked paprika, salt, and black pepper. Mix gently with a fork until the seasonings are evenly distributed.
    • Portion the Beef: Divide the seasoned beef into 8 equal portions (about 2 ounces each). Roll each portion into a loose ball.
    • Heat Your Skillet: Place a large cast iron skillet or griddle over medium-high heat. Add a small amount of oil and let it get very hot.
    • Smash the Beef: Place a tortilla in the skillet. Put one beef ball on the tortilla and immediately smash it down firmly using a spatula. The beef should cover most of the tortilla surface.
    • Cook Until Crispy: Let the beef cook for 2-3 minutes until the edges are crispy and the top is starting to look cooked through.
    • Add Cheese: Fold the tortilla in half (like a taco) to cover half the beef, then flip the entire thing. Place a slice of American cheese on top and let it melt for 30-60 seconds.
    • Add Toppings: Open the taco and drizzle generously with Big Mac sauce. Top with shredded lettuce, diced pickles, and white onion.
    • Serve Immediately: Garnish with sesame seeds if desired and serve with additional sauce on the side.

    Notes

    • Use 80/20 ground beef for the best crispy texture
      Make sure your skillet is very hot before cooking
      Work in batches – don’t overcrowd the skillet
      The Big Mac sauce tastes even better when made a few hours ahead
      Serve immediately for the crispiest results

    Instructions

    1. Make the Big Mac Sauce: In a small bowl, whisk together the mayonnaise, ketchup, mustard, pickle relish, white vinegar, and garlic powder until smooth. Refrigerate until ready to use.
    2. Season the Beef: In a medium bowl, combine the ground beef with garlic powder, onion powder, smoked paprika, salt, and black pepper. Mix gently with a fork until the seasonings are evenly distributed. Don’t overmix, as this can make the beef tough.
    3. Portion the Beef: Divide the seasoned beef into 8 equal portions (about 2 ounces each). Roll each portion into a loose ball.
    4. Heat Your Skillet: Place a large cast iron skillet or griddle over medium-high heat. Add a small amount of oil and let it get very hot – you want it shimmering before you add the beef.
    5. Smash the Beef: Place a tortilla in the skillet (or directly on the griddle). Put one beef ball on the tortilla and immediately smash it down firmly using a spatula or press. The beef should cover most of the tortilla surface. Pro tip: Place a piece of parchment or wax paper between the spatula and beef to prevent sticking.
    6. Cook Until Crispy: Let the beef cook for 2-3 minutes until you see the edges getting crispy and the top is starting to look cooked through.
    7. Add Cheese: Fold the tortilla in half (like a taco) to cover half the beef, then flip the entire thing. Place a slice of American cheese on top and let it melt for 30-60 seconds.
    8. Add Toppings: Open the taco and drizzle generously with Big Mac sauce. Top with shredded lettuce, diced pickles, and white onion.
    9. Serve Immediately: Smash burger tacos are best served hot and fresh. Garnish with sesame seeds if desired and serve with additional sauce on the side.

    Pro Tips for Perfect Results

    • Don’t Skip the Fat: Use 80/20 ground beef for the best flavor and crispiness. Leaner beef tends to dry out and won’t develop that beautiful crispy crust.
    • Get Your Skillet Smoking Hot: The key to that crispy exterior is high heat. If your skillet isn’t hot enough, the beef will steam instead of sear.
    • Work in Batches: Don’t overcrowd your skillet. Cook 2-3 tacos at a time maximum for the best results.
    • Use Room Temperature Tortillas: Cold tortillas will lower the skillet temperature and prevent proper crisping. Warm them briefly before cooking if they’ve been refrigerated.
    • Smash Immediately: Place the beef ball on the tortilla and smash it right away – don’t let it cook first.
    • Press Firmly: The harder you press, the crispier your taco will be. Apply firm, even pressure when smashing.
    • Don’t Skip the Sauce: The Big Mac sauce is what takes these tacos from good to absolutely incredible. Don’t be shy with it!
    • Make Ahead Sauce: The Big Mac sauce tastes even better when made ahead and refrigerated for a few hours – the flavors meld together beautifully.

    Nutritional Insights

    Per serving (1 taco):

    • Calories: 385 kcal
    • Protein: 18g
    • Carbohydrates: 22g
    • Fat: 26g
    • Saturated Fat: 9g
    • Fiber: 1g
    • Sodium: 720mg
    • Cholesterol: 55mg

    Ground beef is an excellent source of protein and iron, providing essential nutrients for muscle health and energy production. The cheese adds calcium and additional protein, while the lettuce provides a dose of vitamins A and K. For a lighter version, consider using lean ground beef (90/10) and reducing the sauce amount.

    Variations to Try

    1. Philly Cheesesteak Smash Tacos

    • Replace ground beef with thinly sliced ribeye steak
    • Swap Big Mac sauce for garlic aioli
    • Top with sautéed peppers, onions, and provolone cheese

    2. Birria Smash Burger Tacos

    • Use seasoned birria beef instead of regular ground beef
    • Dip completed tacos in consomé before serving
    • Garnish with fresh cilantro and white onion
    • Serve with lime wedges

    3. Korean BBQ Smash Tacos

    • Season beef with gochujang, soy sauce, sesame oil, and brown sugar
    • Top with kimchi, pickled radishes, and green onions
    • Drizzle with sriracha mayo

    4. Greek Gyro Smash Tacos

    • Season beef with oregano, cumin, and garlic
    • Top with tzatziki, diced tomatoes, and red onion
    • Add crumbled feta cheese
    • Garnish with fresh dill

    Frequently Asked Questions

    Can I use corn tortillas instead of flour tortillas?

    While flour tortillas are recommended for the best crispy texture, corn tortillas can work in a pinch. Keep in mind that corn tortillas are more delicate and may tear when smashing. They also won’t get quite as crispy. If using corn tortillas, look for smaller 6-inch size and handle them gently.

    What’s the best way to smash the beef without making a mess?

    The key is to smash immediately after placing the beef ball on the tortilla. Use a firm, flat spatula and press down with even pressure. For easier cleanup and to prevent sticking, place a small piece of parchment paper or wax paper between your spatula and the beef.

    Can I make these ahead of time?

    These tacos are really best when made fresh, as the crispy texture is the star of the show. However, you can prep the components ahead of time: make the sauce up to 5 days in advance, portion and season the beef, and prep all your toppings. When ready to serve, just cook the tacos fresh – it only takes about 20 minutes total.

    How do I keep the tacos warm while cooking in batches?

    Place completed tacos on a baking sheet in a 200°F oven. The low heat will keep them warm without continuing to cook or dry them out. Don’t stack the tacos, as this will make them soggy.

    Can I cook these on a griddle instead of a skillet?

    Absolutely! A griddle is actually ideal for this recipe since you can cook multiple tacos at once. Just make sure it’s properly preheated and maintain high heat throughout cooking.

    What other proteins work well with this technique?

    This technique works great with ground turkey, ground chicken, or even plant-based meat alternatives. You can also use thinly sliced steak or chicken breast, pressing them flat on the tortilla. Each protein will require slight adjustments to cooking time.

    Why are my tortillas getting soggy?

    This usually happens if your skillet isn’t hot enough, causing the beef to steam rather than sear. Make sure your skillet is properly preheated before adding the beef. Also, don’t add wet toppings (like fresh tomatoes) until just before serving.

    Can I freeze leftover cooked beef?

    Yes! Cooked and crumbled beef freezes well for up to 3 months. Thaw overnight in the refrigerator and reheat in a skillet before assembling fresh tacos. Note that the tortillas won’t freeze well, so use fresh ones when assembling.

    Storage Tips

    Refrigerating Leftovers: Store components separately in airtight containers for up to 3 days. The cooked beef, sauce, and toppings should all be kept separate for best results. Reheat the beef in a skillet until warmed through and crispy again.

    Freezing: Cooked ground beef freezes well for up to 3 months. Thaw overnight in the refrigerator. The Big Mac sauce can also be frozen – thaw and whisk before using. Fresh tortillas are recommended for assembly, so avoid freezing assembled tacos.

    Reheating: For the best texture, reheat beef in a hot skillet until warmed through and slightly crispy. Avoid microwaving assembled tacos, as they’ll become soggy. If you must microwave, do so in 30-second intervals at 50% power.

    Before You Go

    If you loved these smash burger tacos, you might want to check out some of our other viral recipes:

    Did you make this recipe? Snap a photo and share it on Pinterest! Tag us on Pinterest and use the hashtag #SmashBurgerTacos for a chance to be featured. Your friends and fellow foodies will thank you for the delicious inspiration!

    For more nutritional information and dietary guidelines, visit Nutrition.gov or MyPlate.gov for balanced meal planning tips.

  • Cheese Stuffed Sweet Potato

    Cheese Stuffed Sweet Potato

    Introduction

    If you have been anywhere near TikTok lately, you have probably seen this recipe taking over your feed. The cheese-stuffed sweet potato is the viral 2-ingredient snack that has people everywhere drooling over their screens. This recipe proves that the best food trends do not have to be complicated.

    It is impossibly simple: one sweet potato, one slice of cheese, and about 25 minutes. But bite into that creamy, naturally sweet potato with stretchy melted cheese pulling away in long, satisfying strings, and you will understand why millions of people have watched this video and immediately ran to their air fryers.

    Why You Will Love This Recipe

    • Ready in 25 minutes – From start to finish, you can have this on your plate in under half an hour
    • Only 2 main ingredients – Sweet potato and cheese. That is it
    • Budget-friendly – Sweet potatoes are one of the most affordable vegetables around
    • Naturally healthy – Packed with fiber, vitamins, and natural sweetness
    • Endlessly customizable – Add your favorite toppings or try different cheese varieties
    • Kid-friendly – Children love the interactive pulling cheese effect

    What Makes a Good Cheese-Stuffed Sweet Potato

    The magic of this recipe lies in the contrast of textures. You want a sweet potato that is tender and creamy inside, with skin that crisps slightly in the air fryer. The cheese needs to melt completely but still have that satisfying stretch when you pull it apart. Japanese sweet potatoes work best because they have a drier, denser flesh that holds up beautifully to stuffing. Orange sweet potatoes work too, but they tend to be softer and moister.

    The rest time after cooking is not just a suggestion. That 3-minute wait is the secret step that makes the inside truly silky and makes slicing much easier. Skipping it means a firmer potato that is harder to cut cleanly.

    The Viral TikTok Trend Explained

    This recipe gained momentum when Courtney Cook shared her simple lunch idea on TikTok. The concept was straightforward: air fry a sweet potato, slice it open, stuff it with cheese, and melt. No complicated techniques, no fancy equipment, just a clever combination of everyday ingredients.

    The video resonated because it answered a common problem: what do you make when you want something satisfying but do not have time for a big cooking project? The answer turned out to be this two-ingredient wonder that feels indulgent while actually being nutritious.

    Ingredients

    Here is what you need for this viral recipe. The beauty of this dish is how few ingredients it requires:

    Main Ingredients

    • 1 large Japanese sweet potato (or orange sweet potato)
    • 1 teaspoon olive oil
    • 2 slices Butterkäse cheese (or Havarti, Gruyère, Swiss, white cheddar)
    • Salt to taste

    Optional Garnishes

    • Fresh chives, chopped
    • Cracked black pepper
    • Flaky sea salt
    • Crispy bacon bits
    • Sriracha or hot honey
    • Everything bagel seasoning
    cheese stuffed sweet-potato-ingredients

    Cheese-Stuffed Sweet Potato

    Recipe by Cindy
    0.0 from 0 votes
    Course: Lunch /snackCuisine: AmericanDifficulty: easy
    Servings

    1

    servings
    Prep time

    5

    minutes
    Cooking time

    25

    minutes
    Calories

    340

    kcal

    The viral 2-ingredient TikTok recipe taking over social media.

    Ingredients

    • For the Sweet Potato:
    • • 1 large Japanese sweet potato

    • • 1 teaspoon olive oil

    • • Salt to taste

    • For the Filling:
    • • 2 slices Butterkäse cheese (or Havarti)

    • For Garnish:
    • • Fresh chives, chopped

    • • Cracked black pepper

    • • Flaky sea salt

    Directions

    • Preheat air fryer to 375°F (190°C)
    • Wash, dry, poke holes in sweet potato
    • Rub with olive oil
    • Air fry 20-25 minutes
    • Rest 3 minutes
    • Slice and stuff with cheese
    • Air fry 1-2 minutes to melt
    • Season and serve
    cheese stuffed sweet-potato
    cheese stuffed sweet-potato

    Instructions

    Follow these steps for the perfect cheese-stuffed sweet potato every time:

    1. Prep the sweet potato – Wash your sweet potato thoroughly under running water and pat it completely dry. Use a fork to poke several holes all over the surface. This prevents steam from building up inside and allows for even cooking.
    2. Oil the skin – Rub the outside of the sweet potato lightly with olive oil. This helps the skin crisp up nicely in the air fryer and adds a subtle richness.
    3. Air fry – Place the prepared sweet potato in your air fryer basket. Set the temperature to 375°F (190°C) and cook for 20-25 minutes. The exact time depends on the size of your potato. It is done when it feels tender when you gently squeeze it or when a fork pierces it easily.
    4. The crucial rest – This is the step most people skip, but do not. Remove the sweet potato from the air fryer and let it rest for exactly 3 minutes. This allows the inside to soften even further from residual heat and makes slicing much easier and safer.
    5. Slice and stuff – Cut a slit down the center of the sweet potato, being careful not to cut all the way through to the bottom. Open it gently to create a pocket. Place your cheese slices directly into the opening. The heat from the potato will start melting the cheese immediately.
    6. Final melt – Return the stuffed sweet potato to the air fryer for just 1-2 minutes. You want the cheese to be gooey and slightly golden on top, but not completely melted and disappearing into the potato.
    7. Season and serve – Remove from the air fryer, place on a plate, season with a pinch of salt, add fresh cracked pepper, and garnish with chopped chives. Serve immediately while the cheese is still stretchy and satisfying.

    Pro Tips for Perfect Results

    • Choose Japanese sweet potatoes – They have a drier, creamier texture that holds up better to stuffing. Orange sweet potatoes work but can be softer.
    • Do not skip the rest time – That 3-minute wait makes a huge difference in texture and makes cutting much safer.
    • Use thick-cut cheese – Thin slices melt too quickly. Thick slices (about 1/4 inch) give you that perfect pull effect.
    • Butterkäse is ideal – It melts smoothly without becoming greasy or oily. Havarti and Gruyère are excellent alternatives.
    • Make it ahead – You can air fry the sweet potato in advance and stuff it when ready to serve. Just reheat for 1-2 minutes before adding cheese.
    • Customize the cheese blend – Try mixing two types of cheese for more complex flavor. White cheddar and Gruyère is a winning combination.

    Nutritional Insights

    This viral recipe is not just delicious, it is actually good for you:

    Per serving (using Japanese sweet potato and 2 slices Butterkäse):

    • Calories: 320-350
    • Protein: 12g
    • Carbohydrates: 45g
    • Fiber: 7g
    • Fat: 12g
    • Vitamin A: 380% Daily Value
    • Vitamin C: 30% Daily Value
    • Potassium: 25% Daily Value
    • Calcium: 20% Daily Value

    Health Benefits of Sweet Potatoes:

    • Rich in beta-carotene – Gives them their vibrant orange color and converts to vitamin A in your body, supporting eye health and immune function
    • High in fiber – Promotes digestive health and helps you feel full longer, making this a satisfying meal or snack
    • Complex carbohydrates – Provides sustained energy without causing blood sugar spikes
    • Contains manganese – Supports bone health and helps with metabolism
    • Natural sweetness – Satisfies sugar cravings in a healthy, wholesome way
    • Low glycemic index – Despite being sweet, they do not cause rapid blood sugar increases

    Variations to Try

    Once you master the basic recipe, experiment with these delicious variations:

    Spicy Mexican Style

    • Add a layer of black beans inside
    • Top with diced jalapeños
    • Add a dollop of guacamole on the side
    • Garnish with fresh cilantro
    • Squeeze of lime juice

    Italian Style

    • Use mozzarella and Parmesan cheese
    • Top with warm marinara sauce
    • Add fresh basil leaves
    • Drizzle with extra virgin olive oil

    BBQ Bacon Style

    • Add crispy bacon bits inside and on top
    • Drizzle with your favorite BBQ sauce
    • Top with green onions
    • Add a pinch of smoked paprika

    Mediterranean Style

    • Use crumbled feta and sun-dried tomatoes
    • Add a sprinkle of za’atar
    • Serve with hummus on the side
    • Top with kalamata olives

    Maple Pecan Style

    • Use sharp white cheddar
    • Drizzle with pure maple syrup
    • Top with toasted pecans
    • Add a pinch of cinnamon

    Frequently Asked Questions

    Can I make this in the oven instead of an air fryer?
    Absolutely. Bake your sweet potato at 400°F (200°C) for 45-60 minutes until tender. The air fryer just speeds up the process and gives you a slightly crispier skin, but a regular oven works perfectly fine.

    What cheese works best?
    Butterkäse is the gold standard for this recipe because it melts smoothly without becoming greasy. Havarti, fontina, Gruyère, and a blend of white cheddar and mozzarella also work beautifully.

    Is this recipe gluten-free?
    Yes. This recipe is completely naturally gluten-free as long as you use cheese without additives or cross-contamination. Always check labels if you have celiac disease or severe gluten intolerance.

    Can I make this ahead of time?
    The sweet potato can be cooked ahead and stored in the refrigerator for up to 2 days. When ready to serve, reheat it in the oven or air fryer, then add fresh cheese and melt.

    What toppings go well with this?
    The possibilities are endless. Try crumbled bacon, sliced green onions, a drizzle of maple syrup or hot honey, sriracha, everything bagel seasoning, toasted sesame seeds, or a sprinkle of red pepper flakes.

    Can I use a regular potato instead?
    While this recipe is designed for sweet potatoes, you can absolutely try it with a Russet or Idaho potato. Note that the flavor will be different since regular potatoes are not naturally sweet, and you may want to add more seasoning.

    How do I reheat leftovers?
    Place the sweet potato in the oven at 350°F for 10-15 minutes or in the air fryer at 350°F for 3-5 minutes. Add fresh cheese and melt for the best texture.

    What type of sweet potato should I use?
    Japanese sweet potatoes are ideal because of their drier, creamier texture. Purple sweet potatoes work too for a beautiful presentation. Orange sweet potatoes are the most common and readily available.

    Storage Tips

    If you have leftovers, store the cooked sweet potato and cheese separately. The sweet potato will keep in the refrigerator for up to 3 days in an airtight container. When ready to enjoy, reheat the potato until warmed through, then add fresh cheese and melt. This prevents the cheese from becoming rubbery during reheating.

    Before You Go

    If you love this viral cheese-stuffed sweet potato, why not try other trending recipes on the blog? Check out these favorites:

    If you try this recipe, share your photos on Pinterest and let me know which cheese variety you used. I love seeing your creations!

    Note: For more information on nutrition, visit MyPlate.gov or Nutrition.gov.