Homemade Krispy Kreme Donuts, Light, Fluffy, and Irresistible
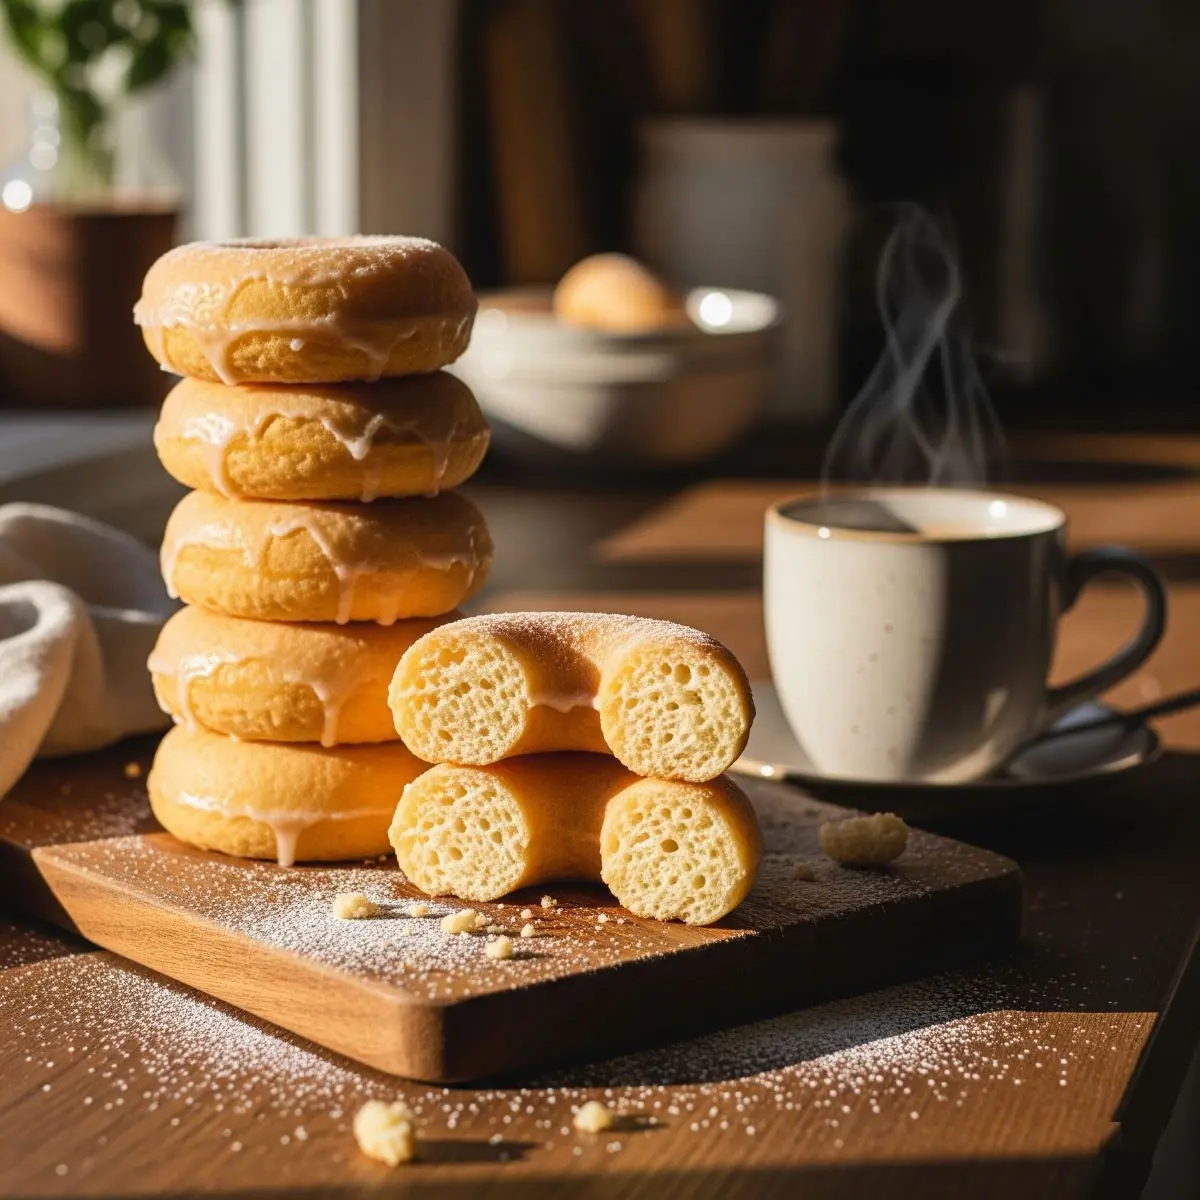
There are few things more magical than biting into a Krispy Kreme Donut, that soft, airy texture, the delicate sweetness of the glaze, and the way it practically melts in your mouth. Now imagine being able to create that same experience at home. Yes, it’s possible! With this recipe, you can bring the joy of freshly fried Krispy Kreme Donuts right into your own kitchen.
What makes these donuts so special is their perfect balance of lightness and flavor. Unlike dense or overly sweet donuts, a Krispy Kreme Donut is fluffy, pillowy, and just sweet enough to satisfy your cravings without being heavy. The dough is enriched with milk, butter, and a touch of sugar, giving it that signature tender crumb. Once fried to golden perfection, each donut is dipped into a silky, vanilla-infused glaze that hardens ever so slightly, creating that iconic sheen you know and love.
The best part? You don’t need to be a professional baker to master this recipe. With a few simple pantry staples and some patience while the dough rises, you’ll be rewarded with a batch of donuts that rivals the original. Serve them warm, when the glaze is still slightly sticky, for the ultimate indulgence.
Homemade Krispy Kreme Donuts aren’t just a treat for breakfast or dessert, they’re an experience. Picture a lazy weekend morning, the aroma of frying dough filling your kitchen, and a platter of shiny glazed donuts waiting on the counter. Pair them with a cup of coffee or a tall glass of milk, and you’ve got pure happiness in every bite.
So next time the craving hits, skip the drive-thru and make your own batch of Krispy Kreme Donuts. One taste, and you’ll realize the homemade version is just as magical, maybe even better.
Make Your Own Krispy Kreme-Style Donuts
Course: BreakfastCuisine: American12
servings20
minutes15
minutesHome made Krispy Kreme-Style Donuts
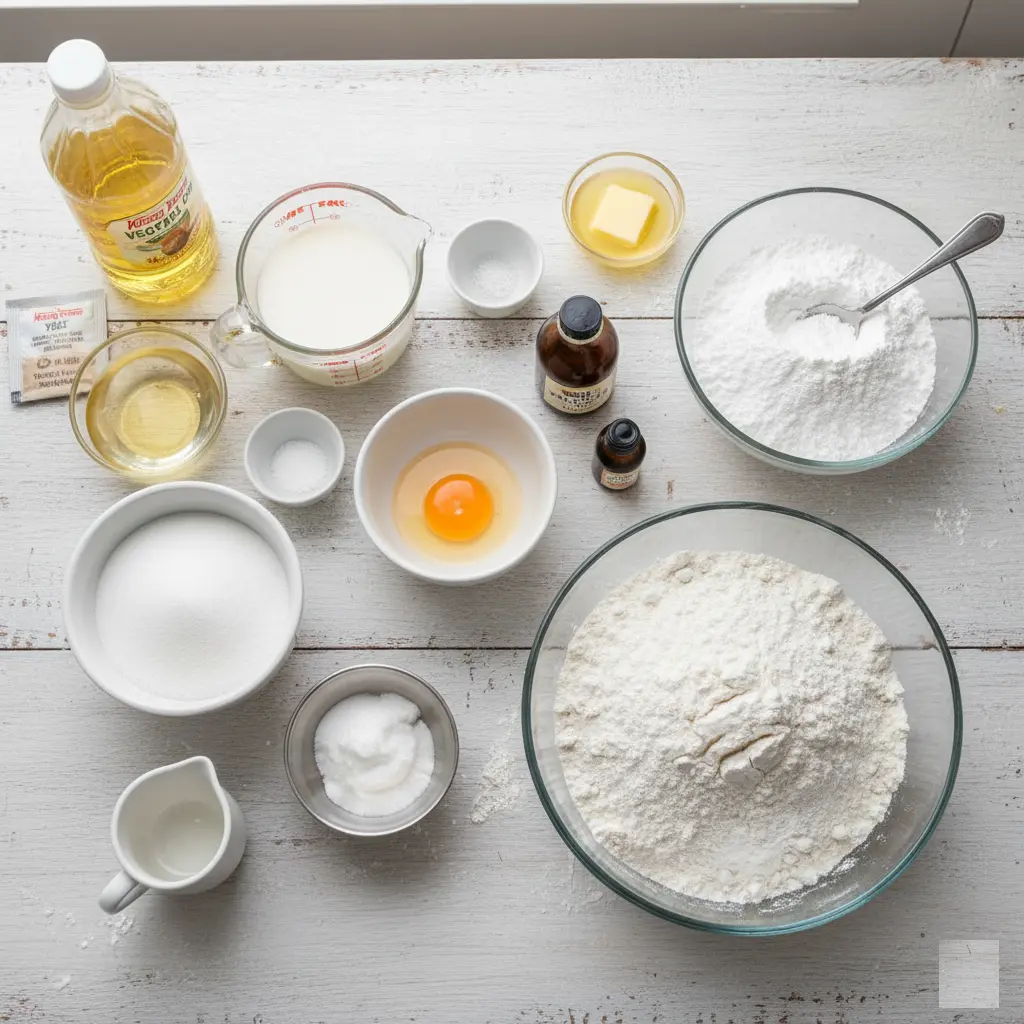
Ingredients
For the Donuts:
1¼ oz package active dry yeast
2 tablespoons warm water
¾ cup warm milk
¼ cup sugar
½ teaspoon salt
1 egg
2½ tablespoons shortening
2½ cups all-purpose flour
Oil for frying (vegetable or canola oil works well)
For the Glaze:
⅓ cup butter, melted
2 cups powdered sugar
1½ teaspoons vanilla extract
4-6 tablespoons hot water
Directions
- Activate the Yeast: In a large bowl, combine the warm water, warm milk, and yeast. Give it a gentle stir and let it sit for about 5 minutes. You’ll know it’s ready when the mixture gets foamy—that’s a sign your yeast is active!
- Make the Dough: Add the sugar, salt, egg, shortening, and flour to the yeast mixture. Using a stand mixer with the dough hook, beat the dough on medium speed for about 2 minutes. The dough should come together and pull cleanly away from the sides of the bowl.
- First Rise: Lightly grease a large glass or ceramic bowl with cooking spray. Transfer the dough to the bowl, cover it with plastic wrap or a clean kitchen towel, and place it in a warm spot. Let it rise for 45 minutes to an hour, or until it has doubled in size.
- Shape the Donuts: Once the dough has risen, punch it down gently and turn it out onto a lightly floured surface. Roll the dough until it’s about ½-inch thick. Use a donut cutter or two different-sized round cutters to cut out your donut shapes. Place the donuts on a baking sheet lined with parchment paper, cover them lightly, and let them rest for a final 15 minutes.
- Fry the Donuts: While the donuts are resting, heat about 2-3 inches of oil in a deep fryer or a heavy-bottomed pot to 350°F (175°C). Carefully fry the donuts in small batches, about 40-60 seconds per side, until they’re golden brown. Use a slotted spoon to transfer the donuts to a paper towel-lined plate to drain off any excess oil.
- Make the Glaze: In a medium bowl, whisk together the melted butter, powdered sugar, vanilla extract, and hot water until the glaze is smooth and silky. Adjust the consistency by adding more hot water, a tablespoon at a time, until it’s thin enough to dip but thick enough to coat the donuts.
- Glaze and Serve: While the donuts are still warm, dip each one completely into the glaze, turning to coat both sides. Place the glazed donuts on a wire rack set over a baking sheet to catch any drips. Let them set for a few minutes before serving.
- Enjoy your delicious, homemade Krispy Kreme-style donuts!
Note: For more informations on nutrition, visit the website: nutrition.gov
🍩 Tips to Succeed with this Homemade Recipe
- Use fresh yeast
Active yeast ensures your donuts rise light and fluffy, just like the real thing. - Measure flour carefully
Too much flour makes donuts dense. Spoon flour into the cup, then level it. - Let dough rise twice
The first rise builds structure, the second rise after shaping creates airy donuts. - Oil temperature matters
Heat oil to 350°F (175°C). Too hot burns the outside, too cool makes greasy donuts. - Don’t overcrowd the pan
Fry 2–3 donuts at a time for even cooking and golden color. - Glaze while warm
Dip donuts into glaze as soon as they cool slightly so it sets shiny and smooth. - Practice patience
Allow resting and proofing time — rushing leads to flat, heavy donuts.
❓ FAQ for the Krispy Kreme Donuts
1. Can I bake instead of frying?
Yes, but texture changes. Baked donuts are lighter and less fluffy than fried.
2. Can I make the dough ahead of time?
Yes, refrigerate overnight after the first rise. Shape and fry the next day.
3. How do I store homemade donuts?
Keep them in an airtight container at room temperature for 1–2 days. Warm briefly before serving.
4. Can I freeze the donuts?
Yes, freeze after frying but before glazing. Reheat in the oven, then glaze.
5. Why are my donuts greasy?
Oil was too cool or donuts weren’t drained properly. Keep oil steady at 350°F.
6. How do I get perfect round shapes?
Use a donut cutter or two round cutters. Chill dough slightly before cutting for clean edges.
7. Can I use instant yeast instead of active dry yeast?
Yes. Skip proofing step and mix directly with dry ingredients.